Introduction
File transfers are generally considered to be critical operations that may pose serious security implications if not performed through secure channels. There are multiple ways to share files like emails, FTP, or external storage devices.
These methods do not follow secure authentication mechanisms, have no audit trail of data transfer, and lacks encryption to secure data through transit. Still, these traditional methods are prevalent across many organizations, making such organizations a perfect target for malicious actors to exploit.
Transfer Files Securely through Unified PAM
To mitigate such security threats, Securden uses Secure File transfer Protocol (SFTP) to securely transfer files. SFTP encrypts the file data over SSH using AES-256 encryption, thus preventing data from unauthorized access and interceptions.
Securden lets your users transfer files between local and remote systems using the Secure File Transfer Protocol (SFTP). Using File transfer controls, you can also move files within a specific remote computer.
The different types of file transfers possible through Unified PAM are:
-
File transfer between a Local machine and Remote Machine
-
File transfer between two remote machines
Pre-requisites
-
To enable secure file transfers, the target Windows machine must have OpenSSH Server installed and running to allow SSH connectivity with client machine and data transfer over port 22.
-
If you are transferring files to or from a Remote Computer, then ensure that the device is available in Unified PAM or else you should have the IP address and login credentials of that machine available to establish connection. In the case of manual login, ensure that the remote machine is active and discoverable.
Note
Securden is not responsible for scanning files for detection of malware. It is recommended to utilize malware scanning tools and follow best practices before transferring files via the service.
Steps to transfer files from one workstation to another
Step 1: Select the File Transfer Option
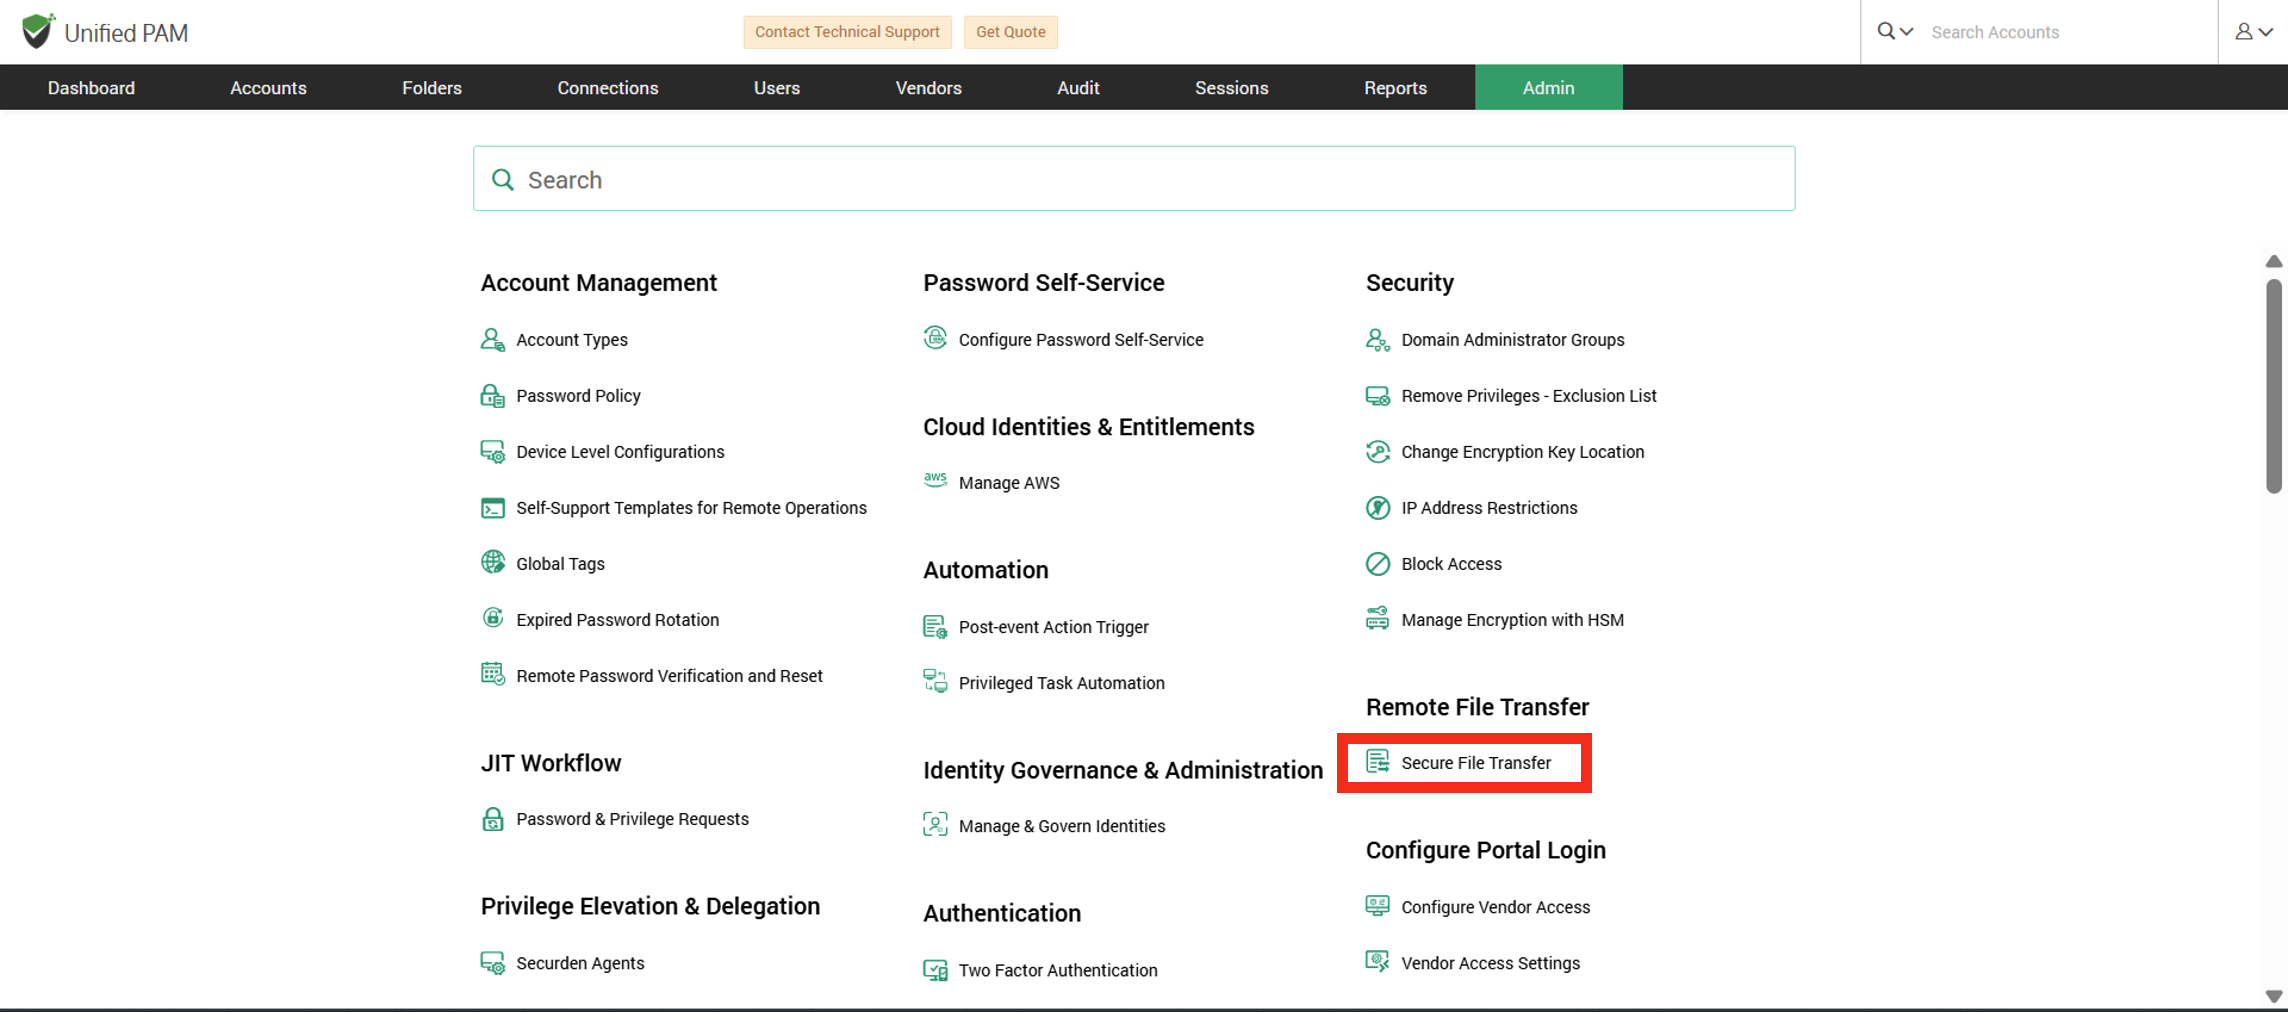
In the Unified PAM interface, navigate to Admin >> Remote File Transfer >> Secure File Transfer
Step 2: Configure Source and Destination system
The source and destination systems can be either your local computer or any remote computer. If a Remote computer is selected, then you must provide the credentials to log into the remote machine. You can fetch the credentials from Unified PAM or manually enter the login credentials.
Note
For selecting the credentials from Unified PAM, the machine must have been discovered and imported into the PAM solution.

Step 3: Copy files Between Systems
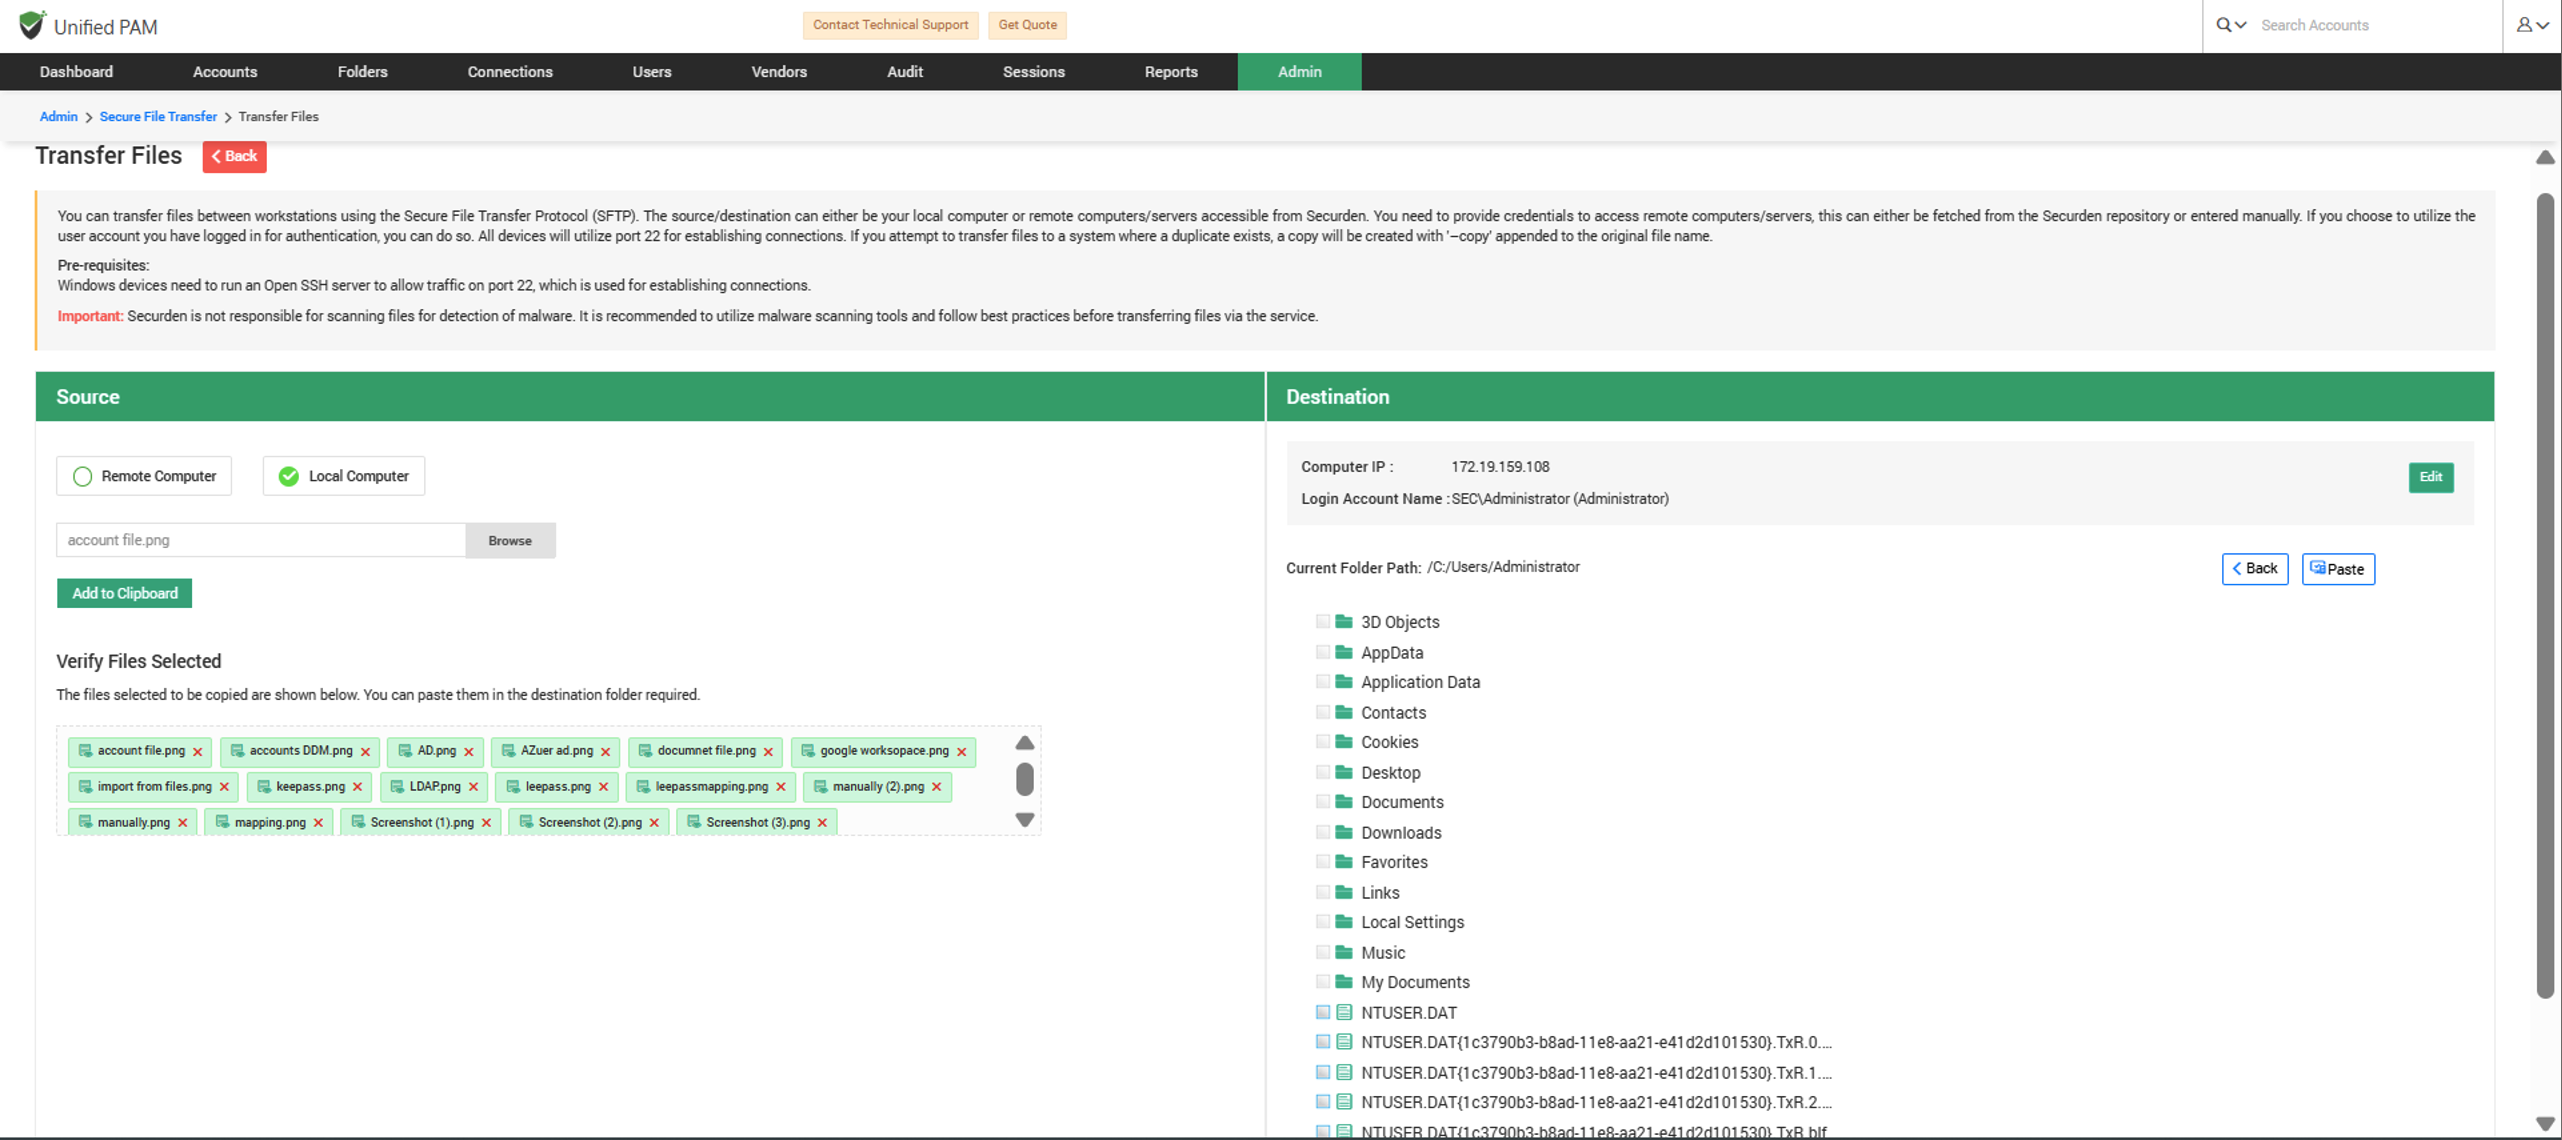
When Local computer is configured as the source machine
In the source section, you will have the option to browse the files you want to transfer from your system. You can then add these files to the clipboard.
In the destination section, you can navigate the directory structure of the remote machine and use the Paste option to transfer the copied files from the local machine.
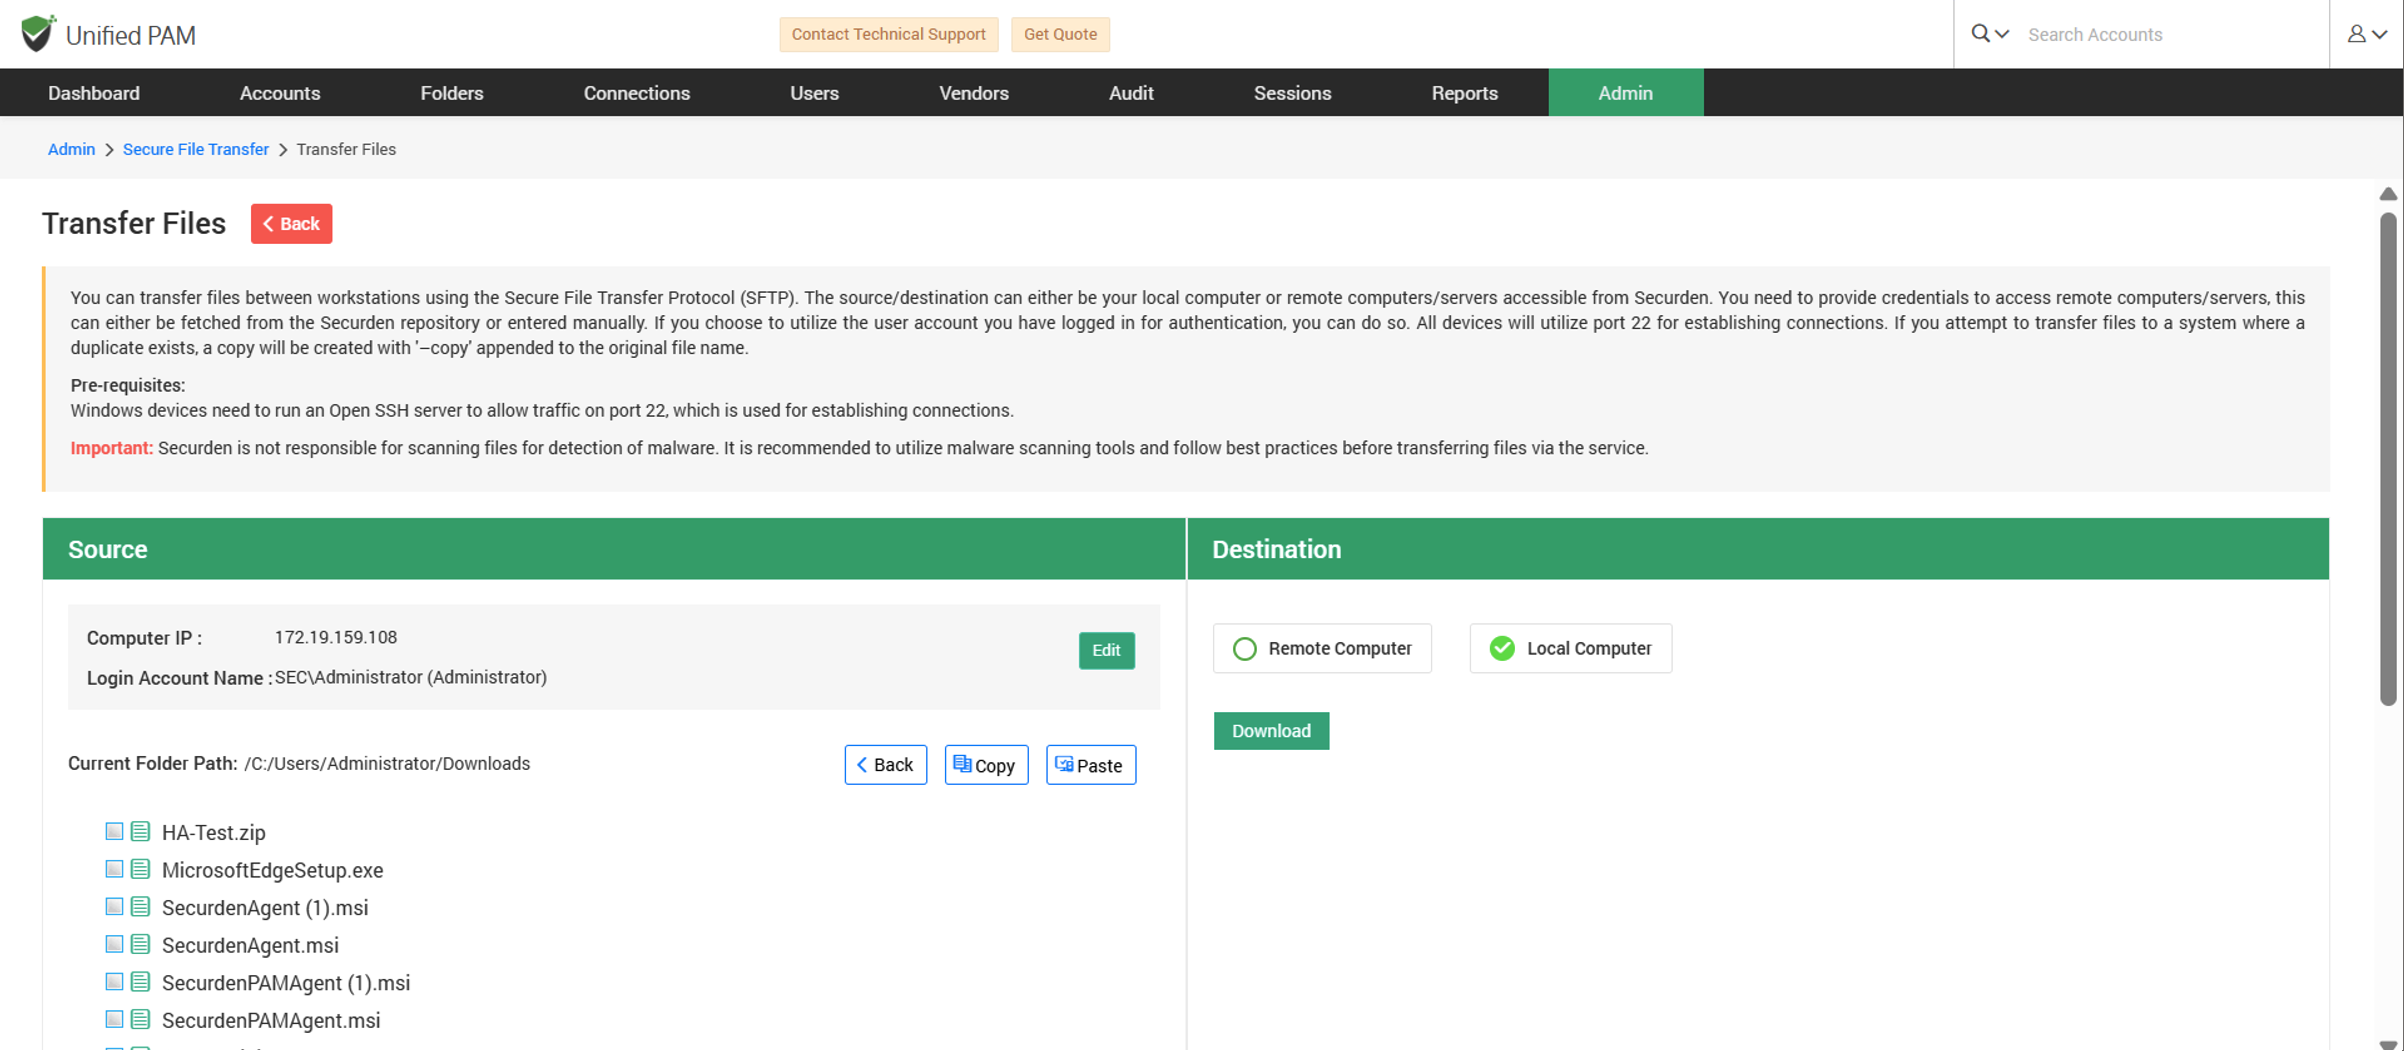
When Local computer is configured as the Destination
You will have a Download option to transfer the files from the remote machine directly to your Local machine.
Note
You cannot choose the location of storage in this case. By default, the files will be stored in your Downloads folder.
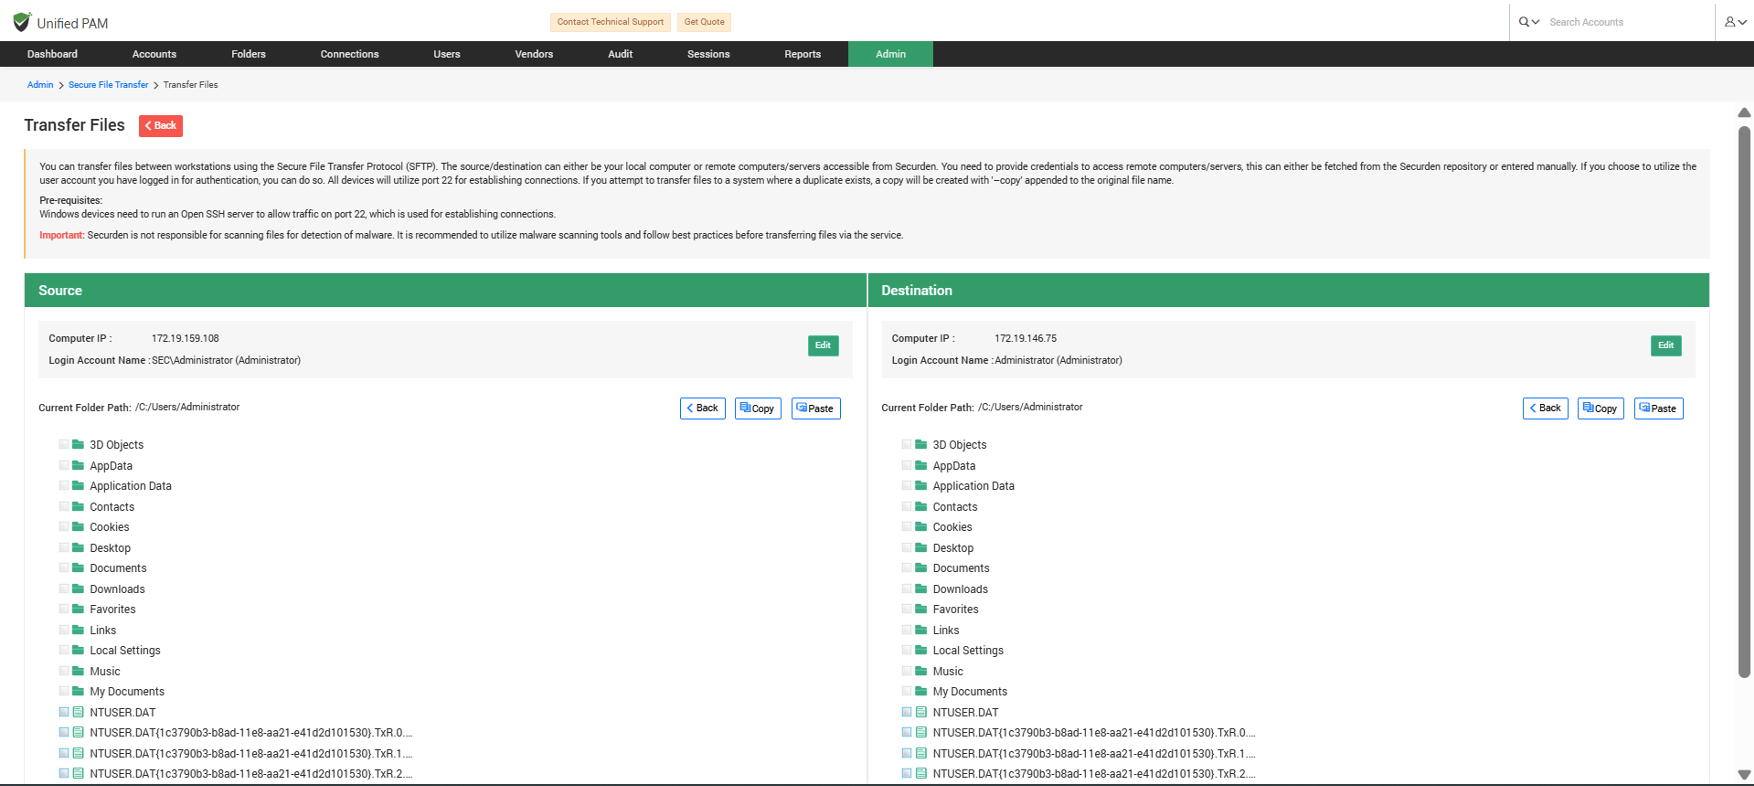
When Remote computer is configured as either Source or Destination
You will have the Copy and Paste option in the remote computer section. You can navigate through the directory structure of your remote machine from the interface.
To copy files, select any number of files by enabling the check box against them and then click on the Copy option. Then, navigate to the desired destination directory on the remote machine in the destination section and click on Paste option to transfer the selected files.
You can also move files within the same remote machine using the File transfer controls.
Note
In one go, you can transfer multiple files from one computer to another, but the cumulative size of all the files should not exceed 300 MB.