General
How to enforce folder selection while making changes to the accounts?
This configuration will let you add the new accounts to a folder rather than keeping them as standalone accounts within the product.
To enforce this, navigate to Admin >> Customization >> Configuration >> Account Management >> General, and find the Enforce Folder Selection configuration. Click on the Edit button.
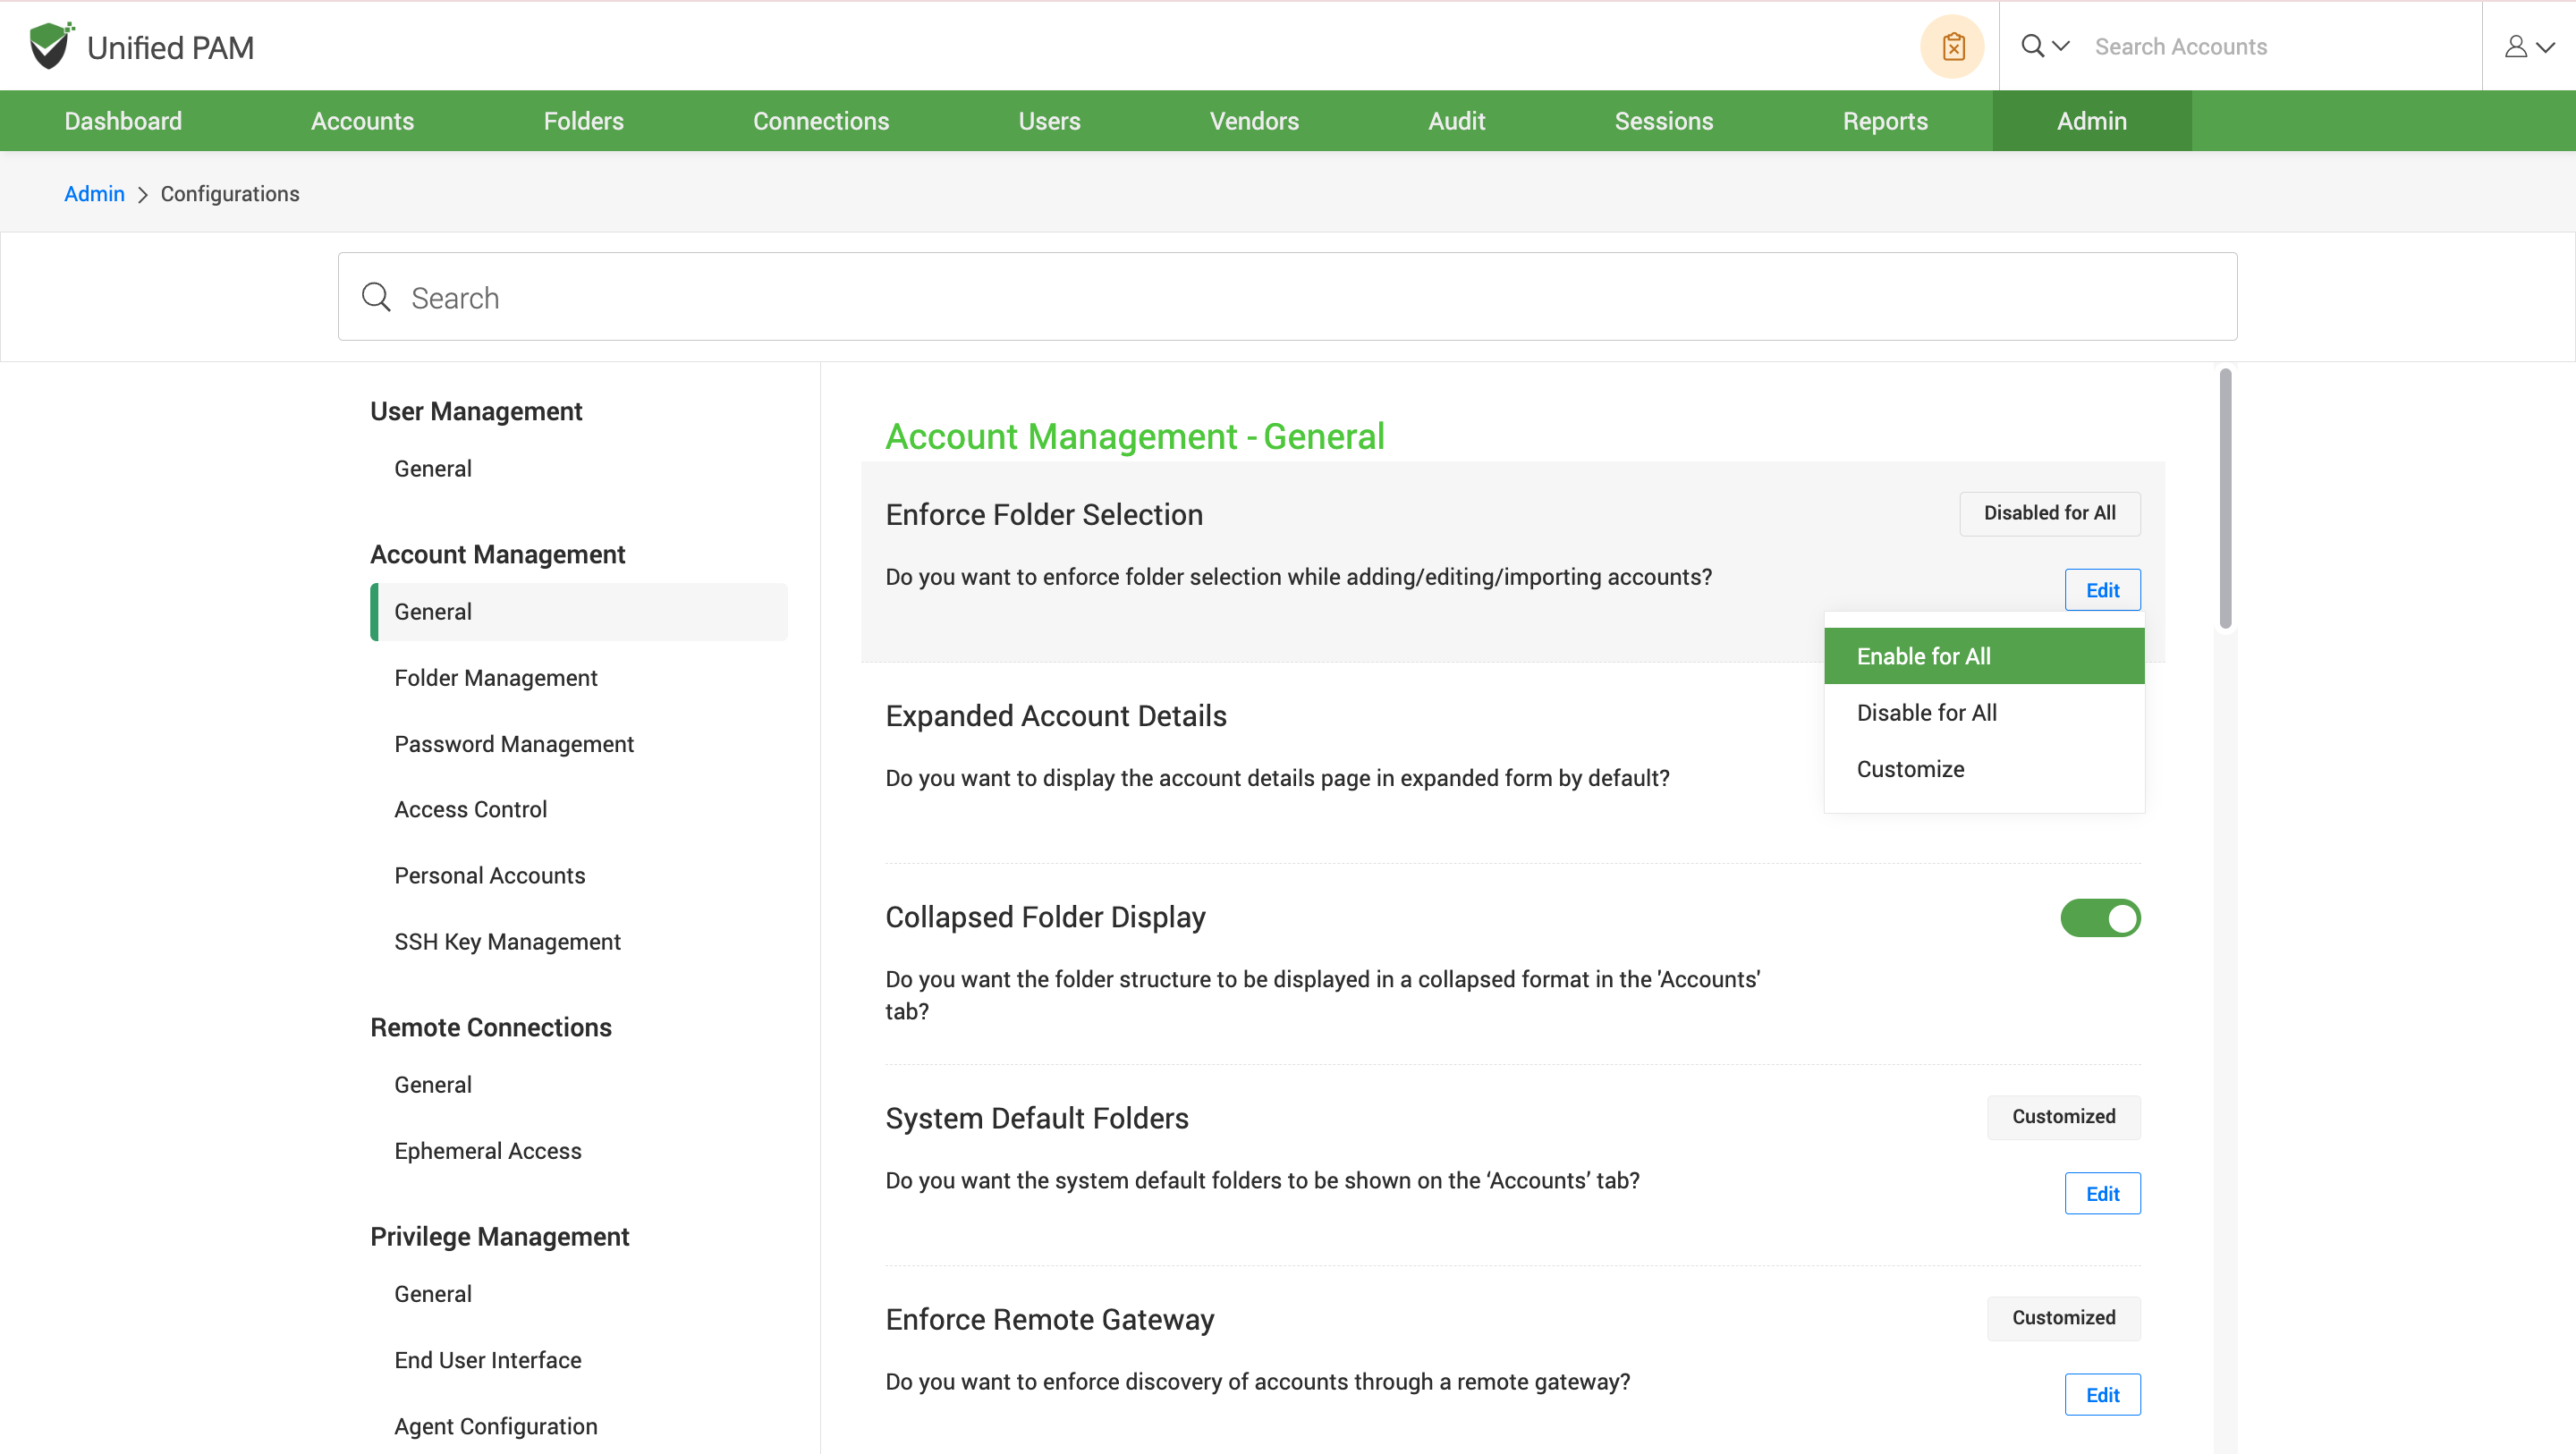
If you enable this option, it becomes mandatory to select a folder while adding or importing an account into the product. To enable folder selection for accounts, select Enable for All and Disable for All to disable the enforcement on accounts.
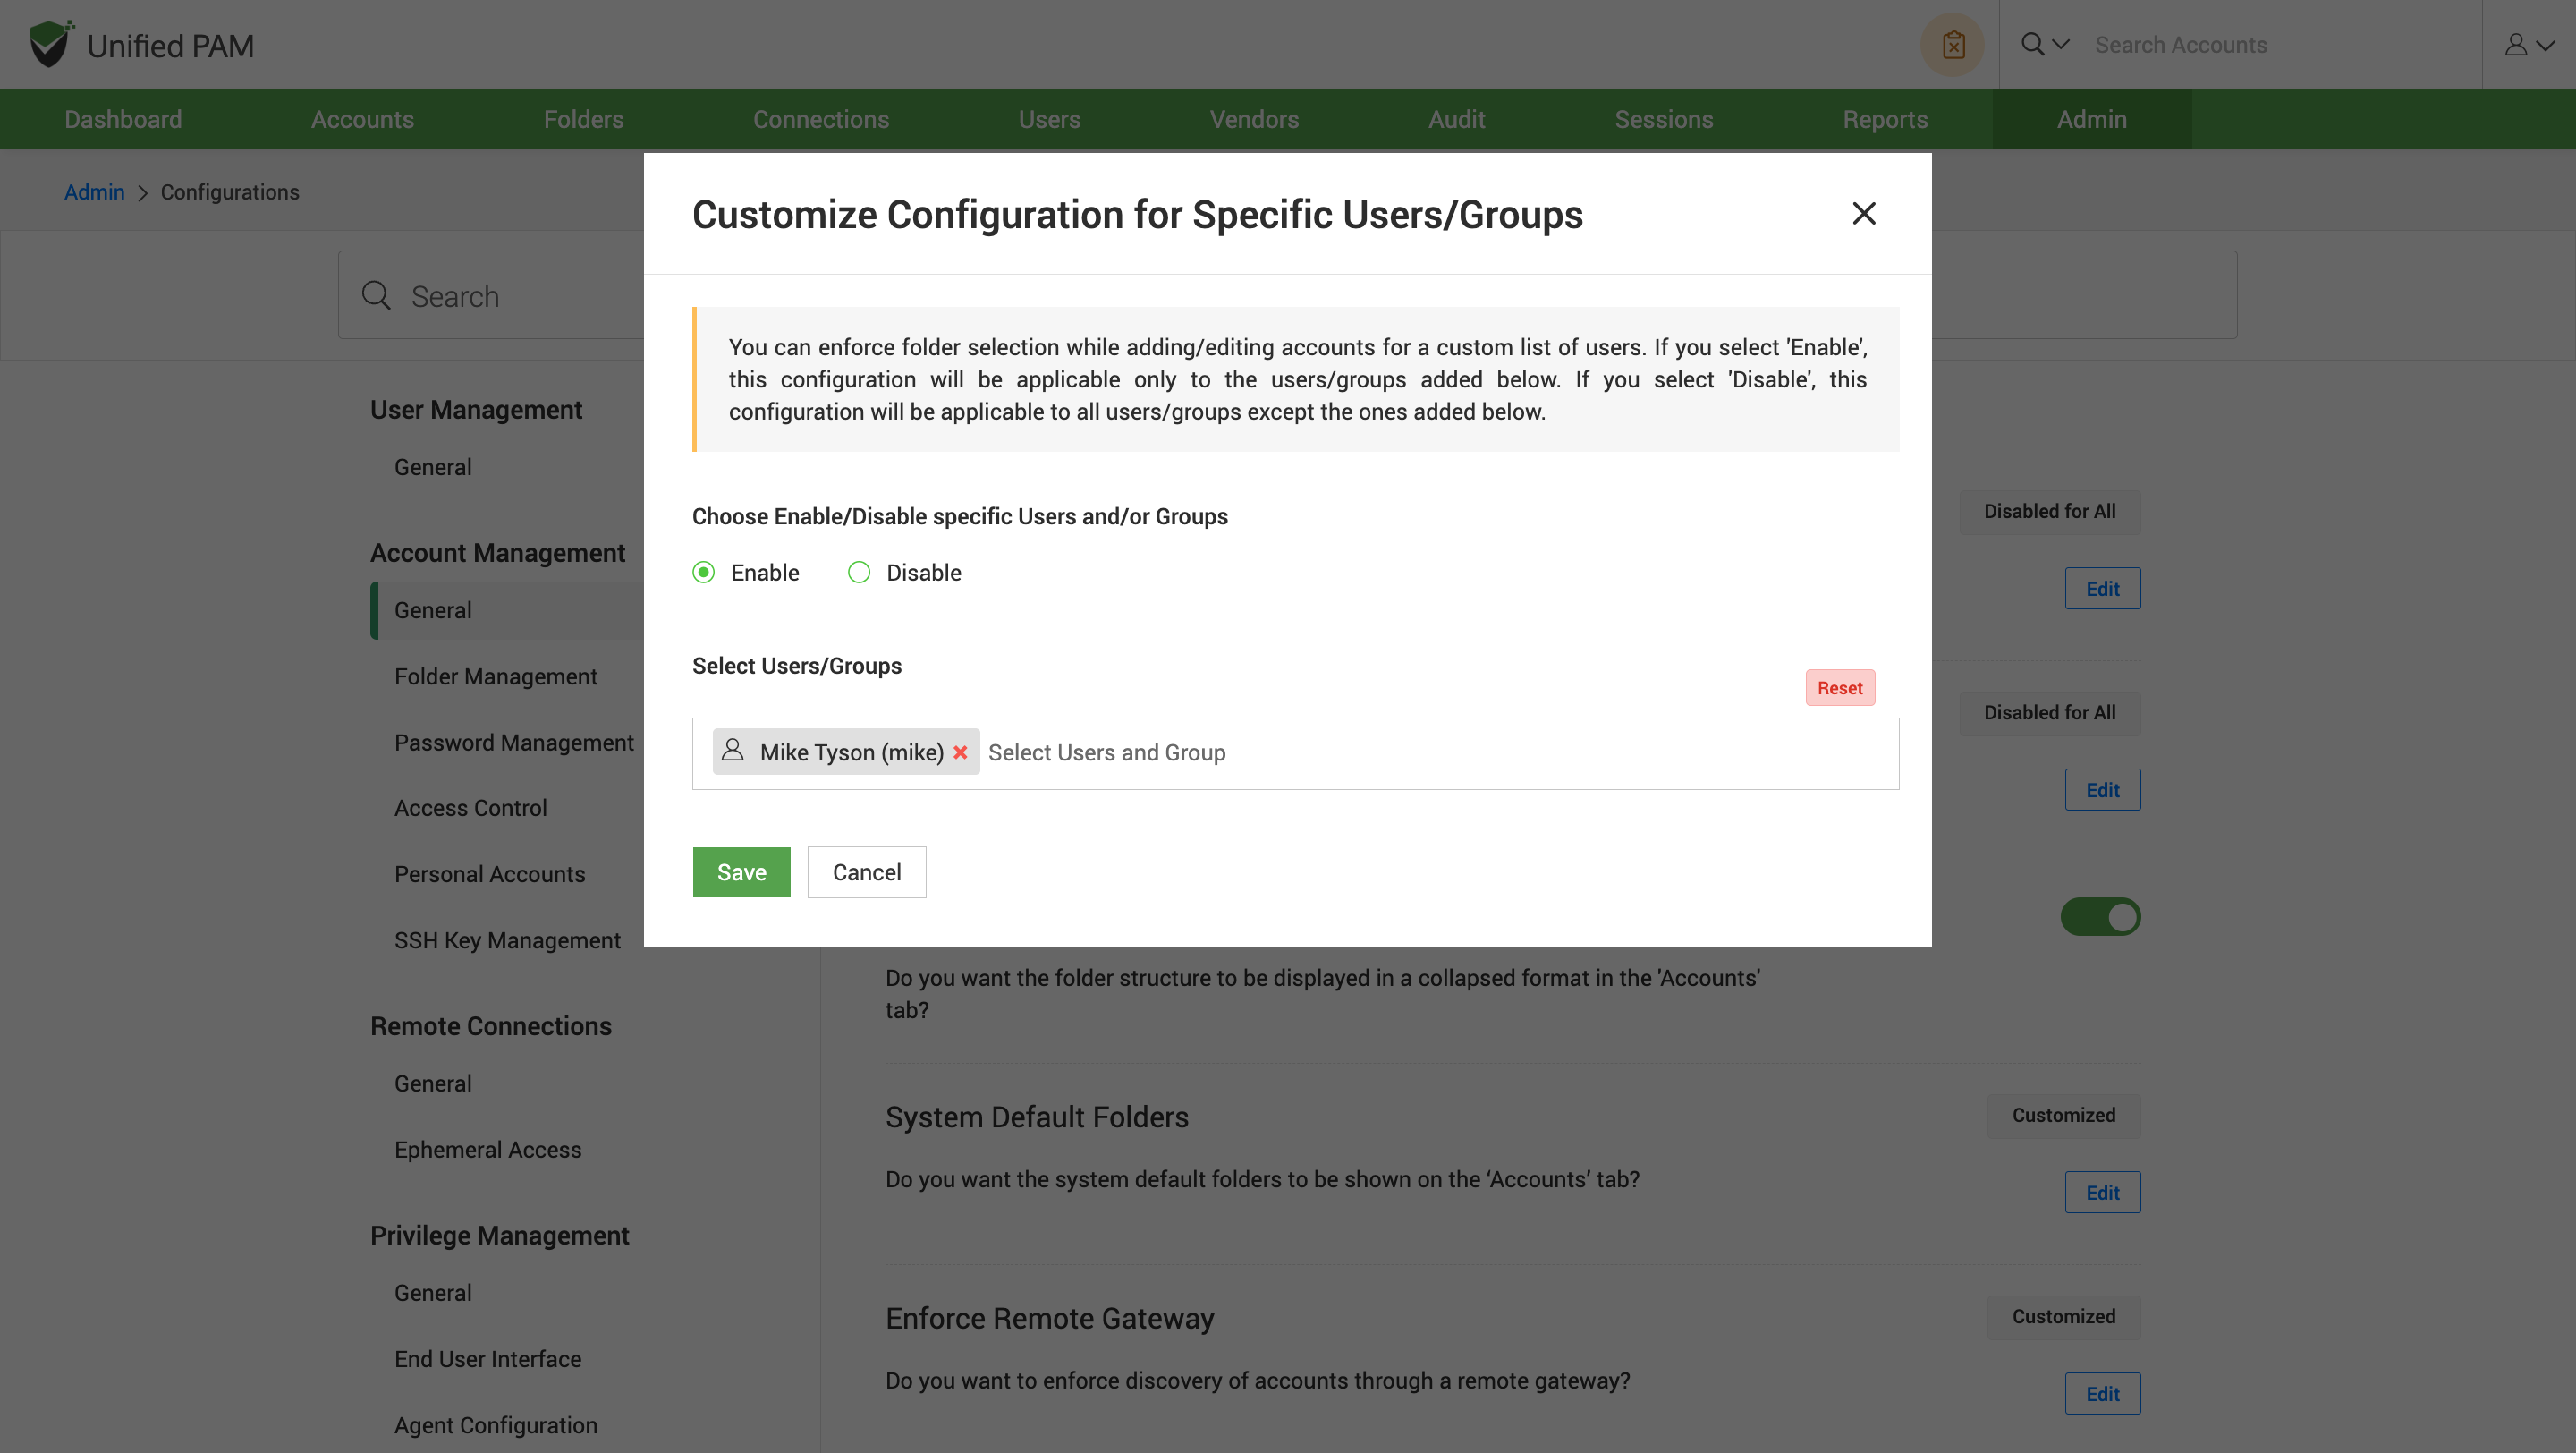
To enable or disable the folder selection option for specific users or groups, a custom list of users is created using the Customize option. This allows you to opt for mandatory account addition to the folder for selected users or groups. Select the users or groups and click on the Save button to save the changes.
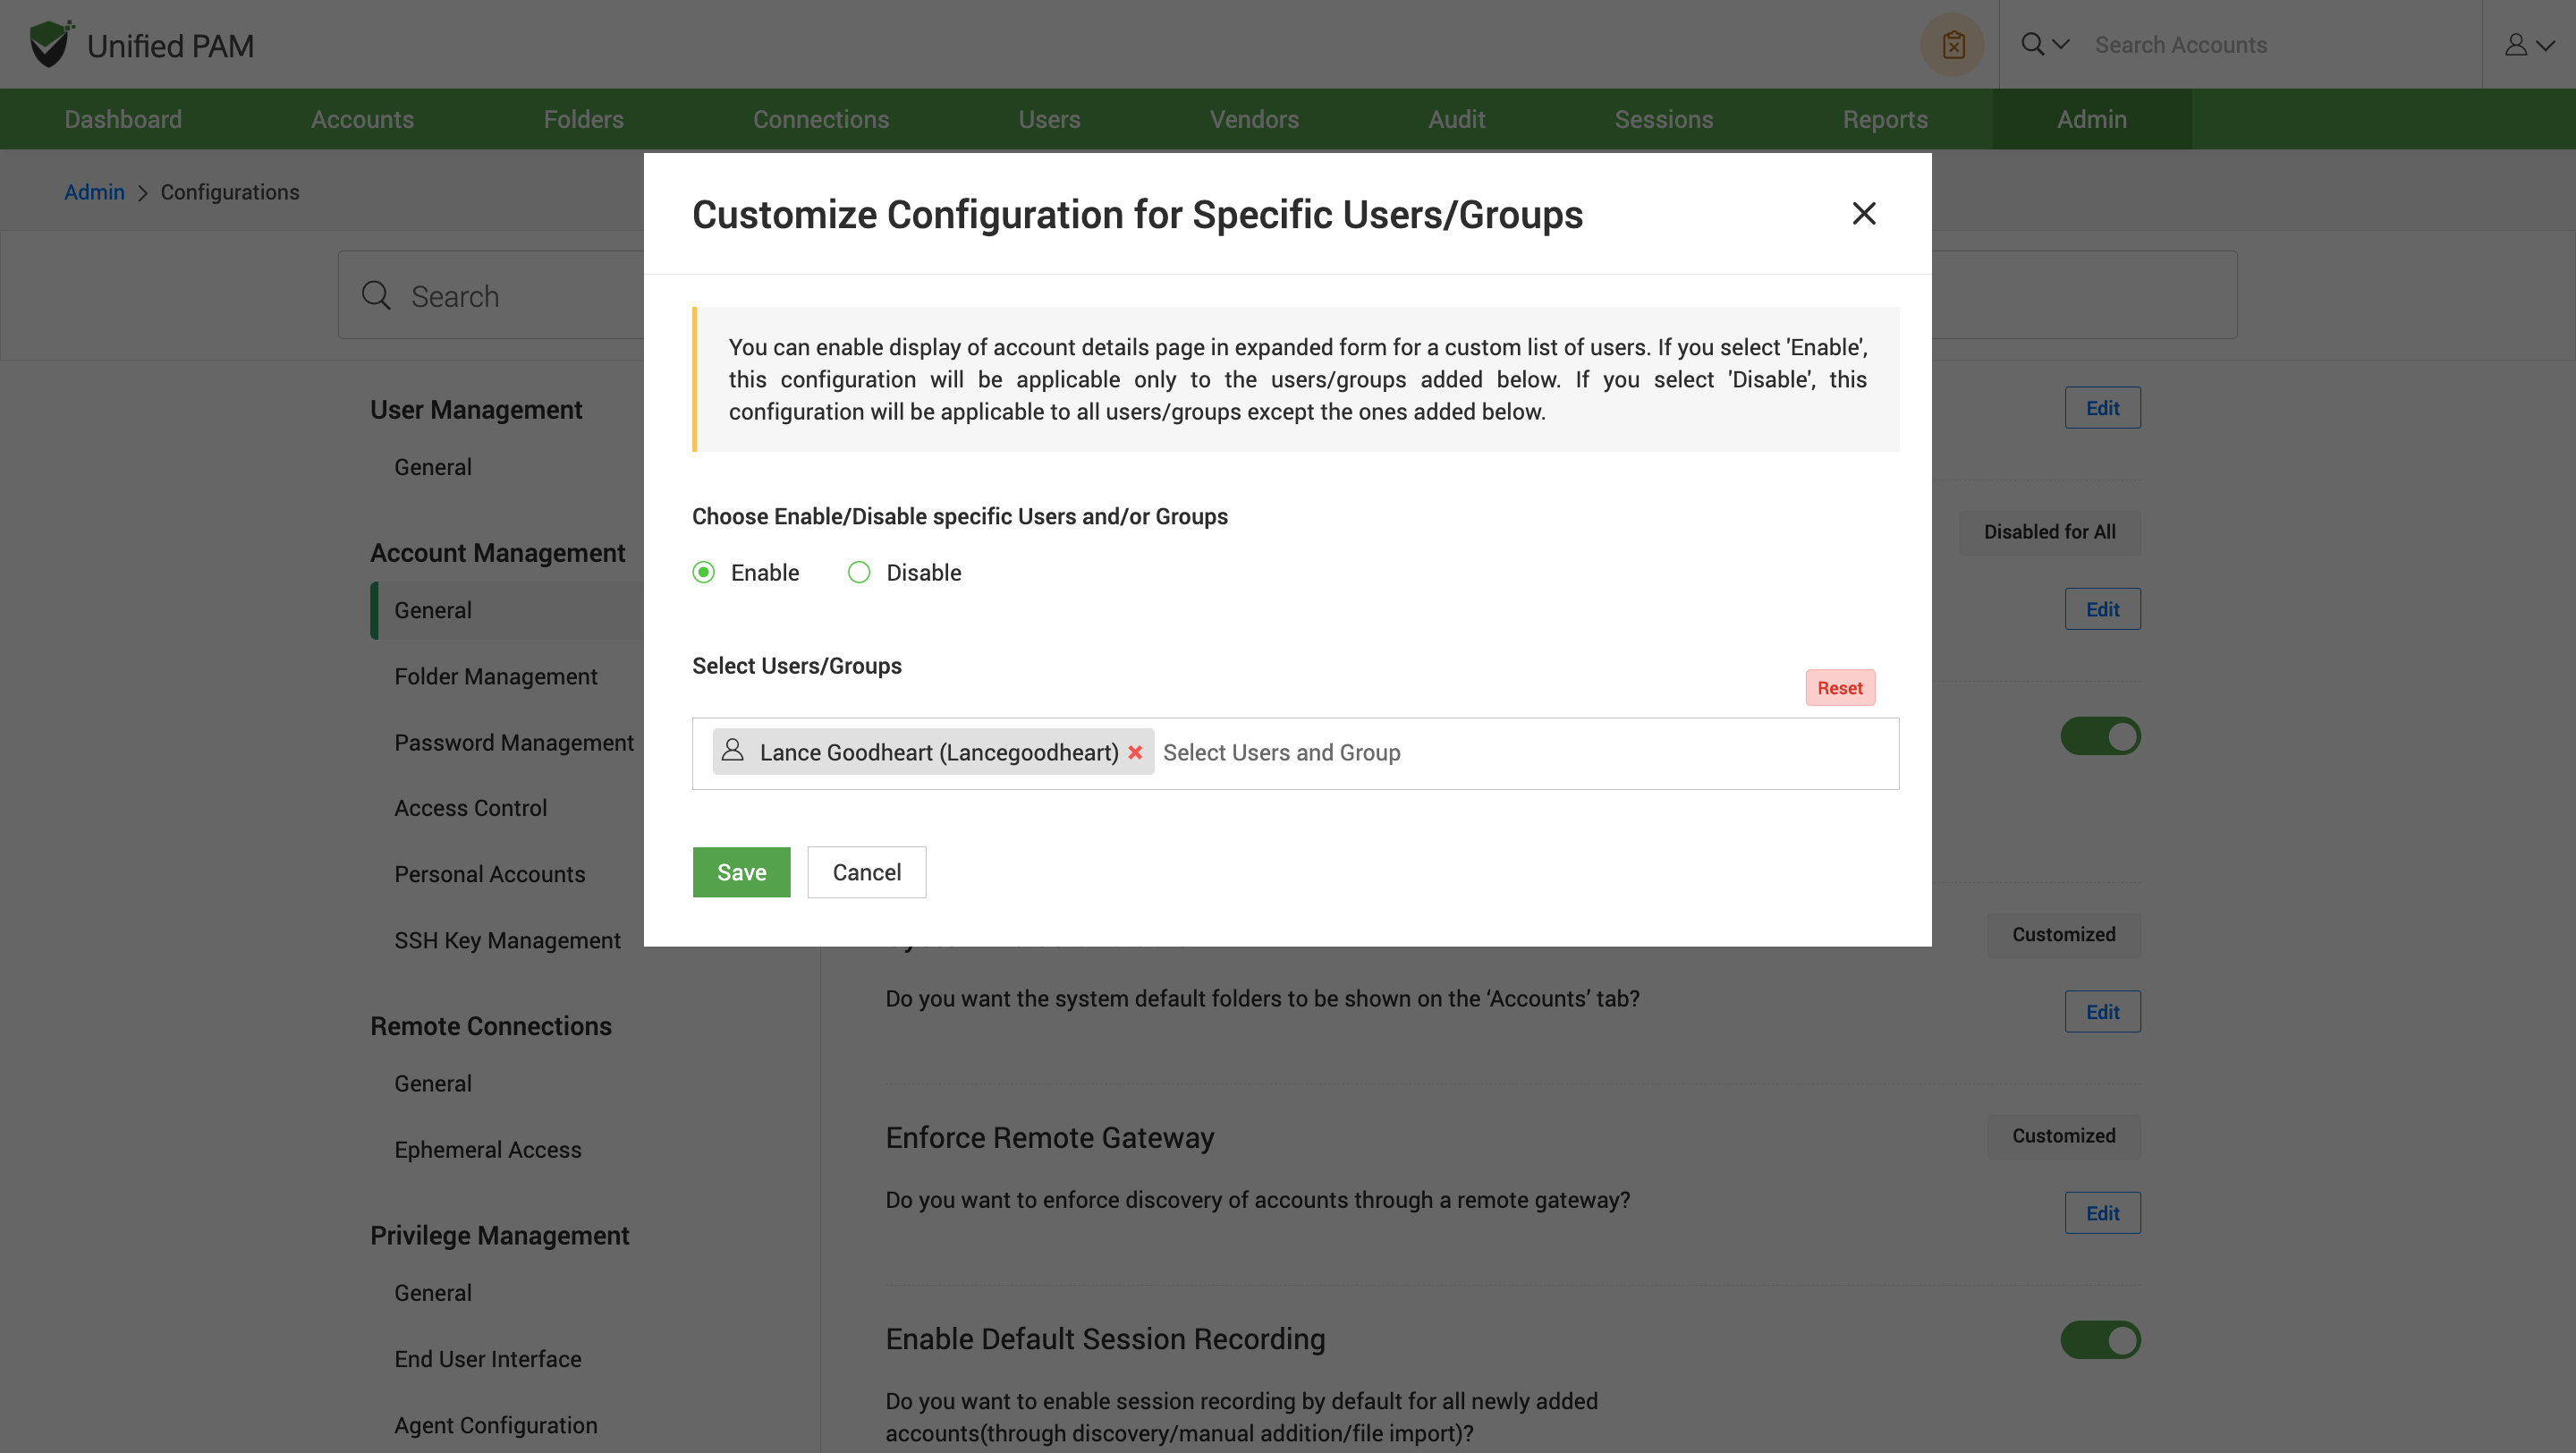
How to get expanded accounts details page?
You can display the account details page for the users in an expanded form by default.
To enable this, navigate to Admin >> Customization >> Configuration >> Account Management >> General, and find the Expanded Account Details configuration. Click on the Edit button.
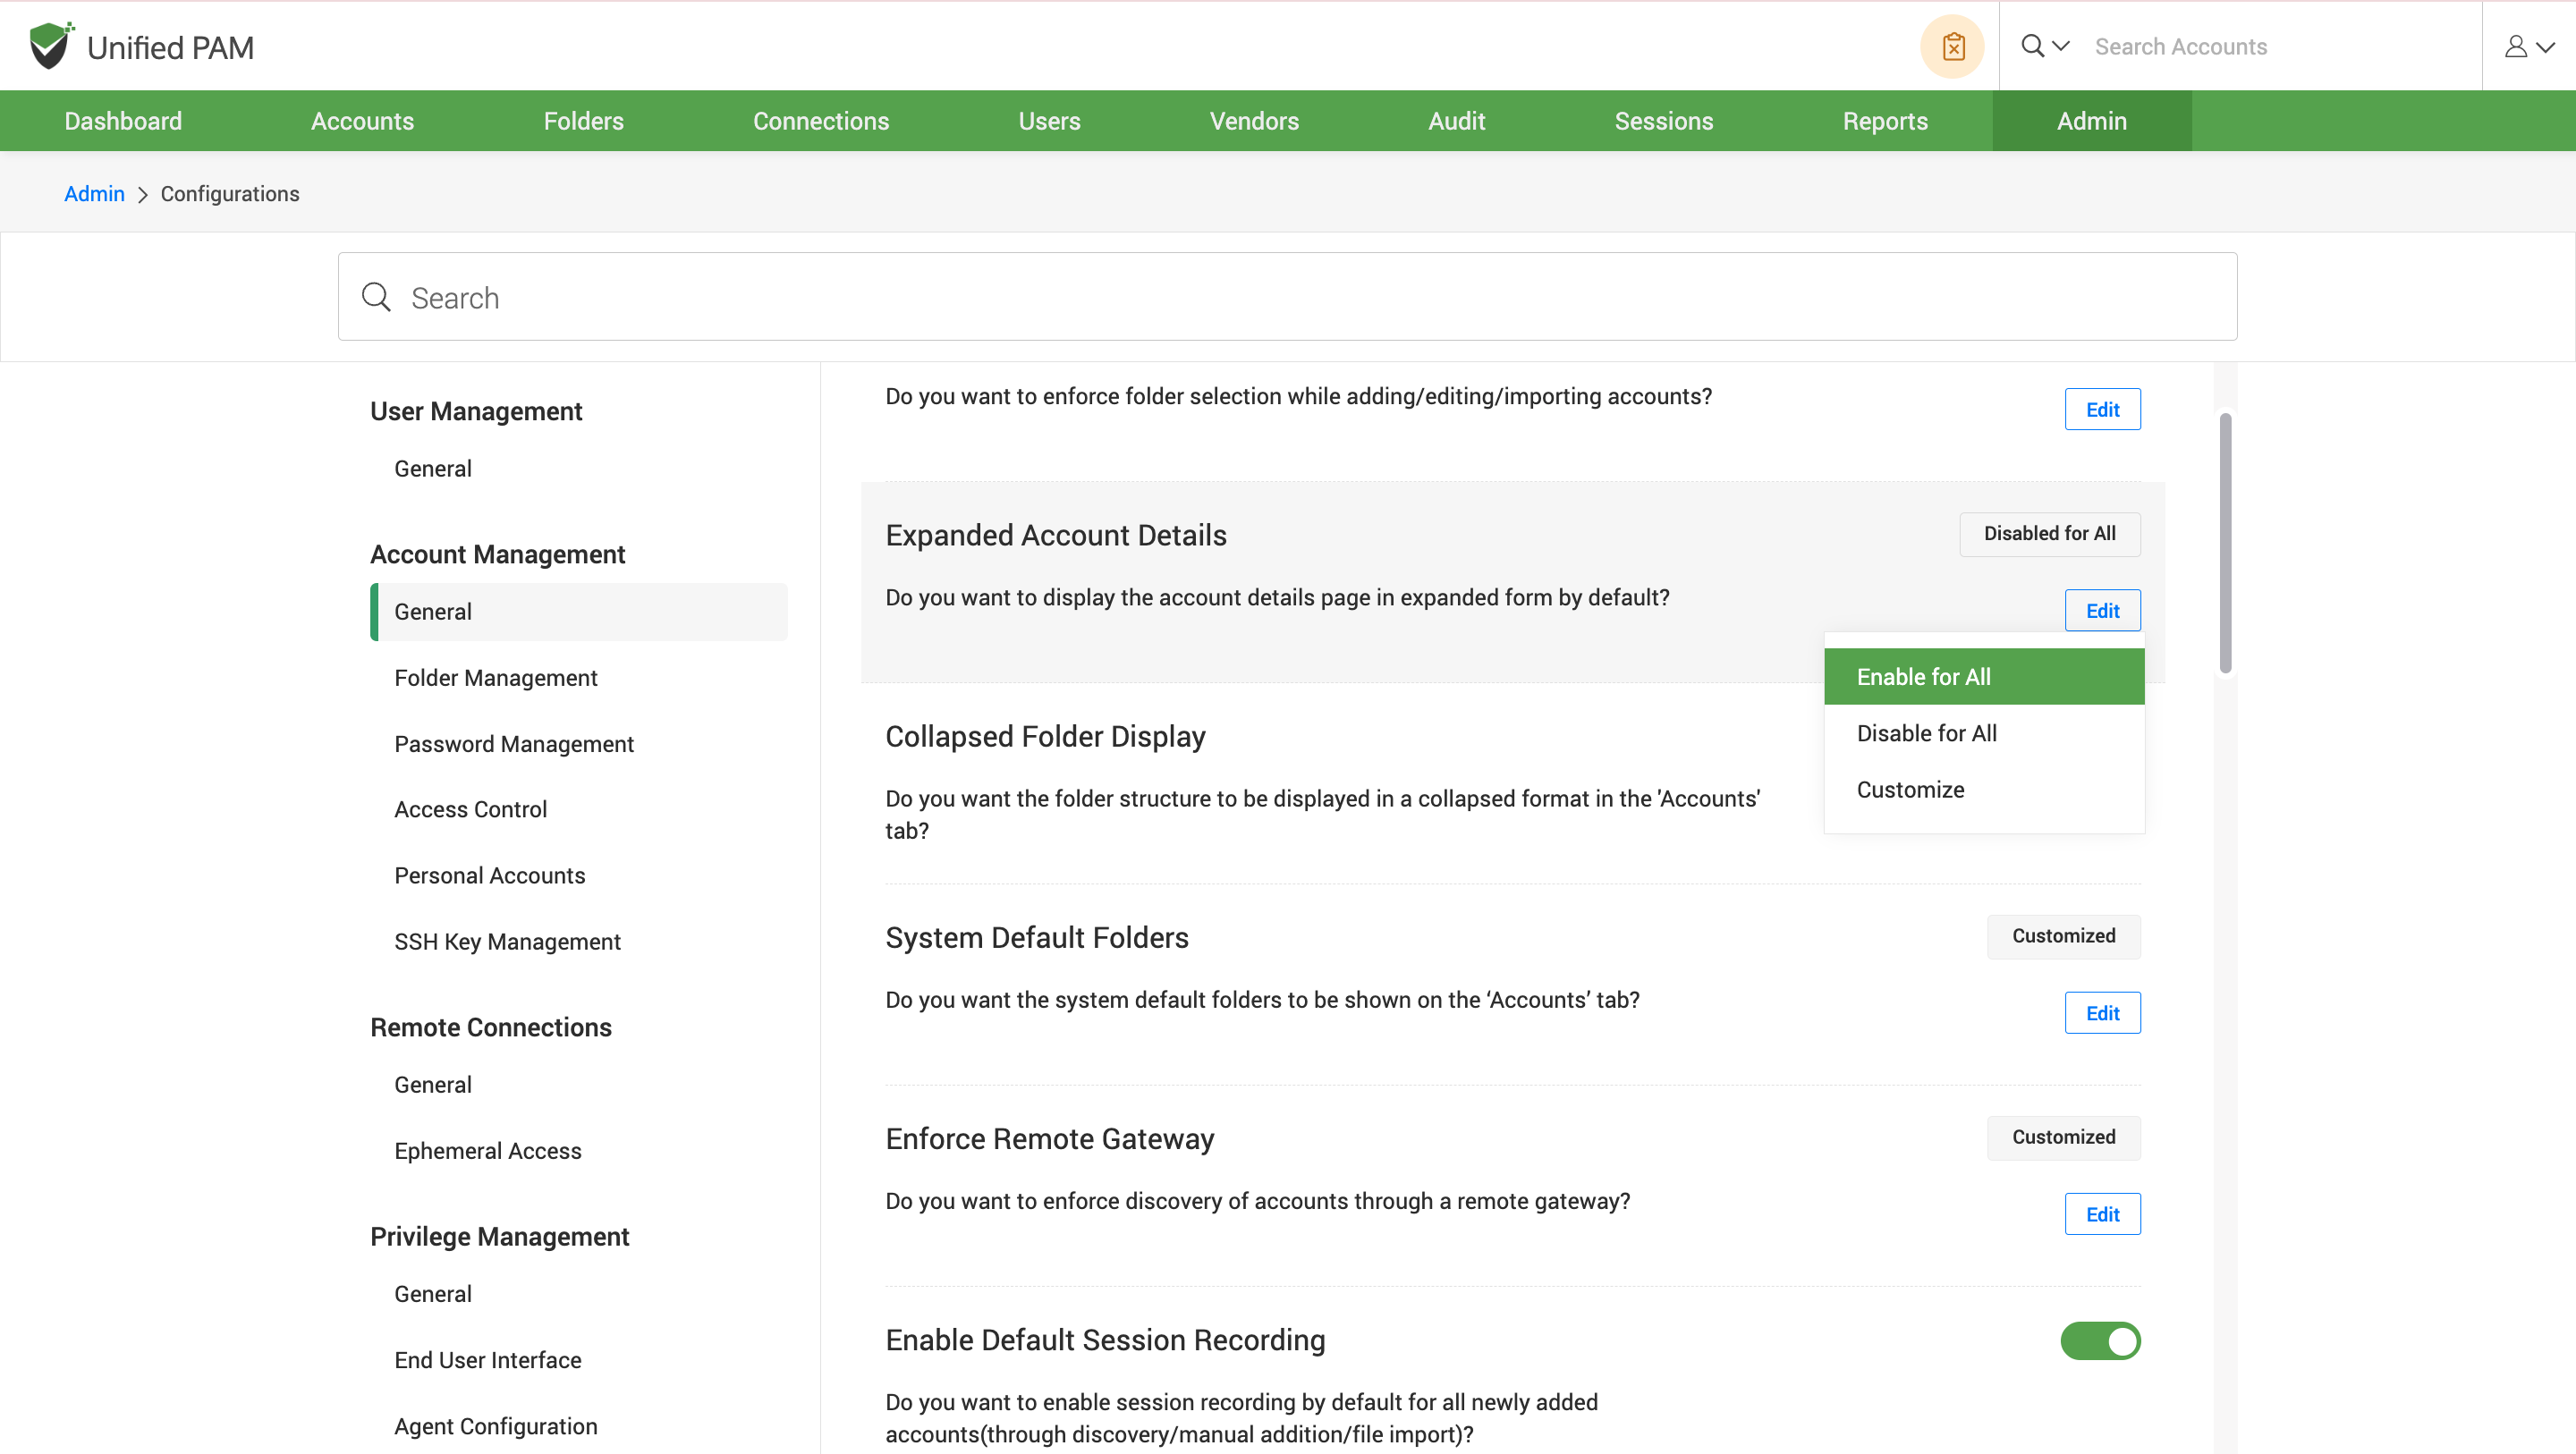
To enable expanded detail page of accounts, select Enable for All and Disable for All to disable the default setting of displaying the page.
To enable or disable the display account page option for specific users or groups, a custom list of users is created using the Customize option. In accordance with the number of users or groups that require a detailed page of accounts, the list can be customized. Click on the Save button to save the changes.
How to display a detailed folder structure?
You can get a detailed version of folder structure of accounts by displaying the structure in a collapsed format in the ‘Accounts’ tab.
To display the structure, navigate to Admin >> Customization >> Configuration >> Account Management >> General, and find the Collapsed Folder Display configuration. Slide the toggle button to the right to enable the feature.
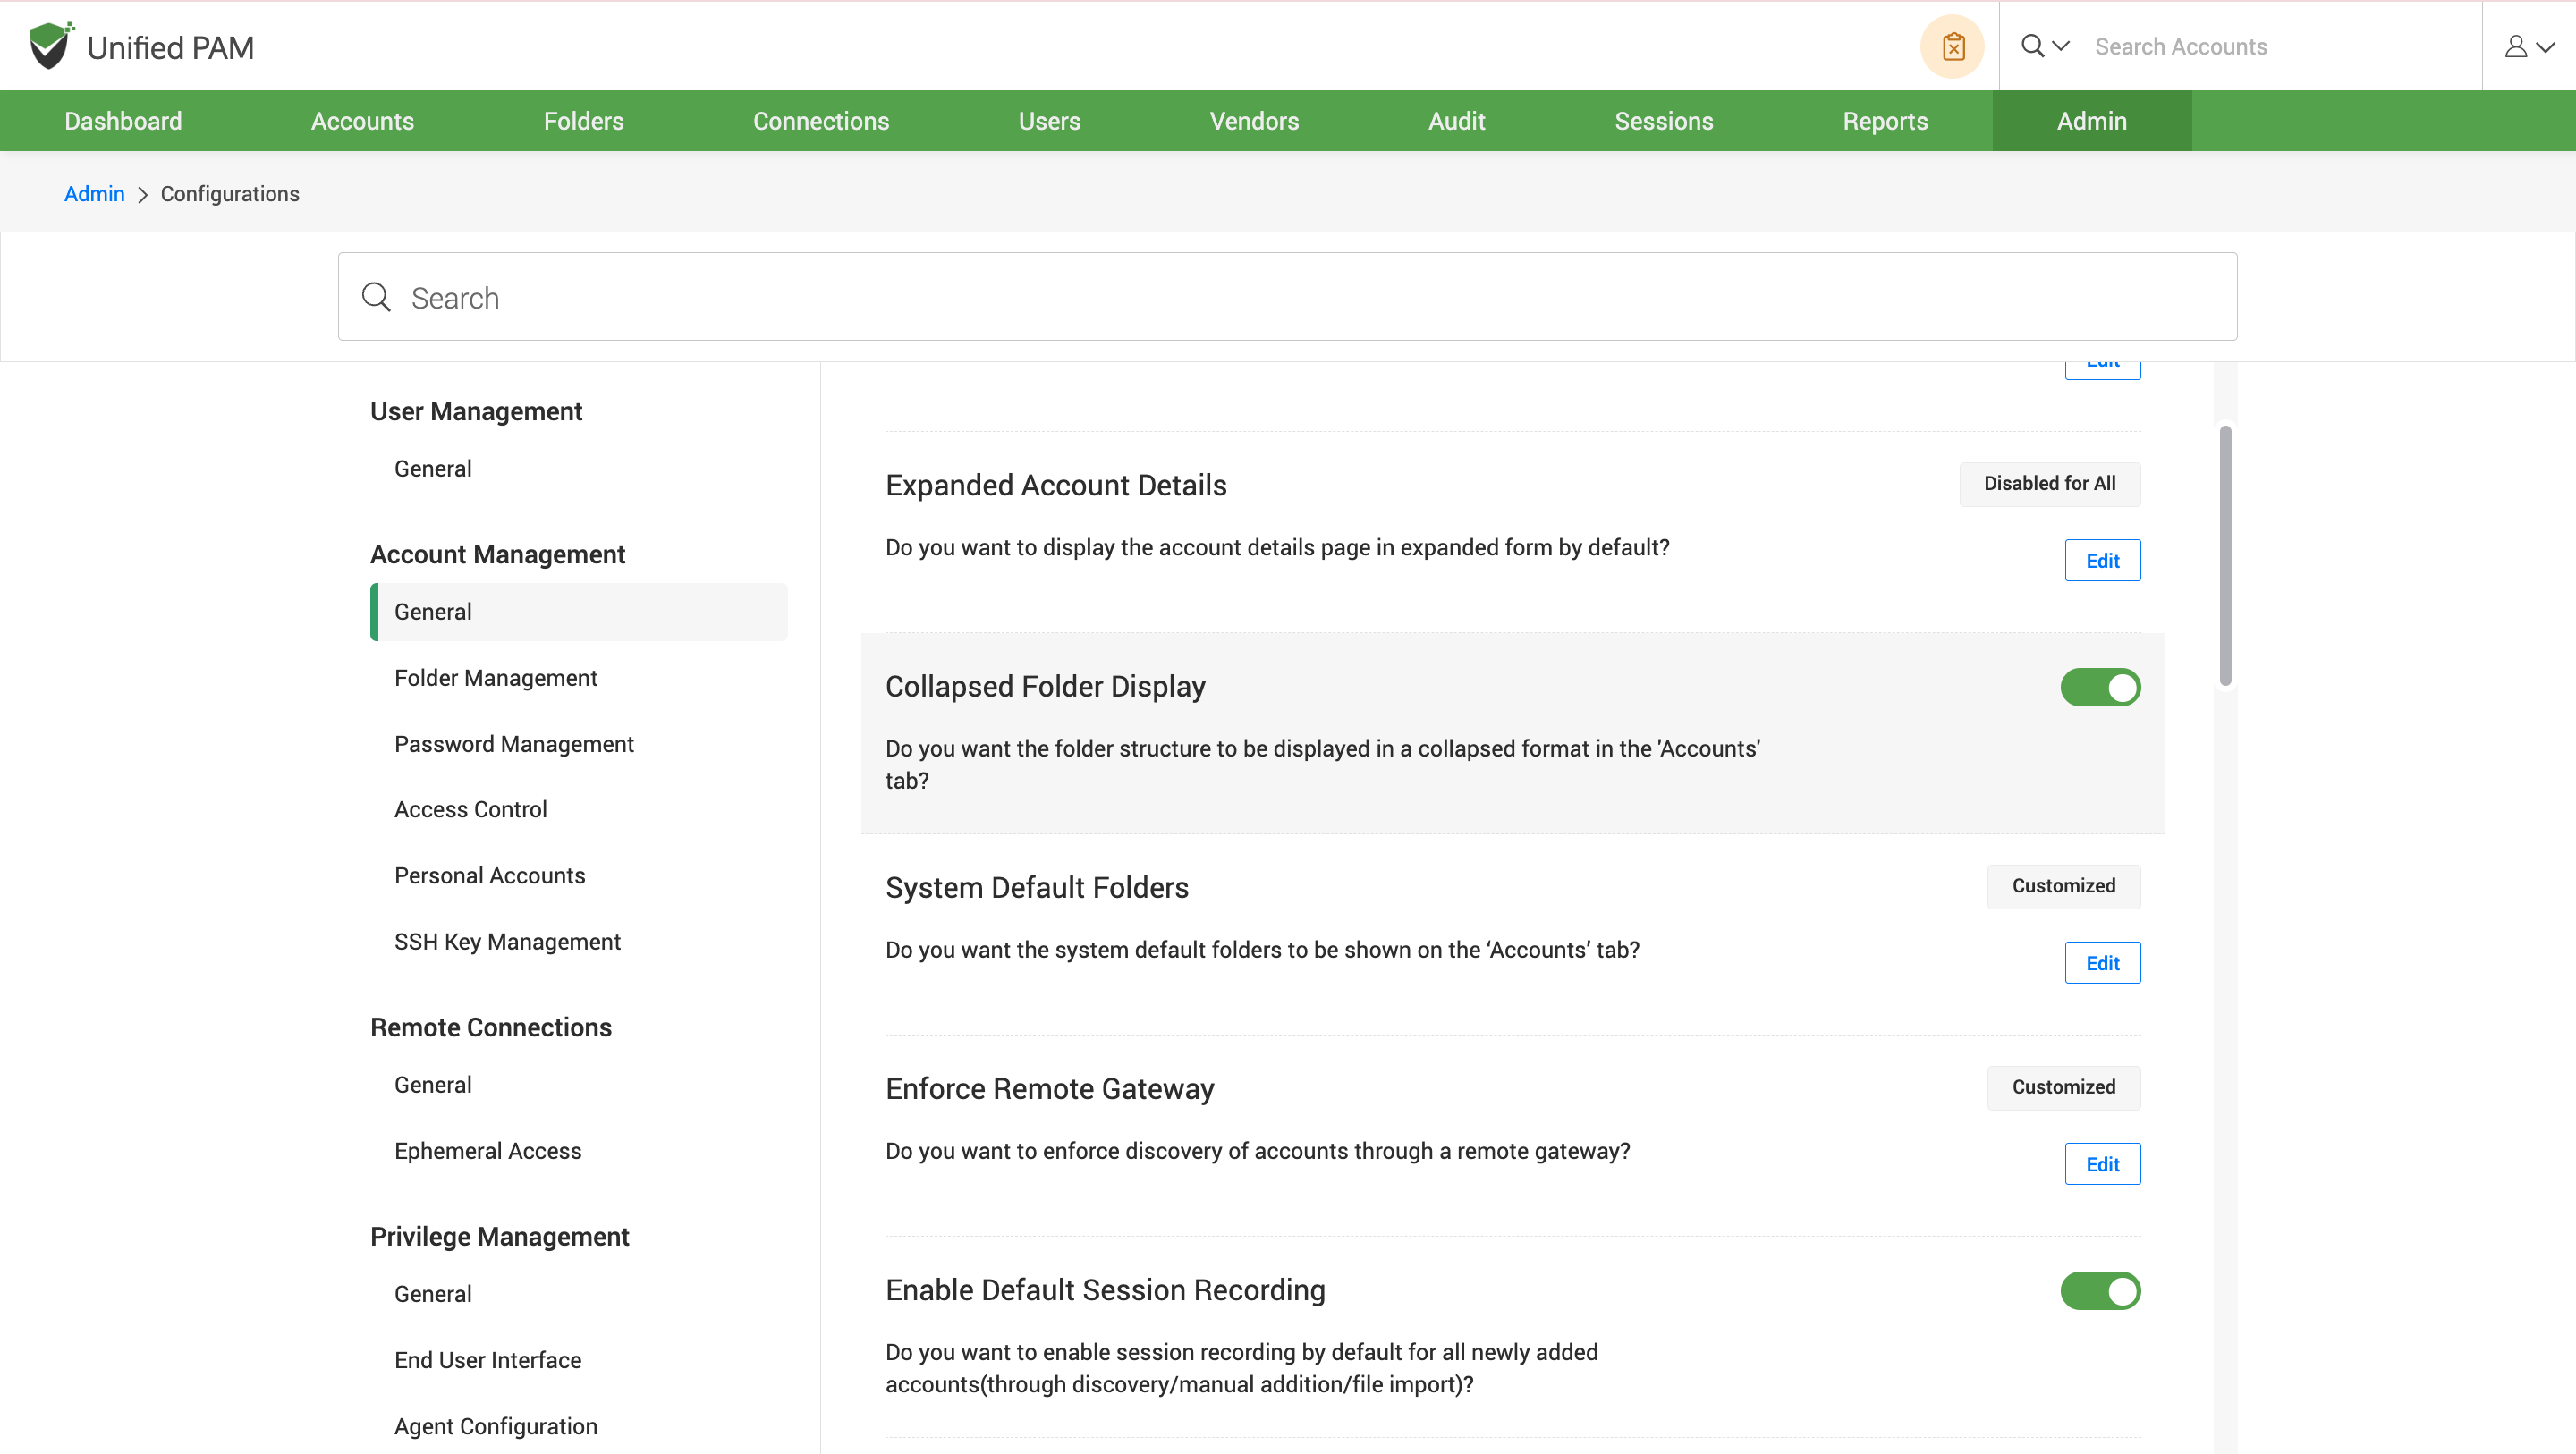
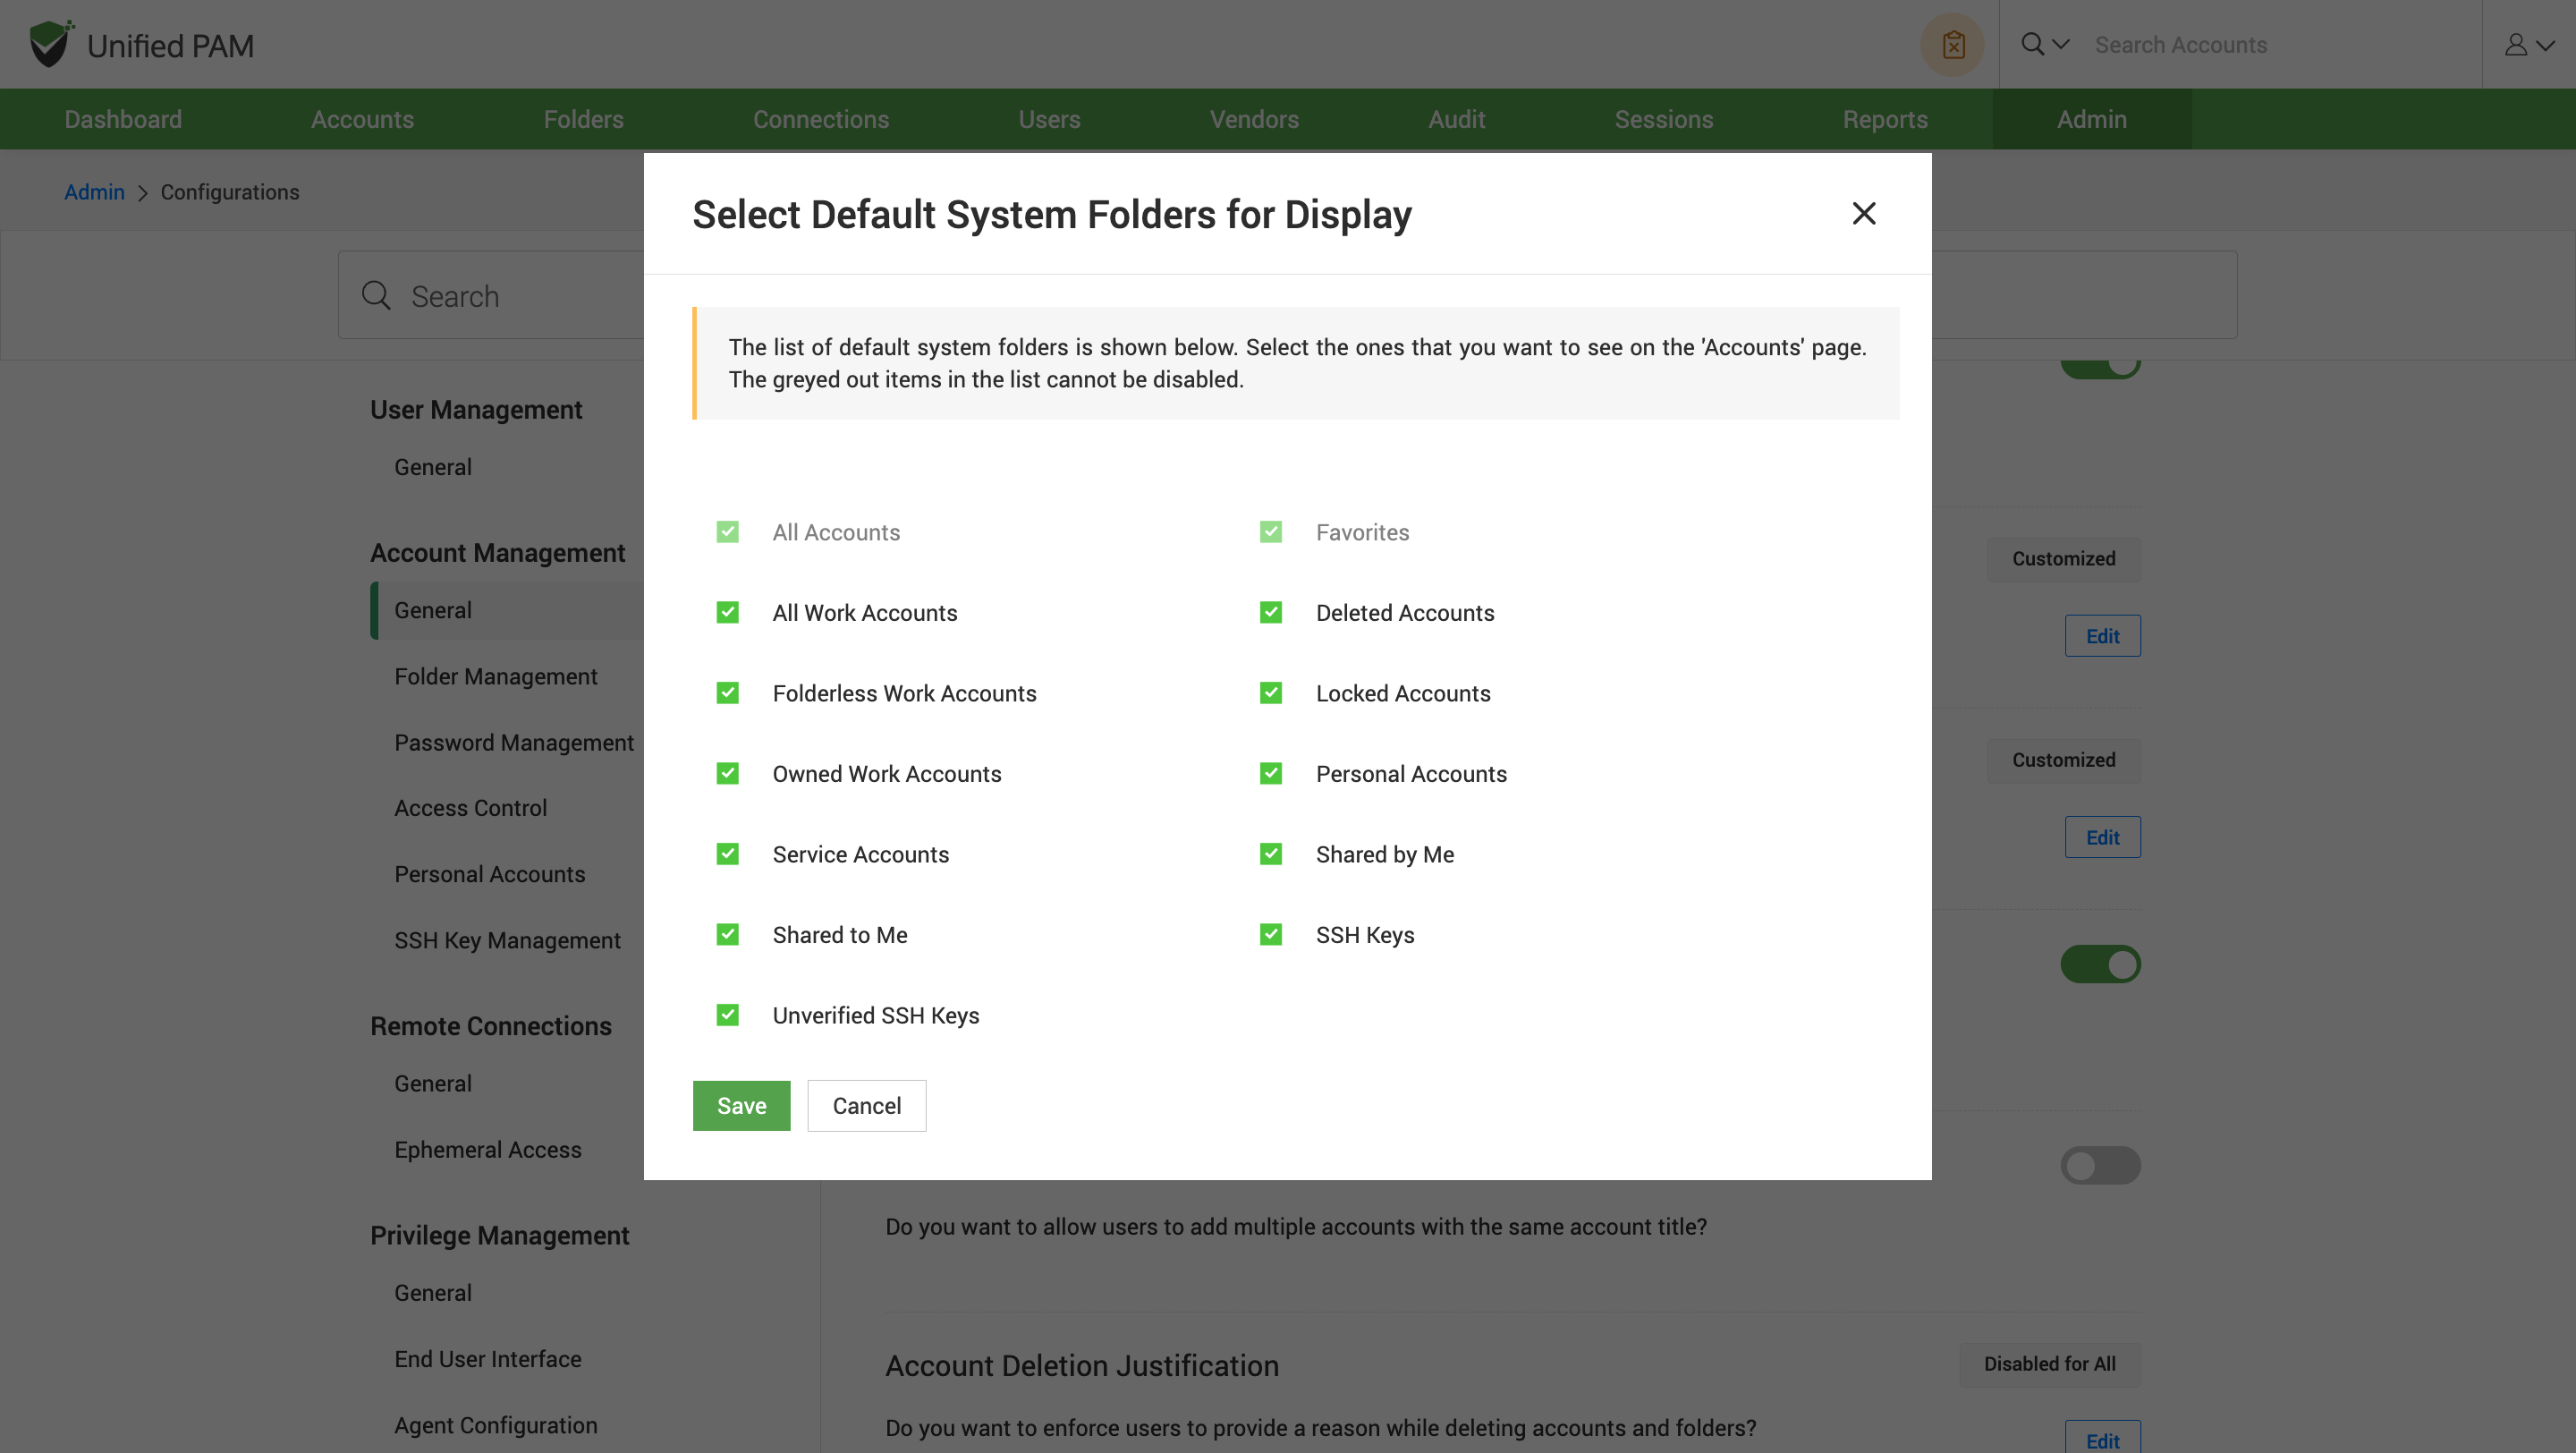
How to display system default folders?
The default folders help to group the accounts of a particular section within a single folder. The default folders include sections such as personal accounts, service accounts, locked accounts and SSH keys. You can select the default folders to display on the ‘Account’ tab according to your requirements.
To enable this, navigate to Admin >> Customization >> Configuration >> Account Management >> General, and find the System Default Folders configuration. Click on the Edit button.
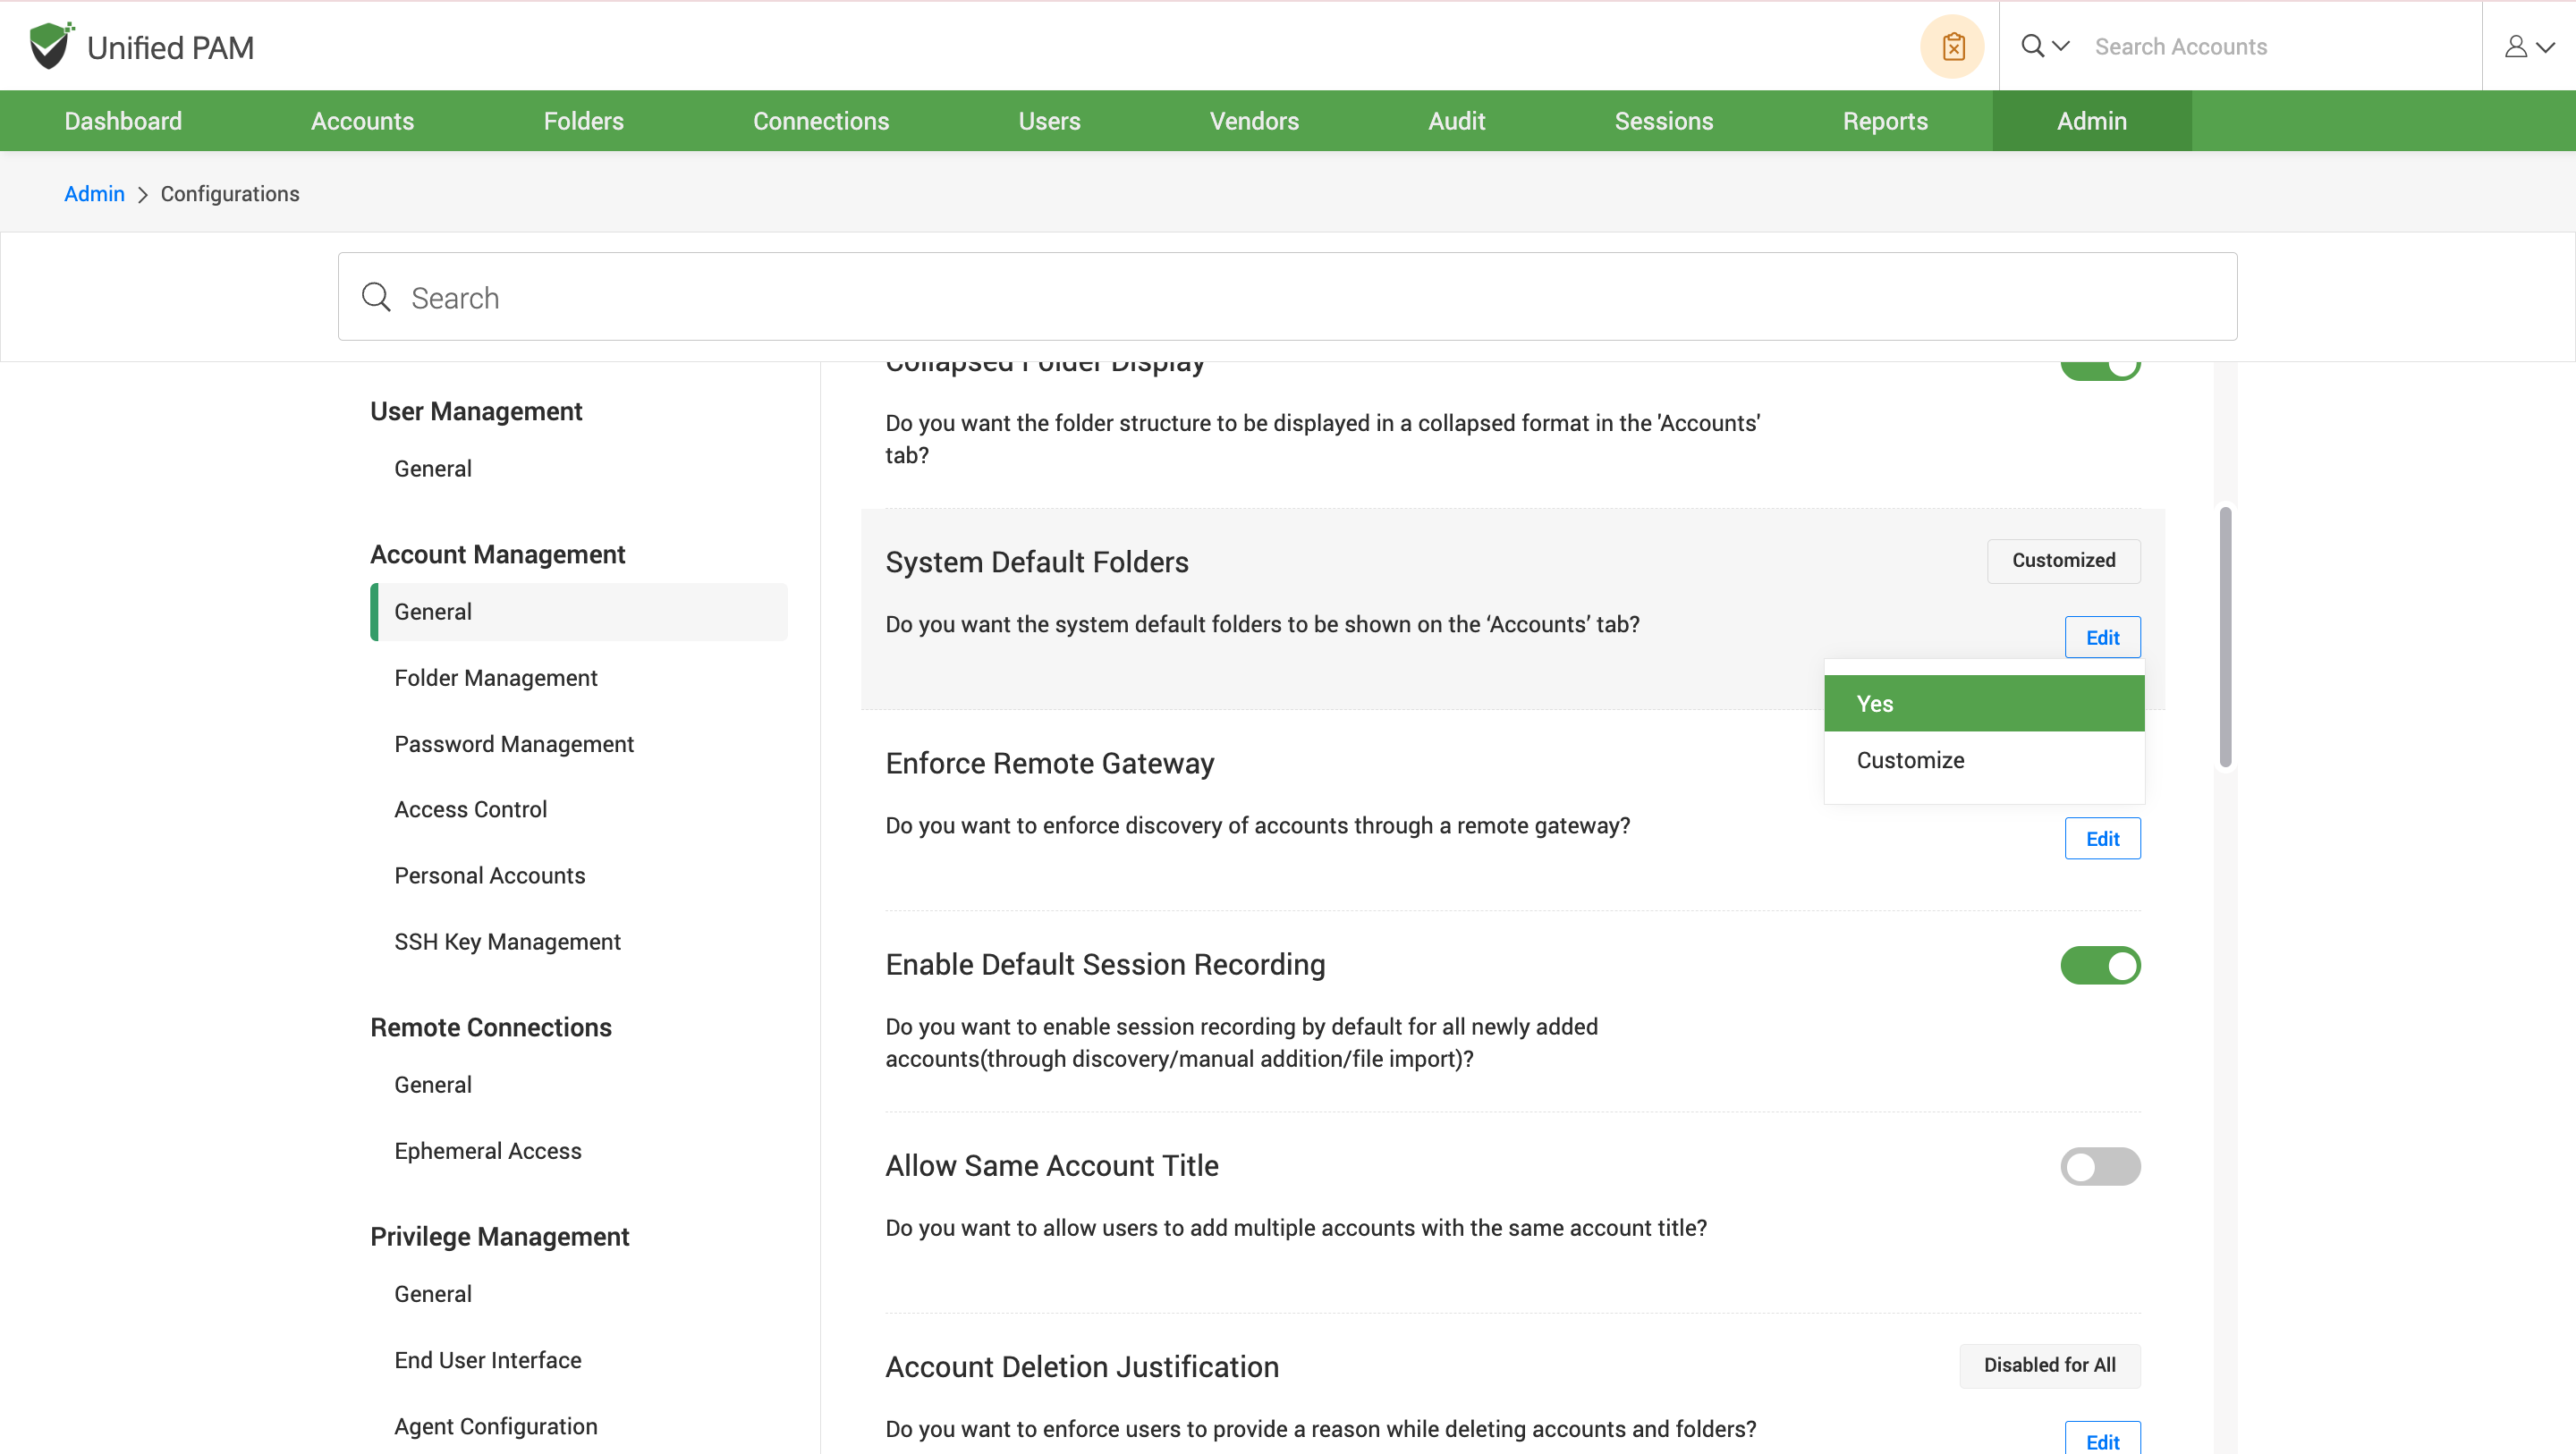
Select Yes to show all the folders by default or Customize option to choose a list of default type folders that you wish to display. Click on the Save button to save the changes after selecting the type of account folders you require.
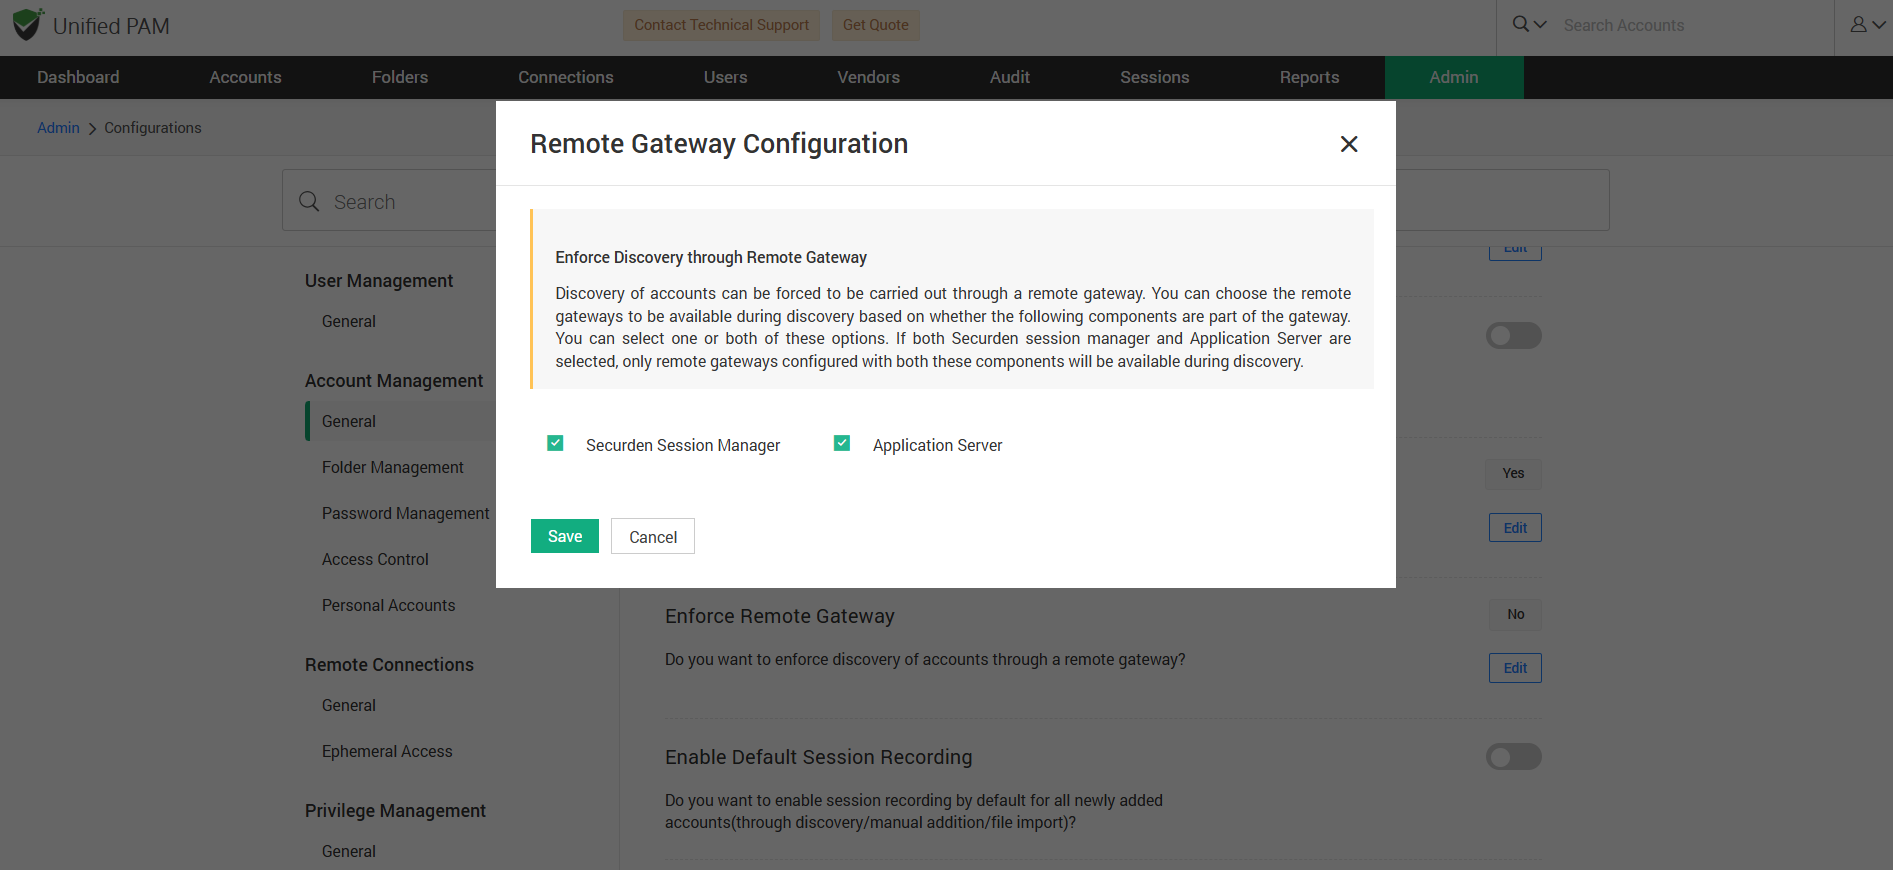
How to Enforce Discovery of Accounts Through Remote Gateway?
You can automate the scanning of network or systems to find and list user accounts, services, and credentials through a remote gateway. You have to choose the component to be present on the gateway acting as an intermediate system used by Securden to securely reach other systems.
To select the gateway components, navigate to Admin >> Customization >> Configurations >> Account Management >> General and find Enforce Remote Gateway configuration.
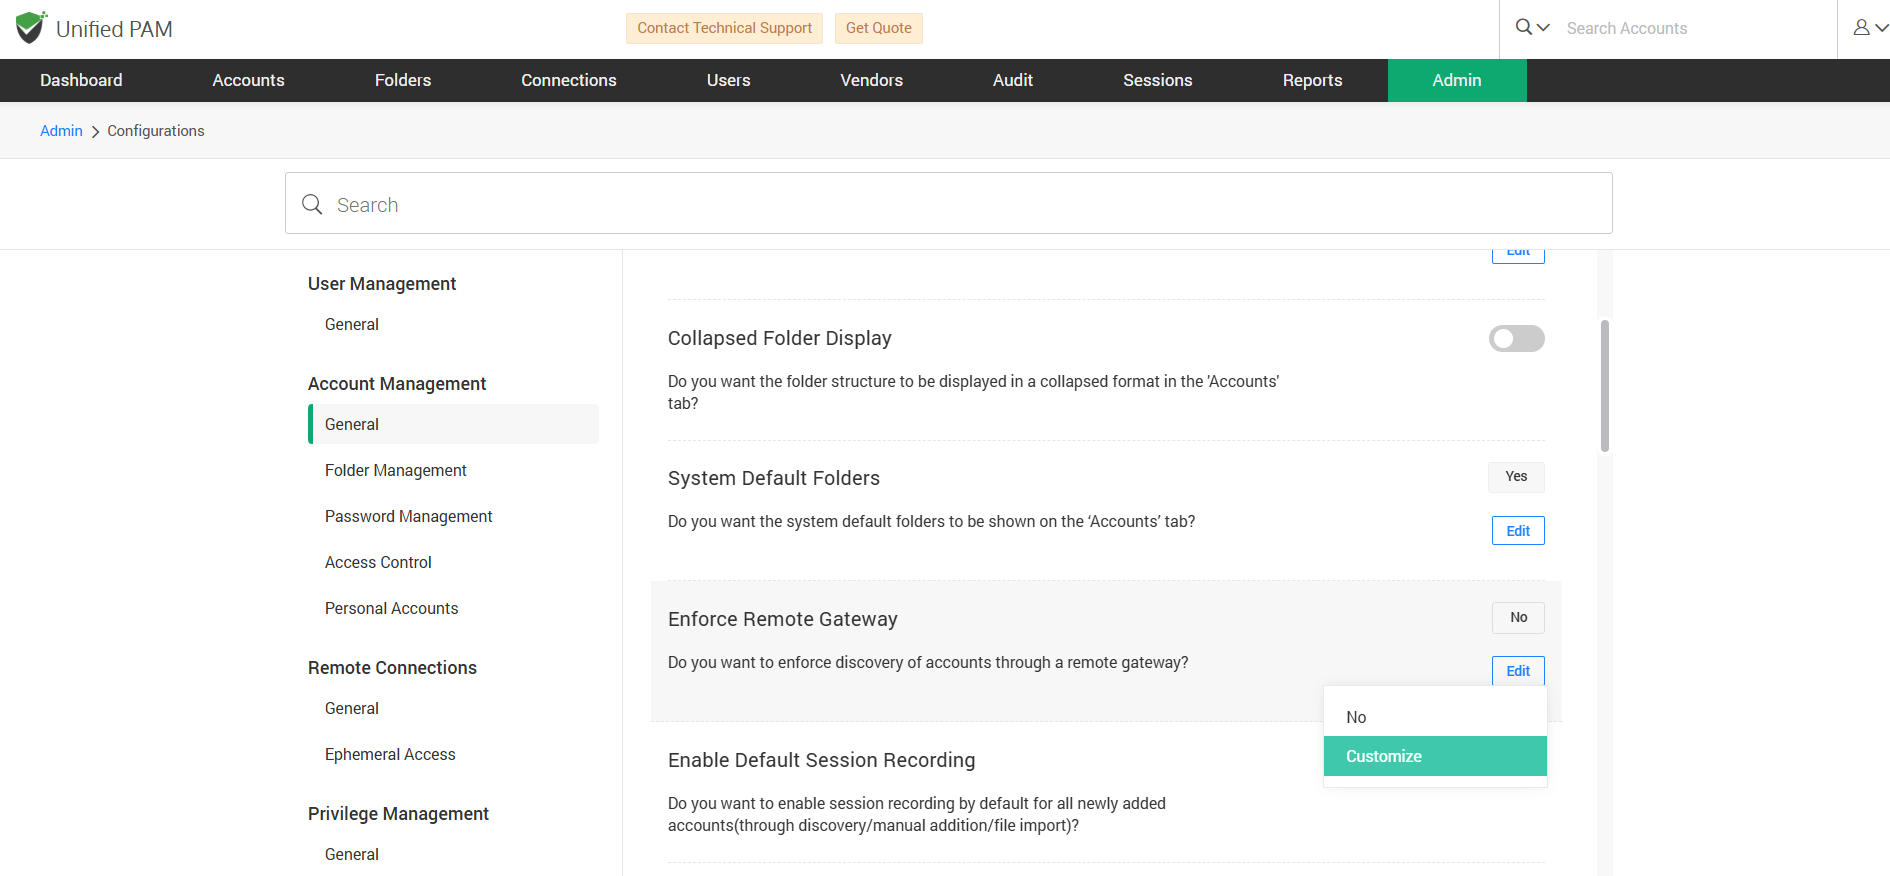
Click on the Edit button. To enforce discovery of accounts, choose Customize option and a popup appears on the screen. Select the components you want to be available during discovery. You can select one or both options. Choose No if you do not want to enforce a gateway. Click on the Save button to save the changes.
Note
If only one is selected, gateways with that component will be used. If both are selected, only those gateways that have both components installed will be used for discovery.
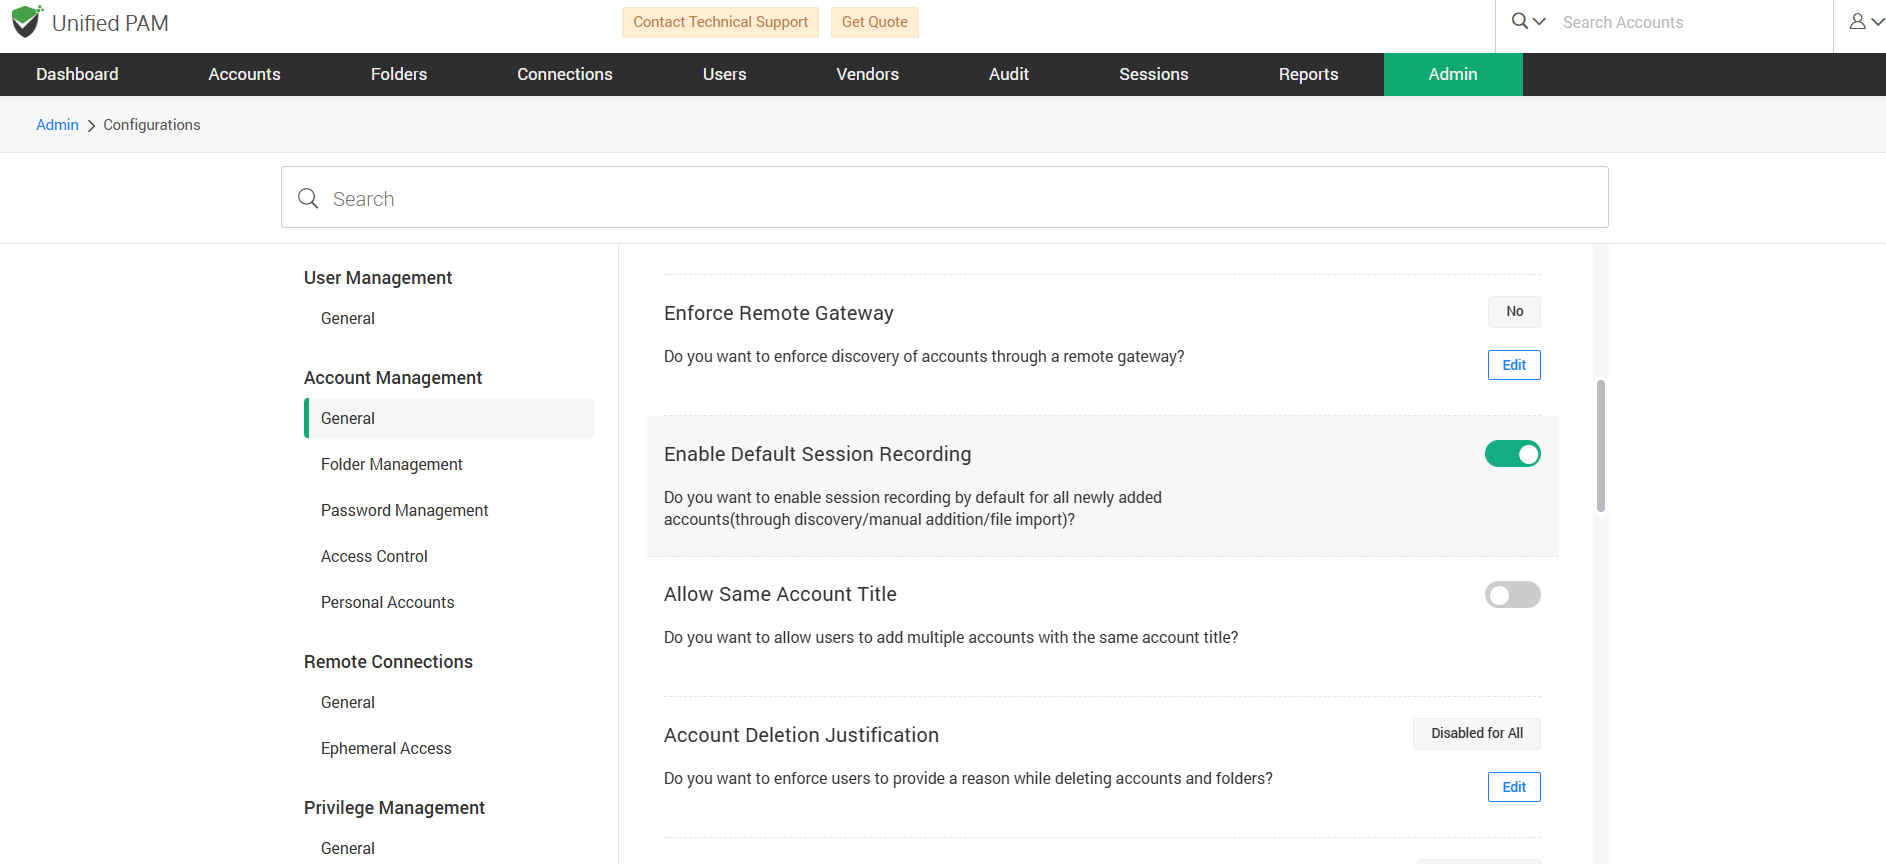
How to Set Default Session Recording for Added Accounts?
You can enable session recording by default for all the newly added accounts such as accounts that are added through account discovery, manually and by importing from a file.
To enable the session recording, navigate to Admin >> Customization >> Configurations >> Account Management >> General and find Enable Default Session Recording configuration. Slide the toggle button to the right to configure the feature.
How to enable users to add multiple accounts with the same title?
You can allow users to add multiple accounts with the same account title.
To enable this, navigate to Admin >> Customization >> Configuration >> Account Management >> General, and find the Allow Same Account Title configuration. Slide the toggle to the right position.

How to enforce users to provide a reason while deleting accounts and folders?
Securden can enforce an option where users will have to provide a reason while deleting accounts and folders. You can disable it for all the users or customize it to make the reason provision mandatory for specific Users/Groups.
To configure this, navigate to Admin >> Customization >> Configuration >> Account Management >> General, and find the Account Deletion Justification configuration. Click on the Edit button.
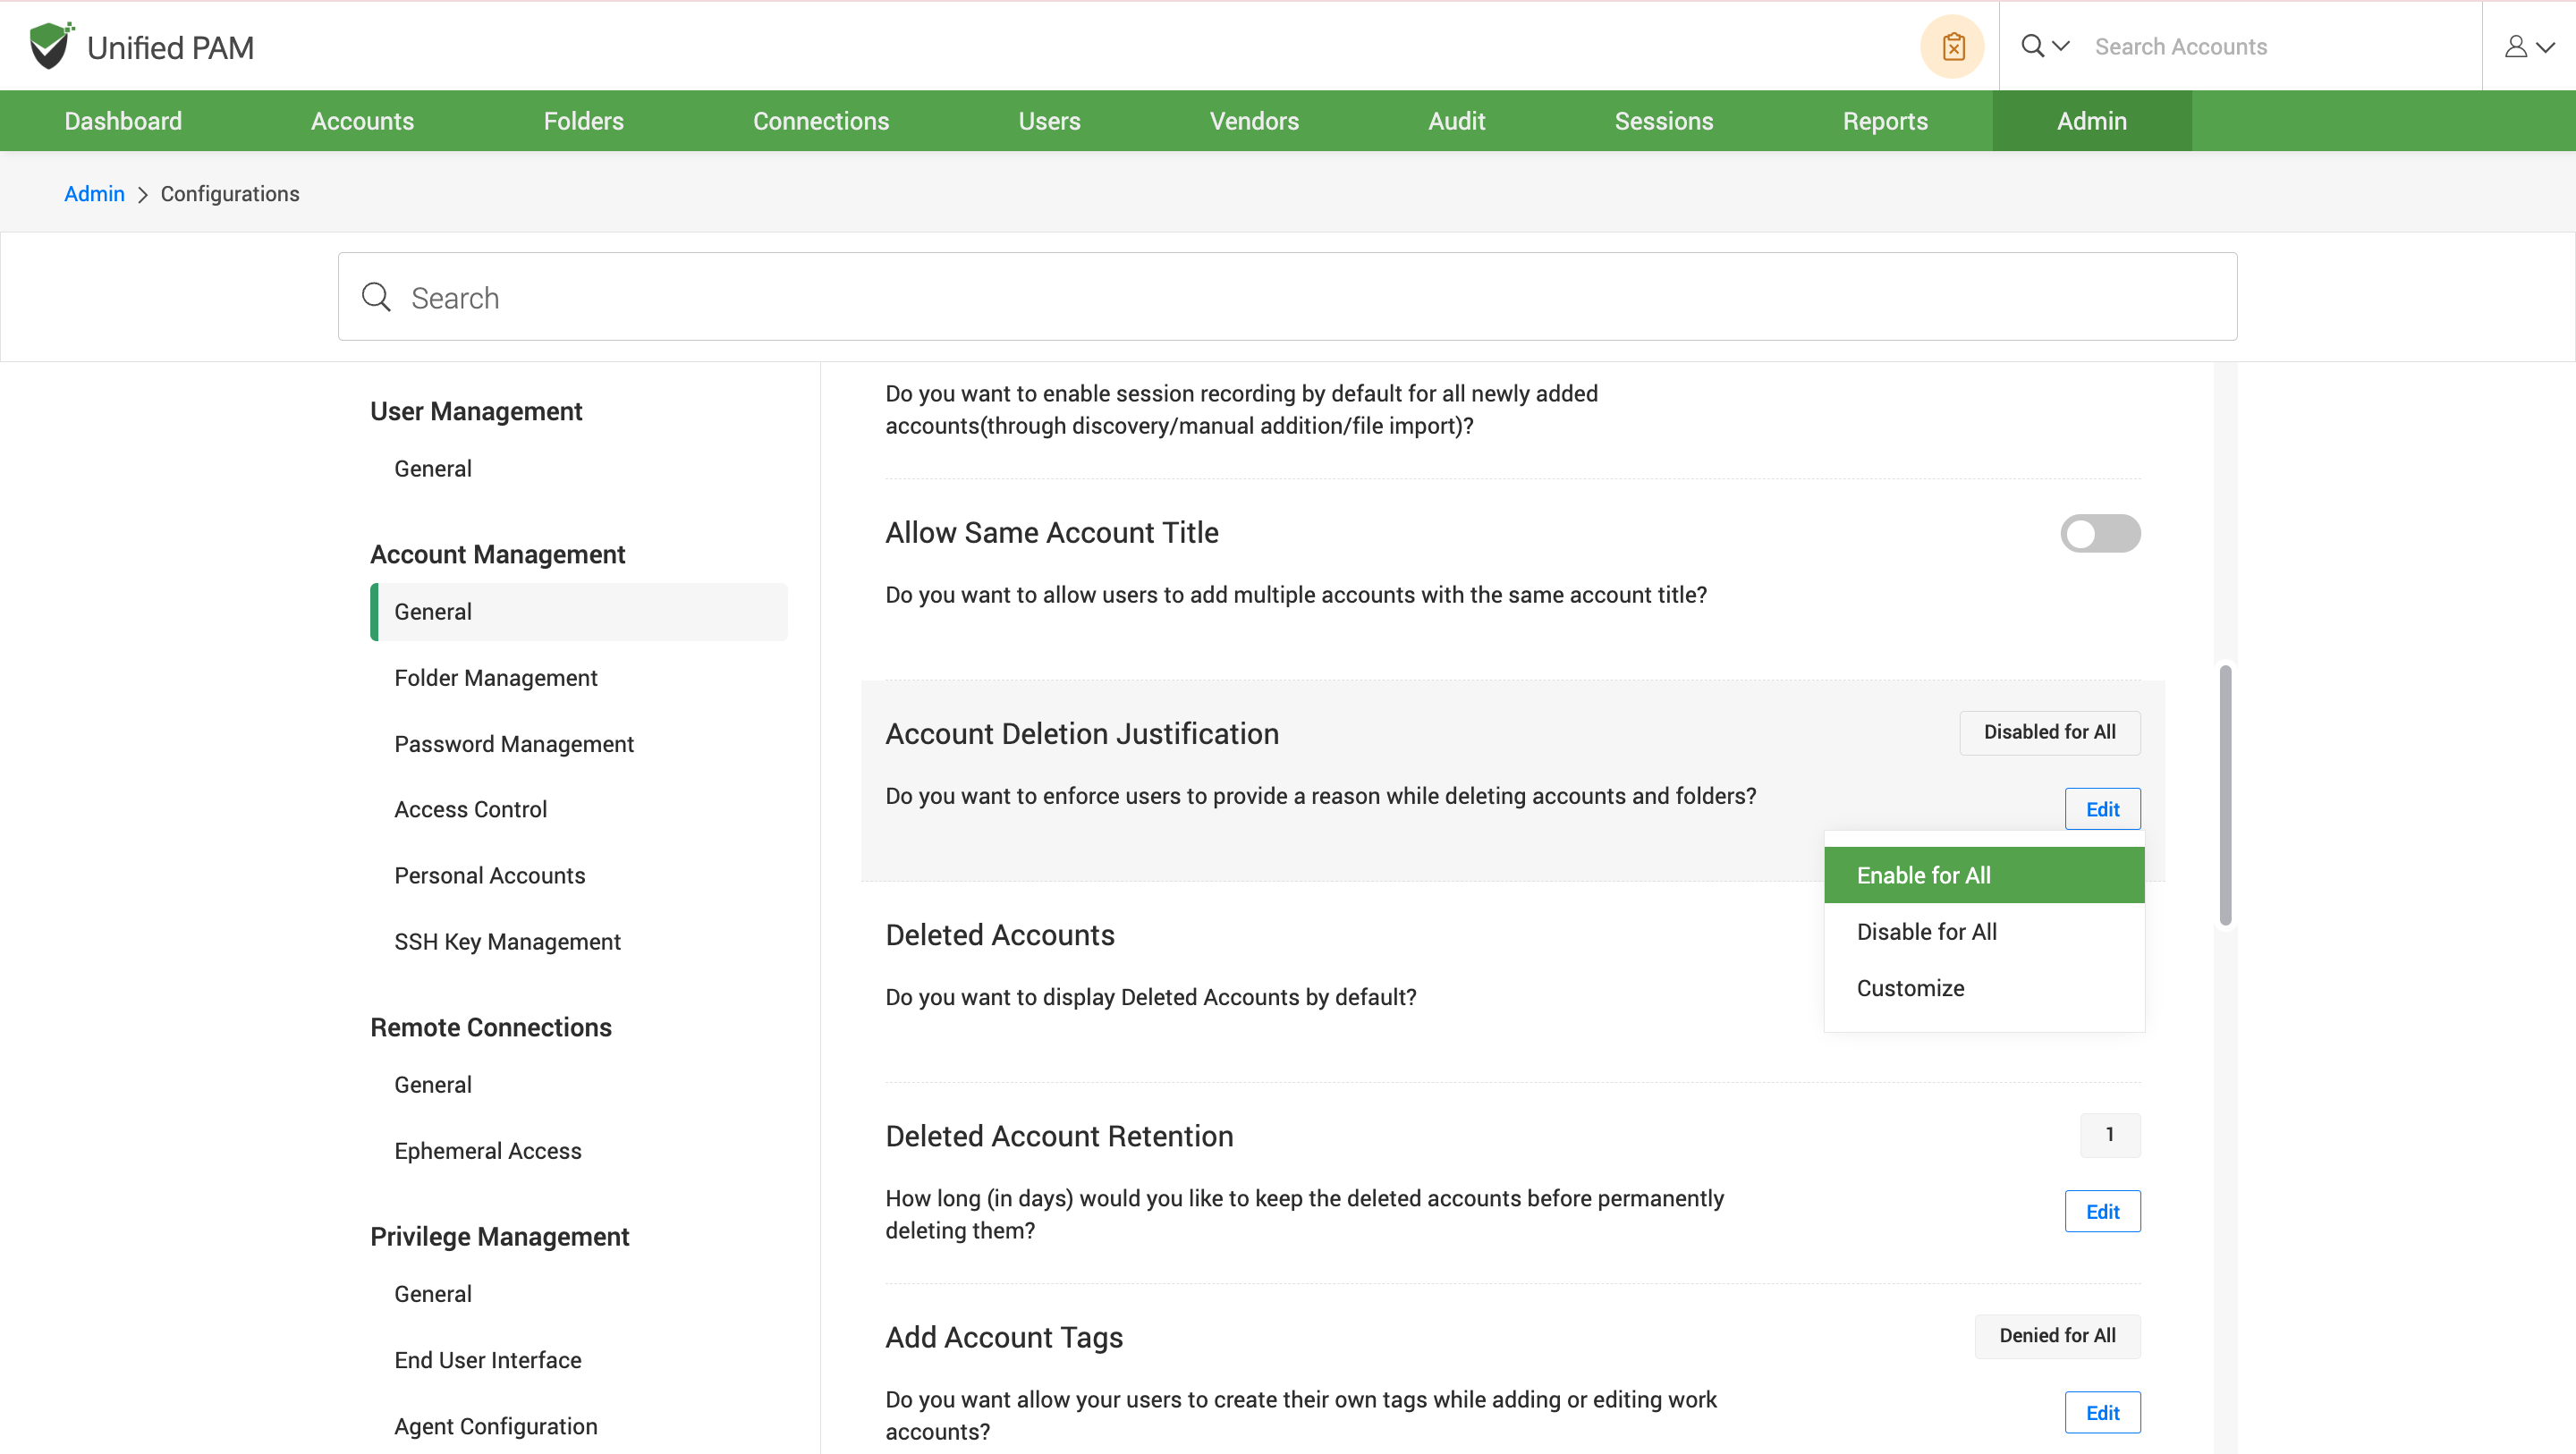
To enable users to provide reason for deleting accounts, select Enable for All and Disable for All to disable the provision of justification.
To enable or disable justification option for specific users or groups, a custom list of users is created using the Customize option. In accordance with the number of users or groups that require justification for an account or a folder deleting operation, the list can be customized. Click on the Save button to save the changes.

How to display recently deleted accounts by default?
You can display the details of all the accounts deleted for the users by default.
To display this, navigate to Admin >> Customization >> Configuration >> Account Management >> General, and find the Deleted Accounts configuration. Click on the Edit button.
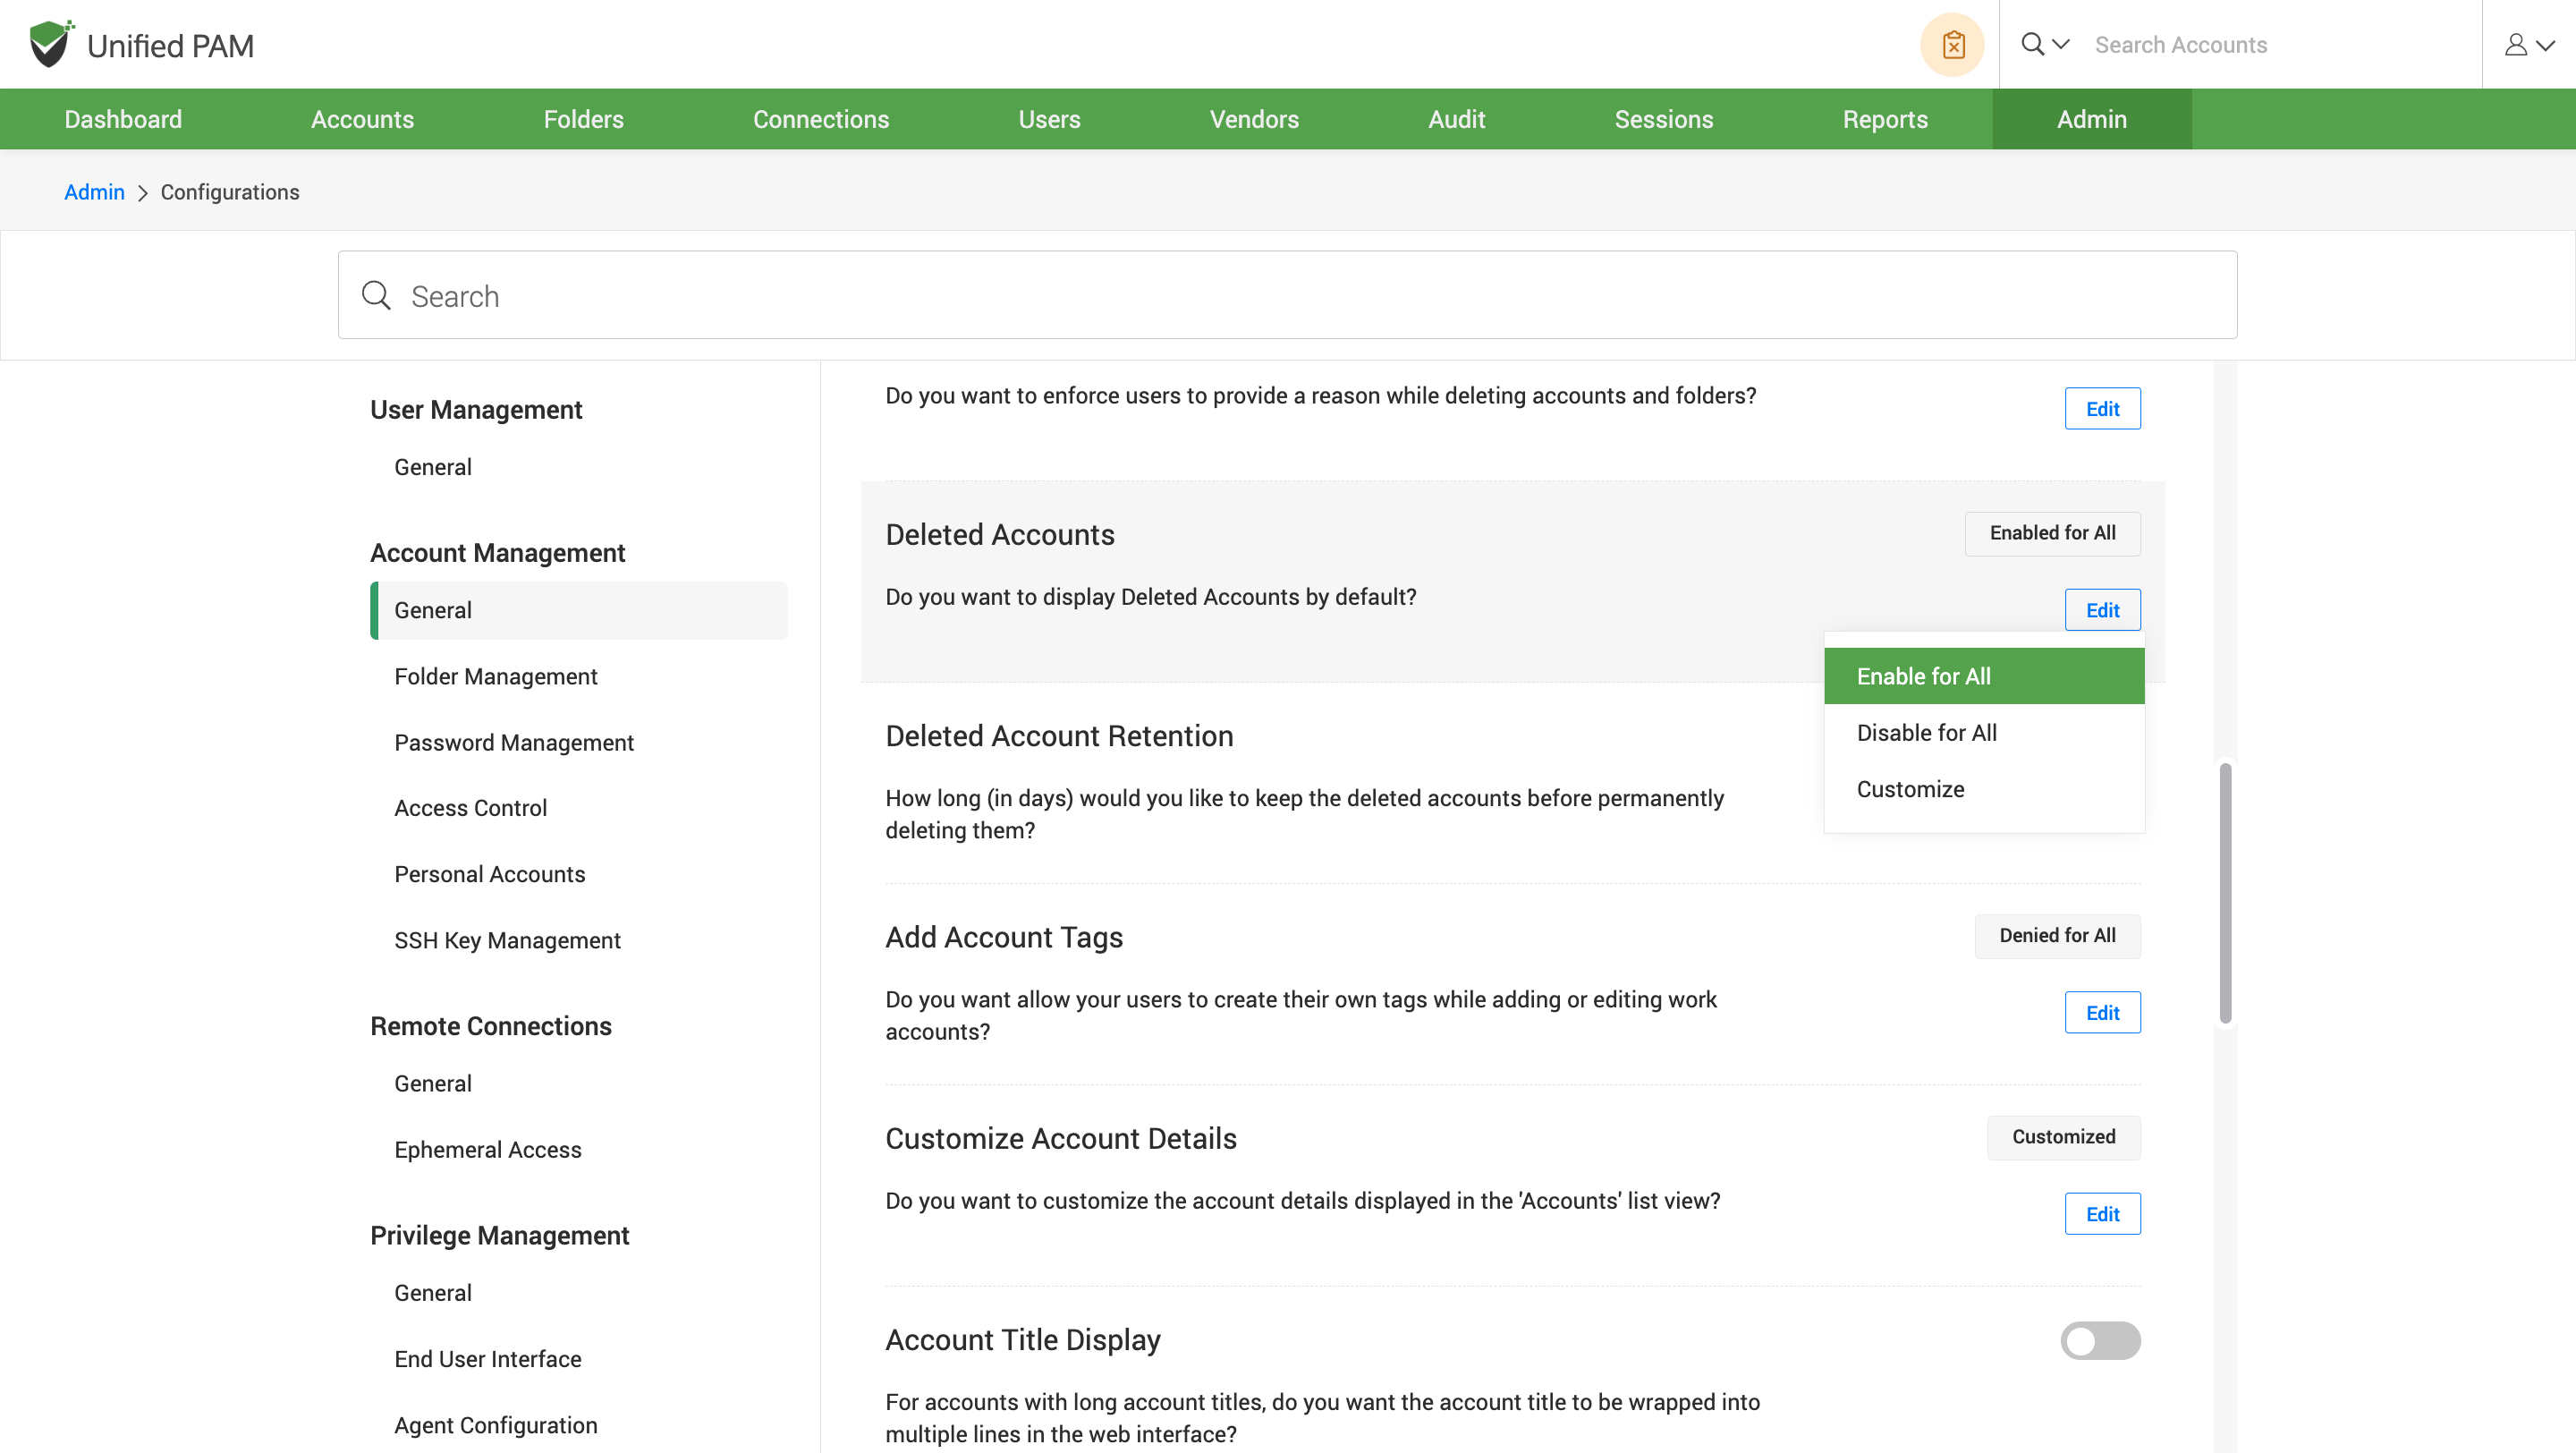
To enable the display of recently deleted accounts, select Enable for All and Disable for All to disable the default setting for displaying the deleted accounts.
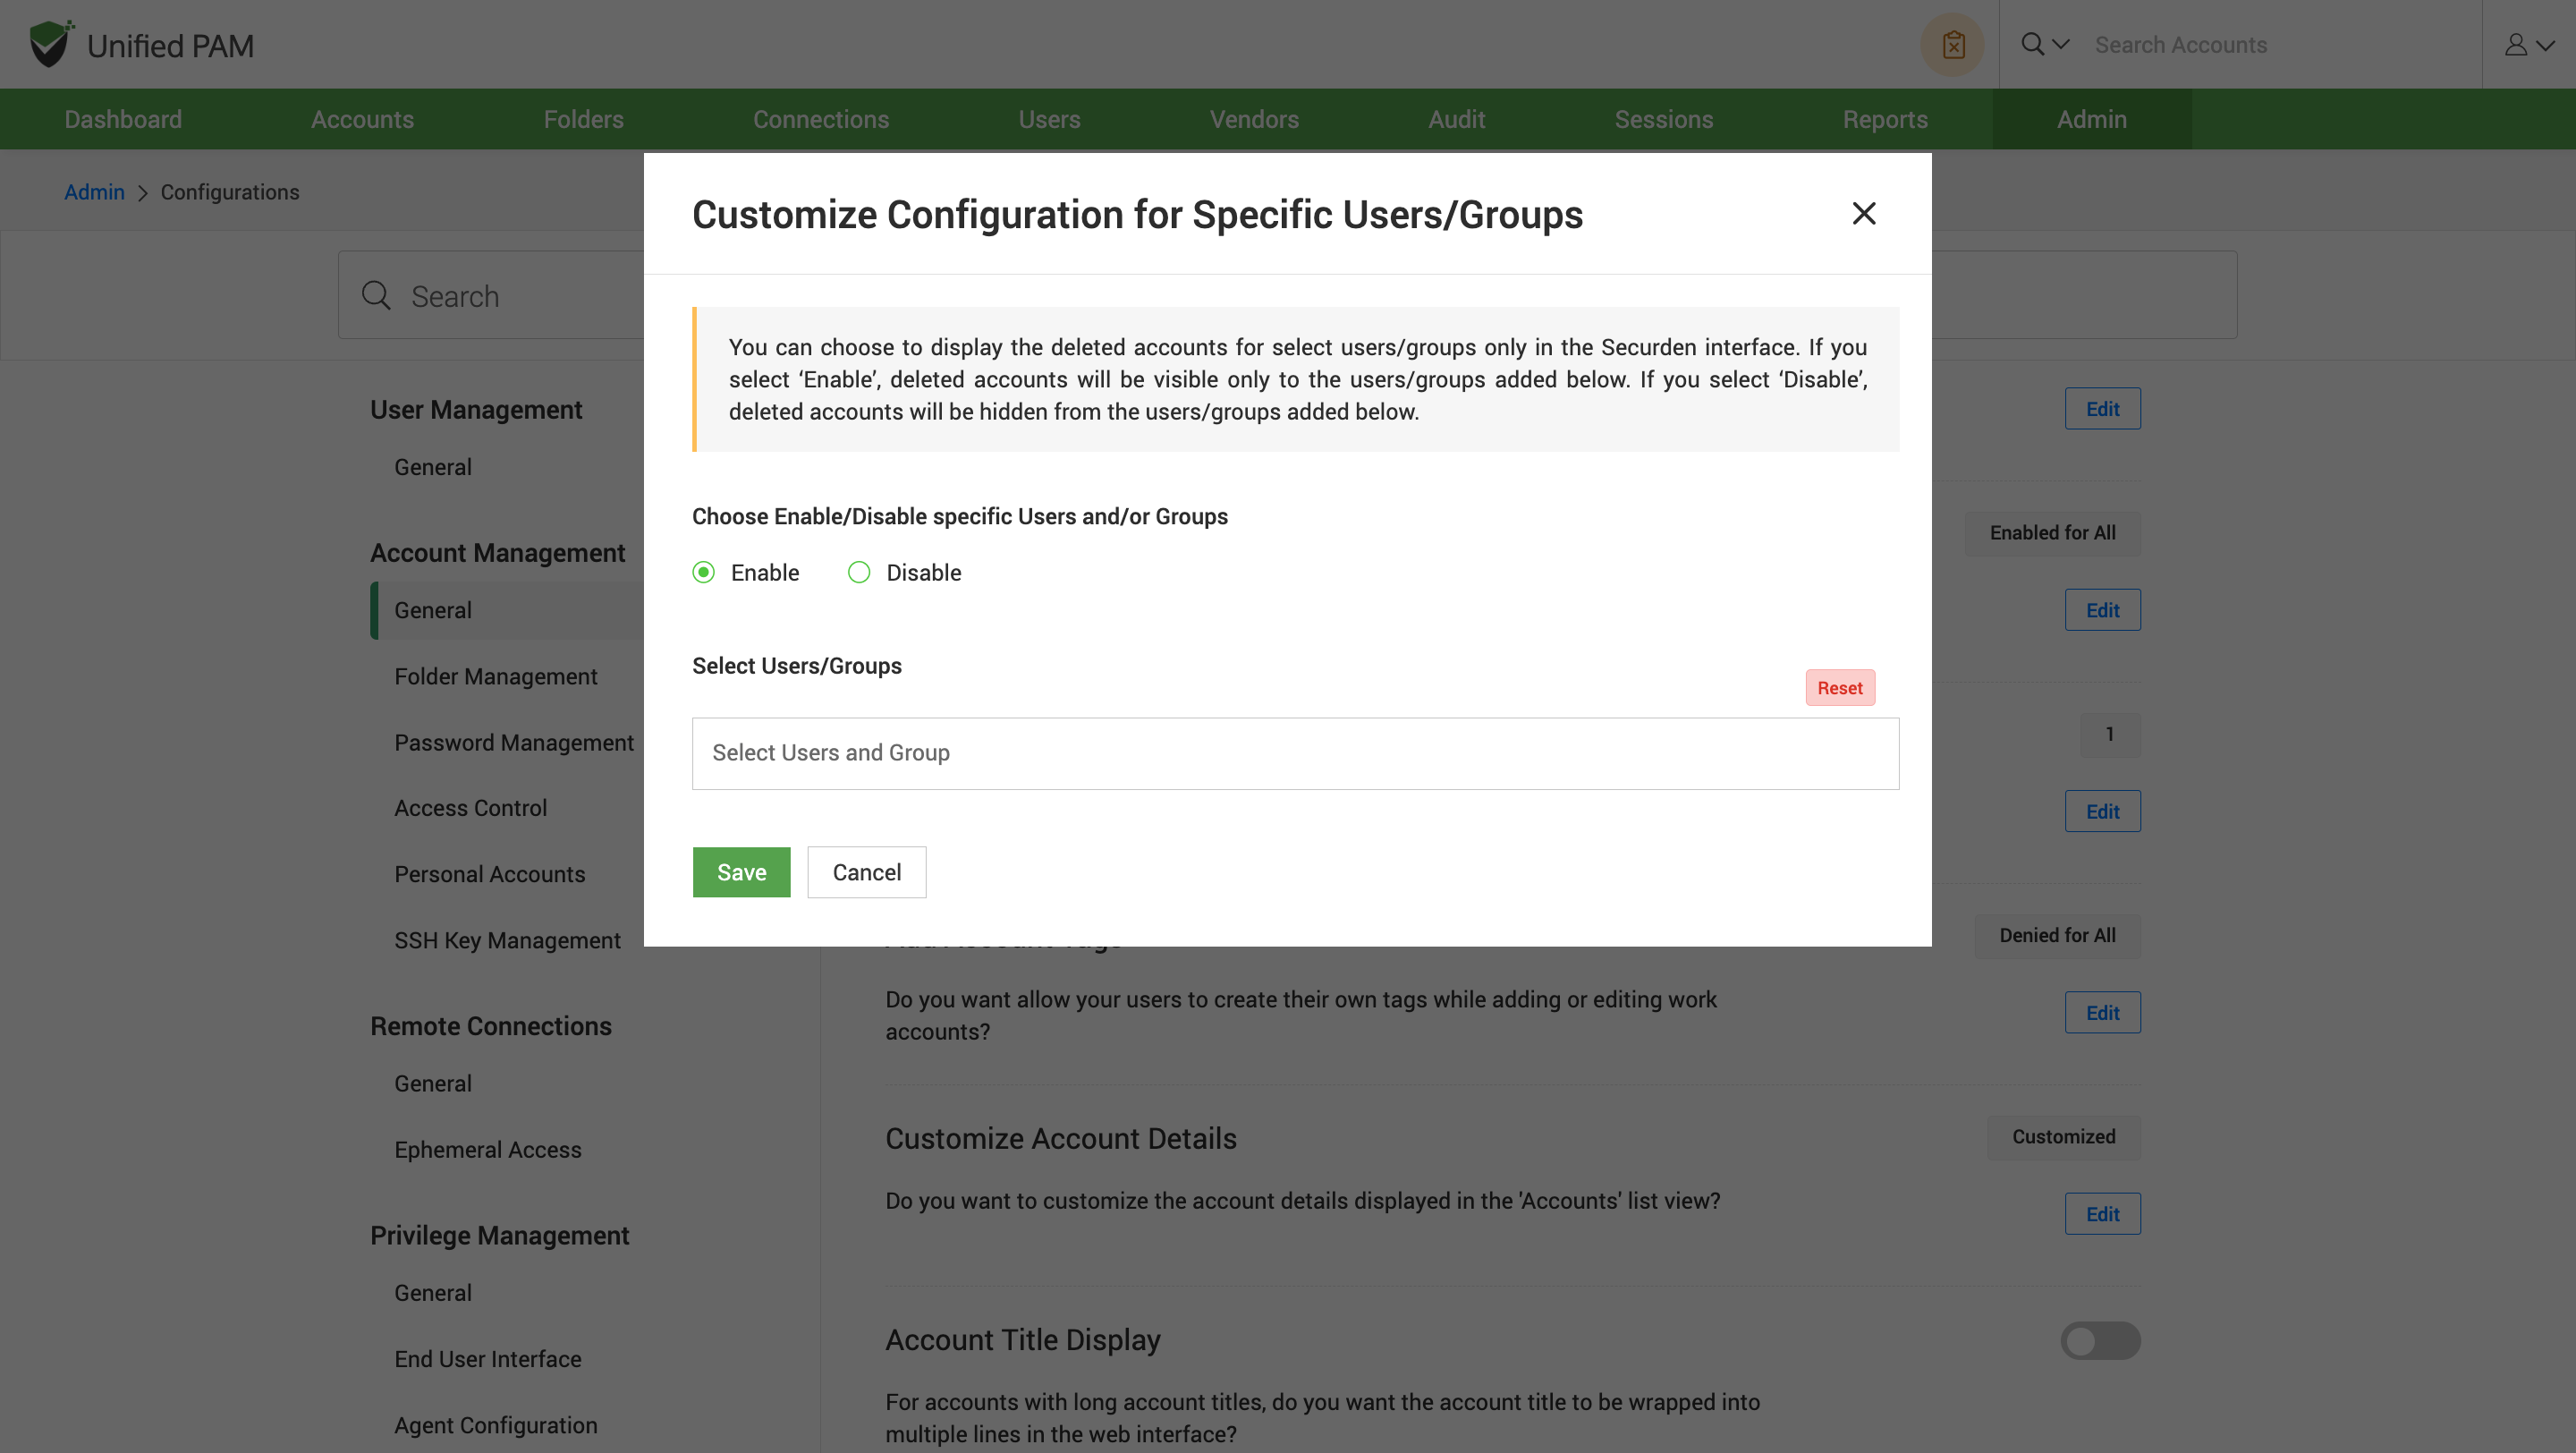
To enable or disable the display deleted accounts option for specific users or groups, a custom list of users is created using the Customize option. If you select ‘Enable’, recently deleted accounts will be visible only to the users/groups added below. If you select ‘Disable’, recently deleted accounts will be hidden from the users/groups added below. Click on the Save button to save the changes.
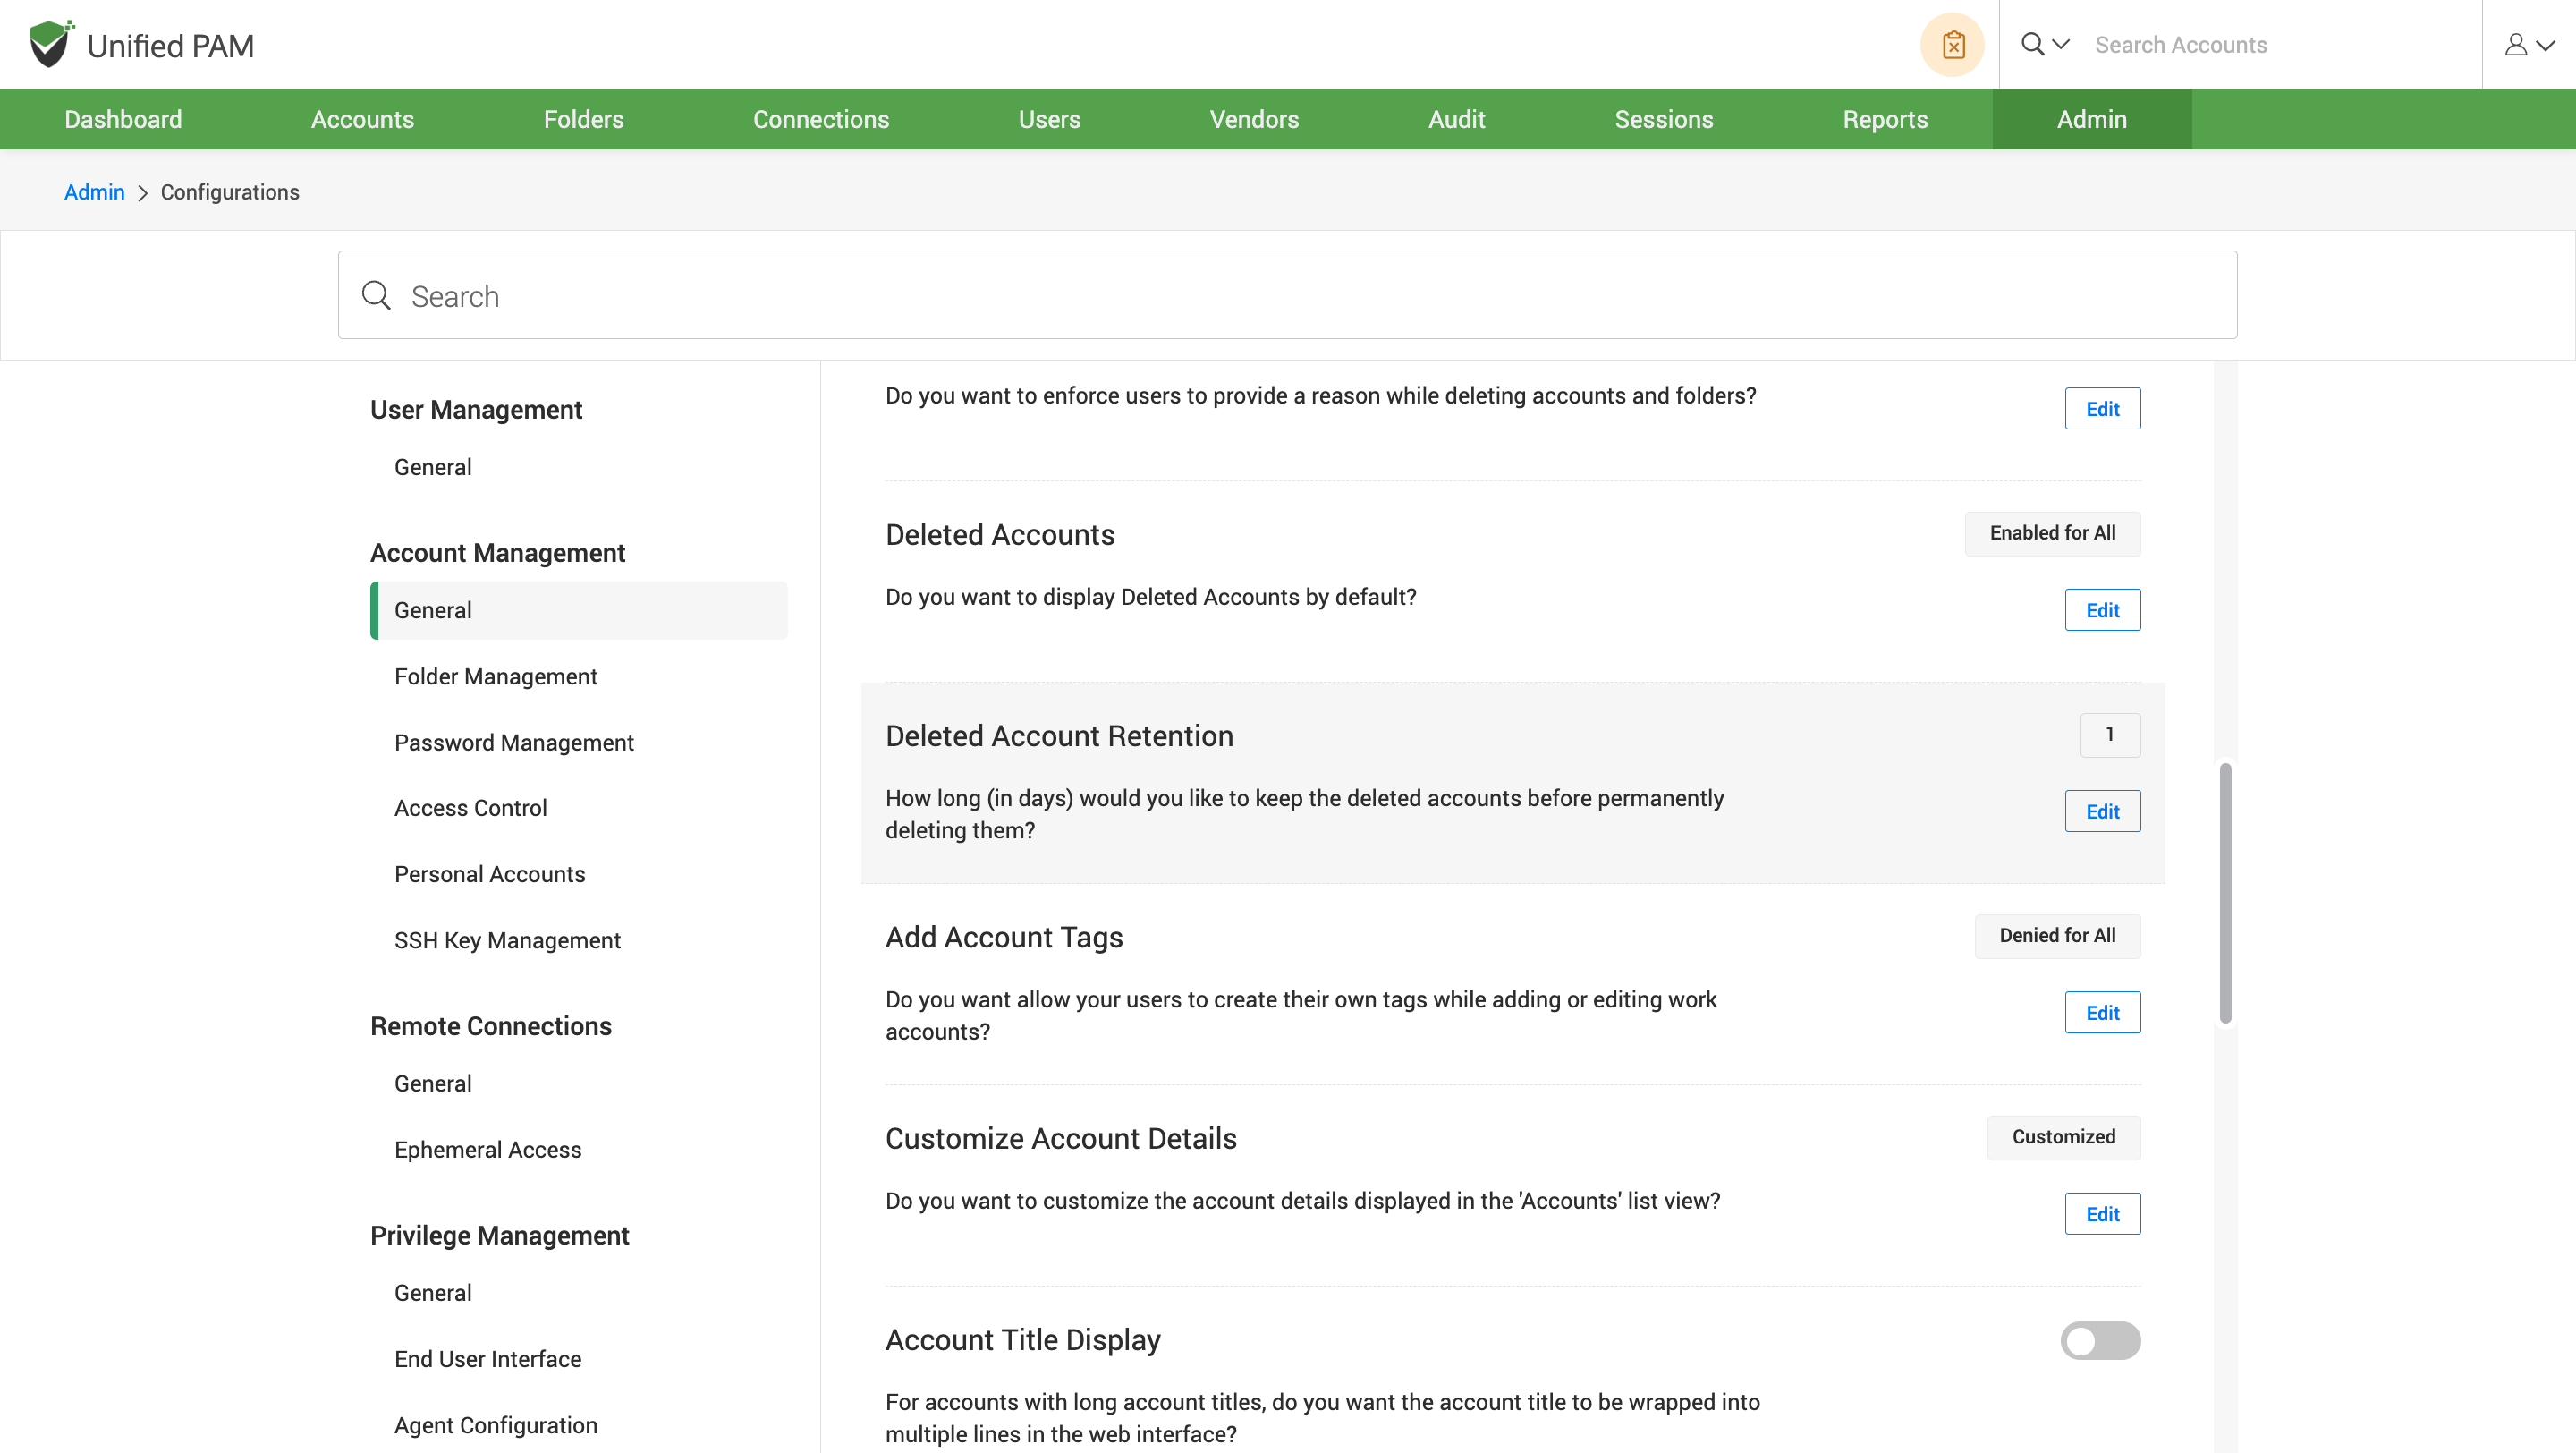
How to set the time for the recently deleted accounts to be retained for recovery before permanent deletion?
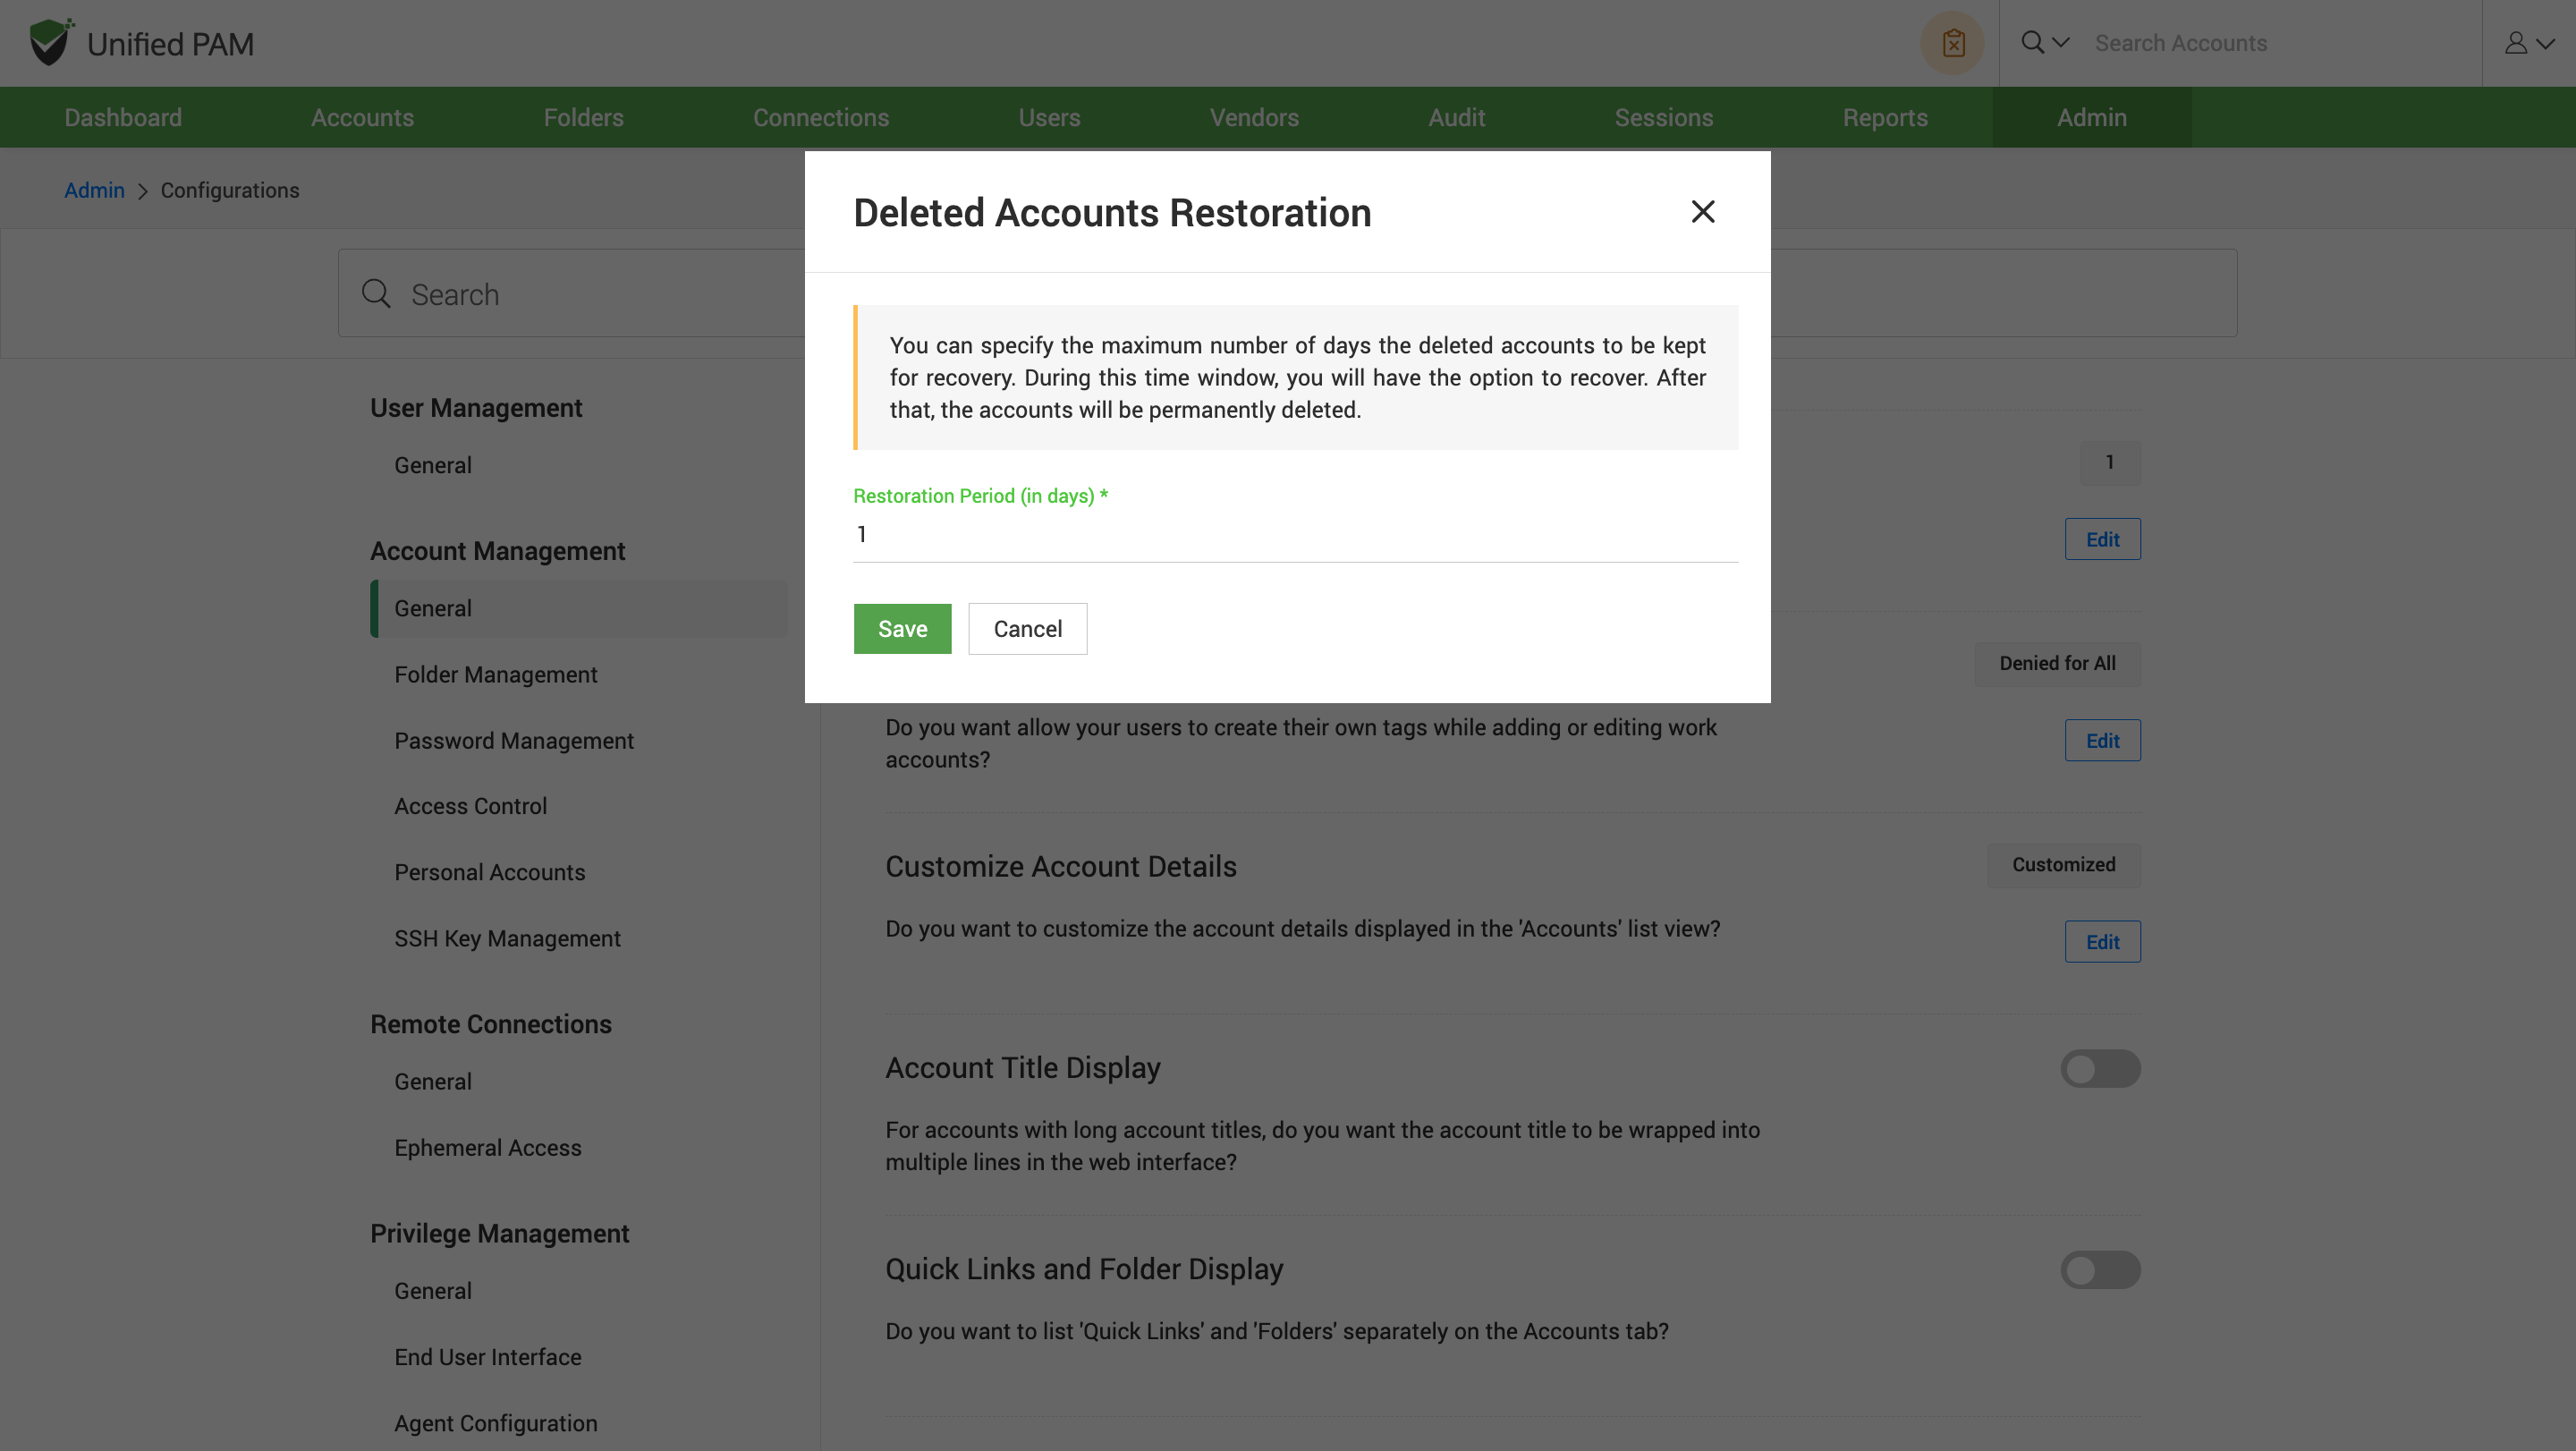
You can choose the maximum number of days for recently deleted accounts to be retained for recovery. During this time window, you will have the option to recover. After that, the accounts will be permanently deleted.
To set the duration, navigate to Admin >> Customization >> Configuration >> Account Management >> General, and find the Deleted Account Retention configuration.
Click on the Edit button and a popup appears. Enter the retention period (in number) you chose to set for the recovery and click on the Save button to save the changes.
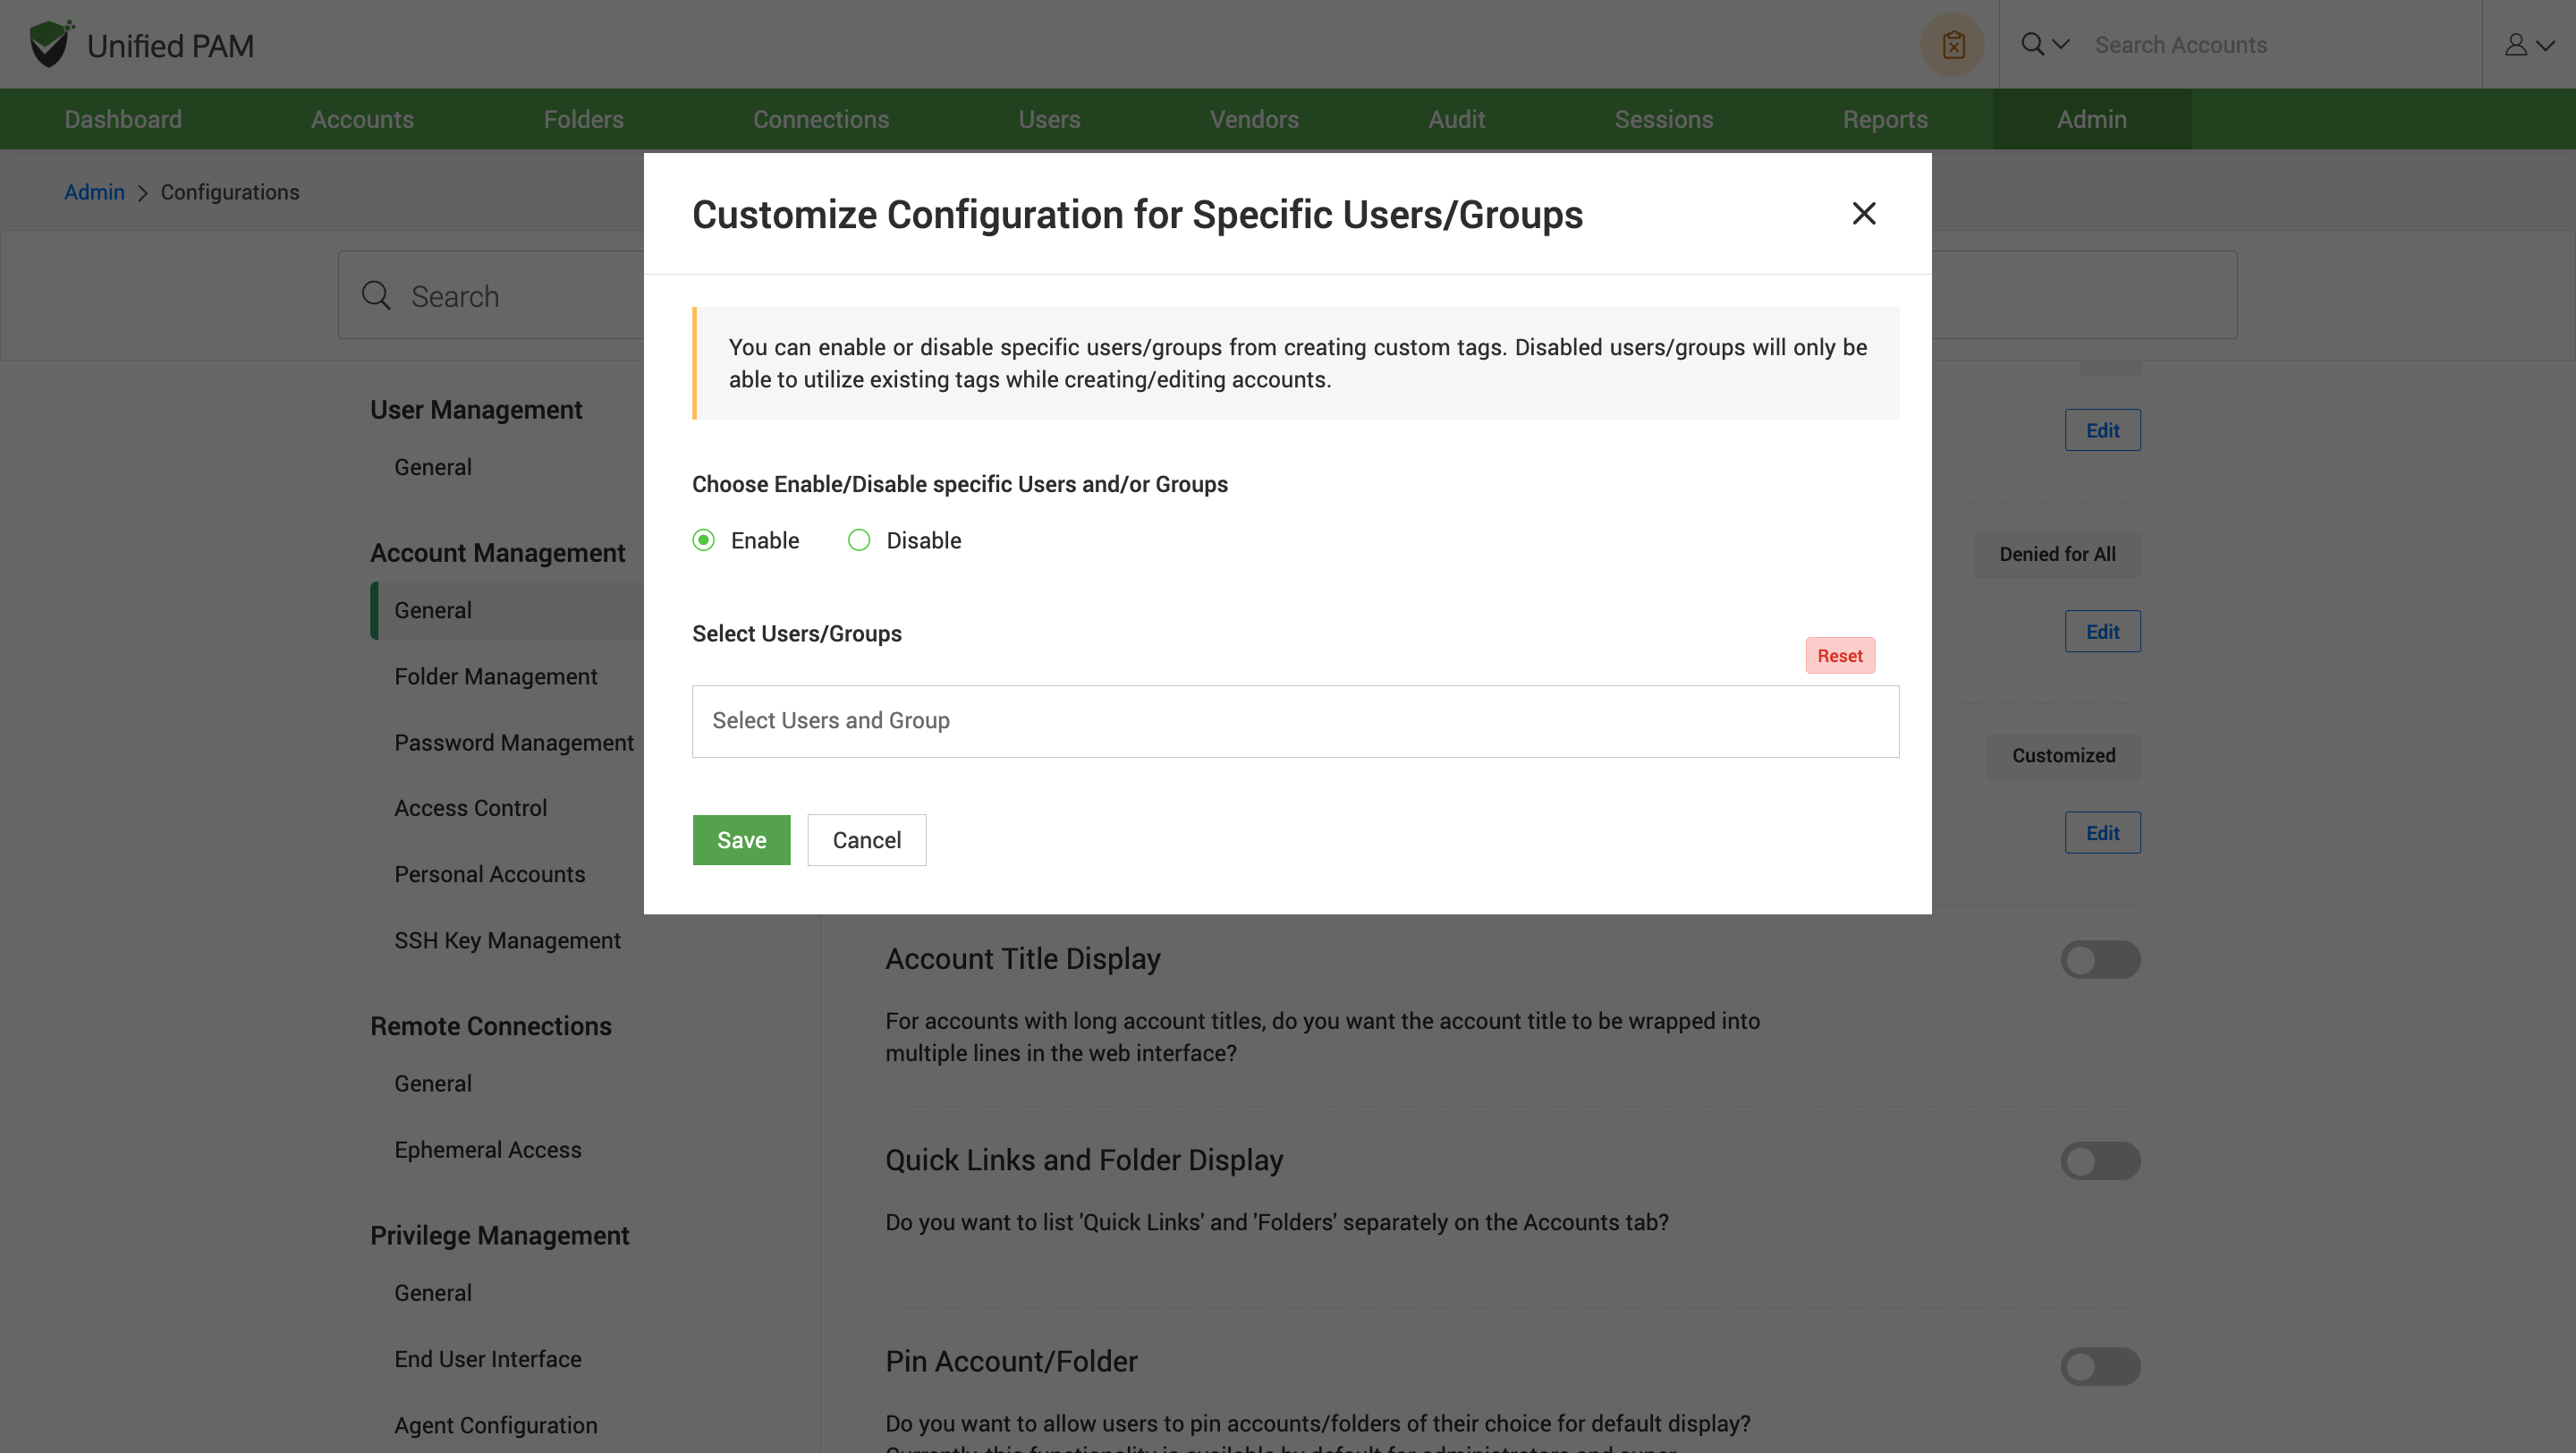
How to allow users to create their own tags while editing work accounts?
You can configure the users to create their own tags for their respective work accounts while adding or editing work accounts.
To enable this, navigate to Admin >> Customization >> Configuration >> Account Management >> General, and find the Add Account Tags configuration. Click on the Edit button.
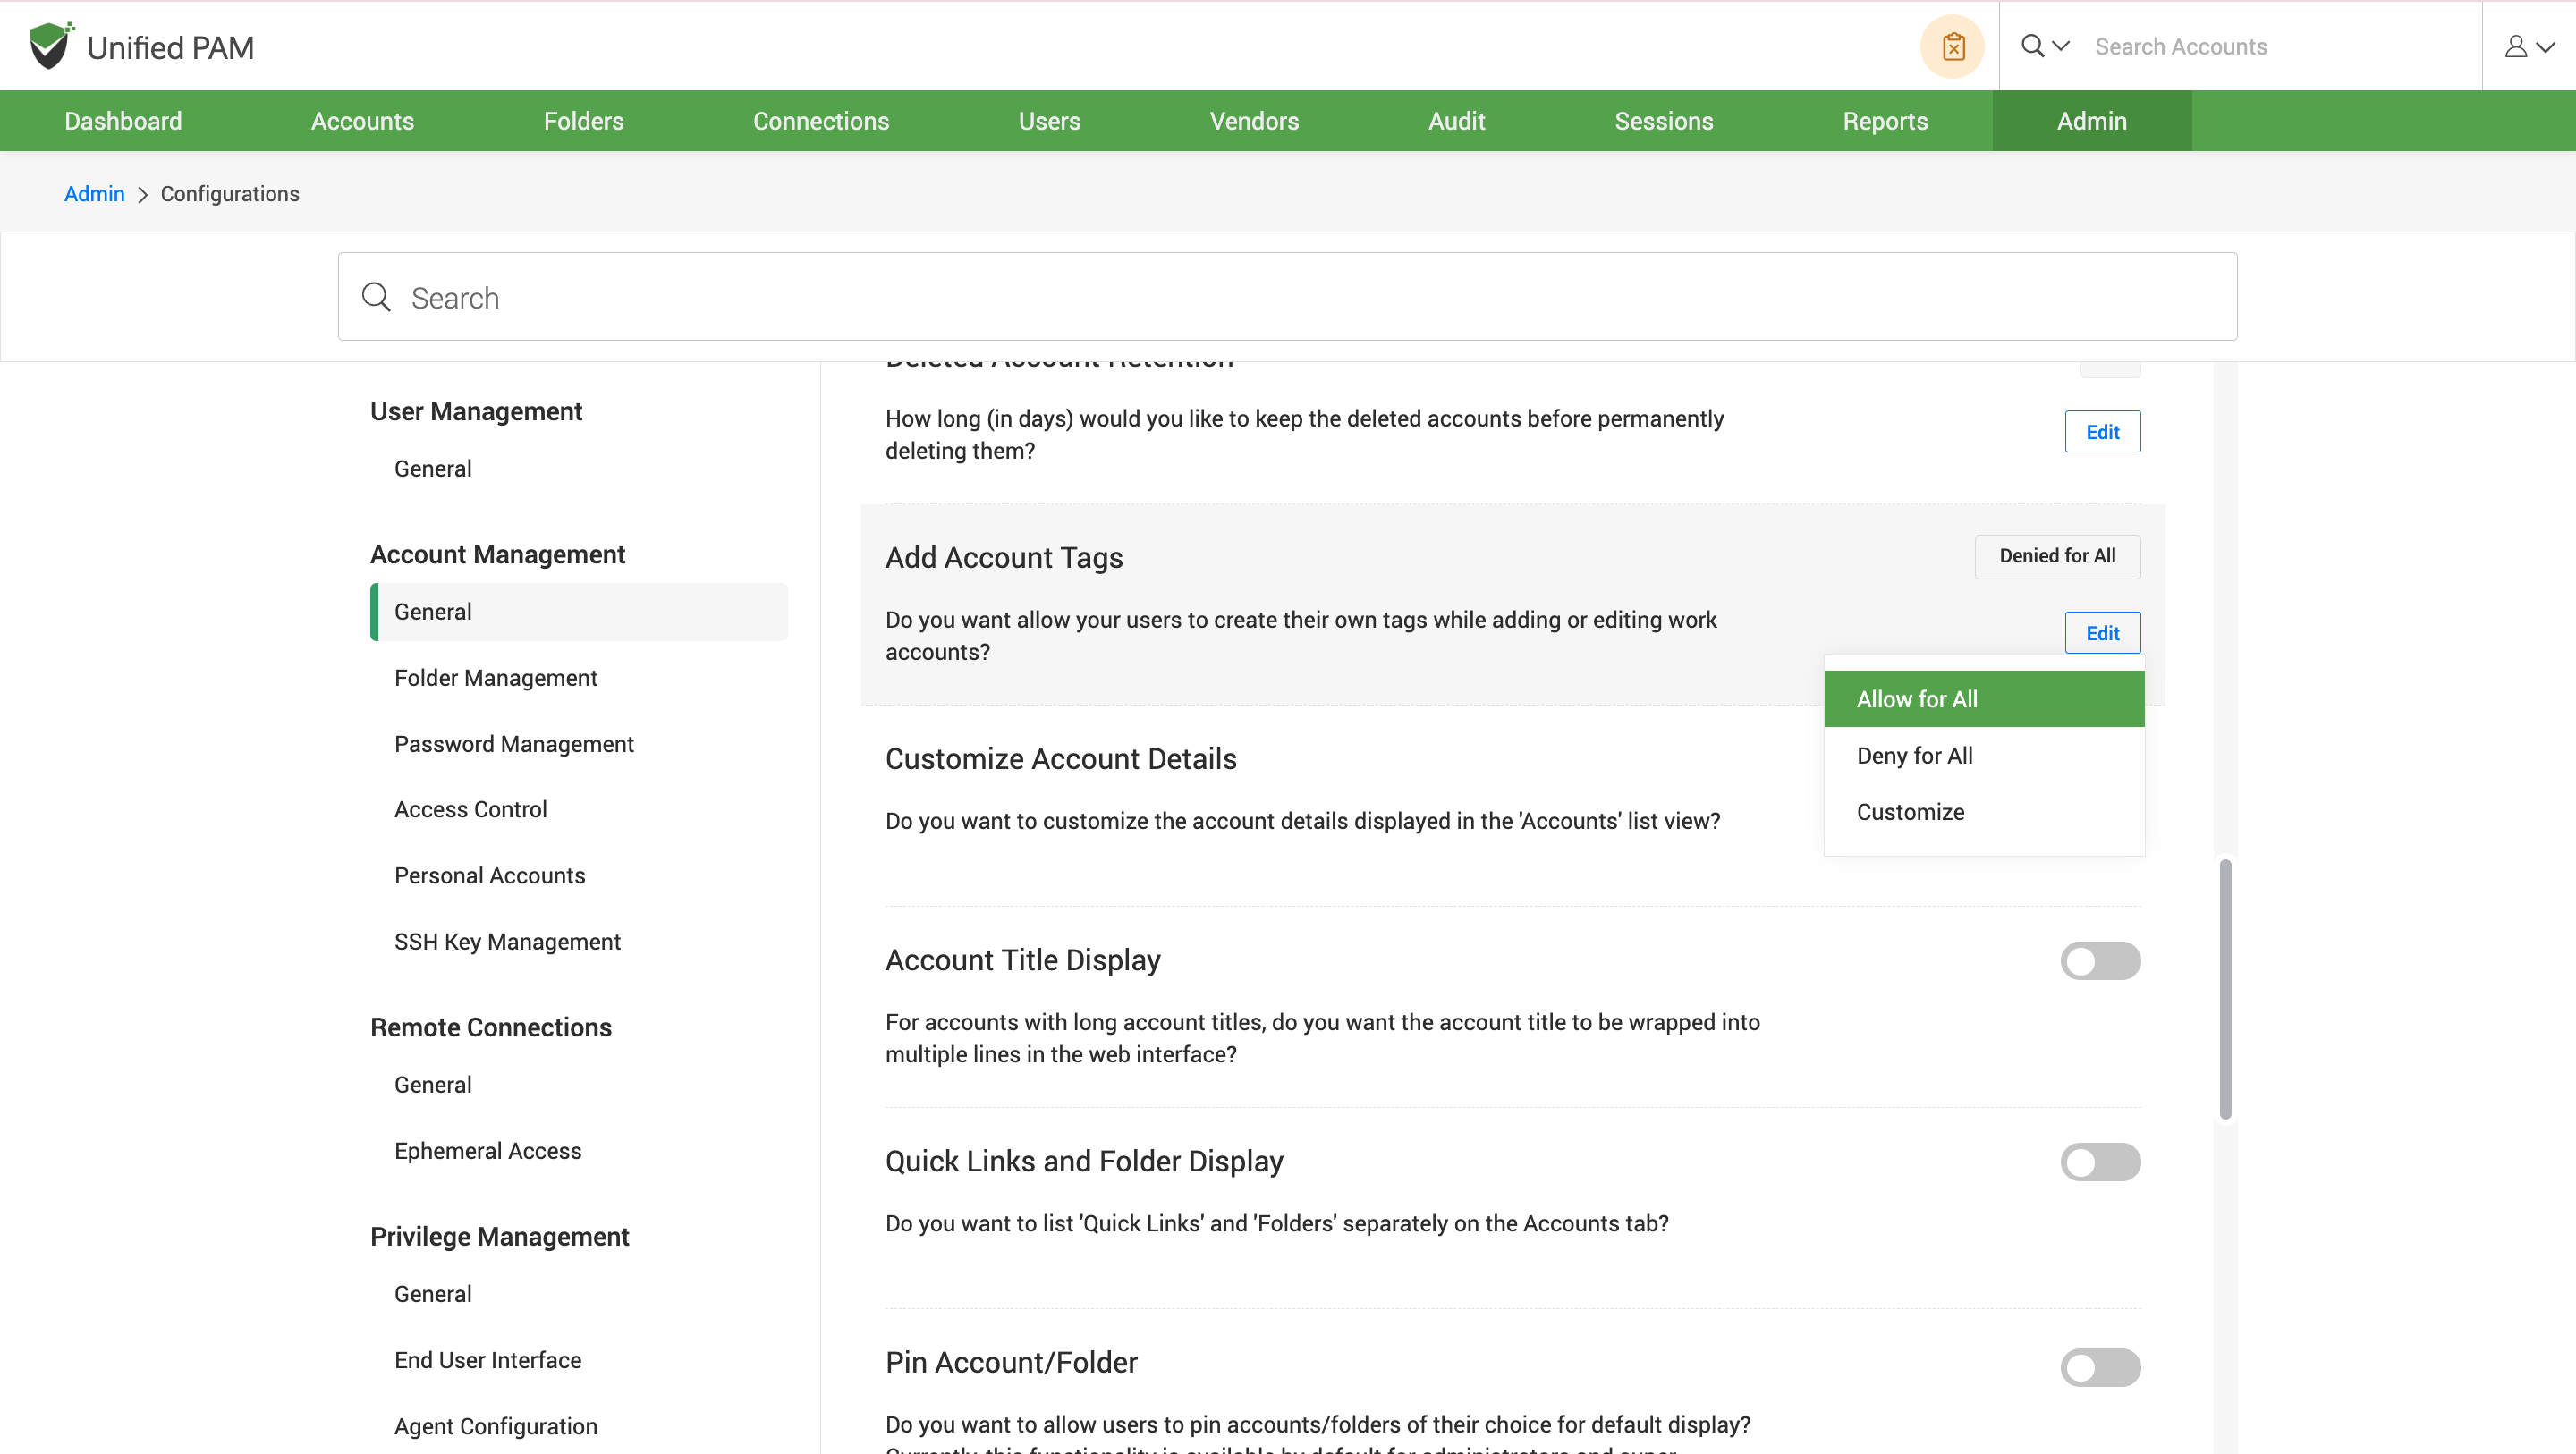
To enable the usage of tags for all users, choose Allow for All and Deny for All to deny the creation of tags for the accounts. Select the ‘Customize’ option to enable or disable specific users/groups from creating custom tags. Click on the Save button to save the changes.
Note
Disabled users/groups will only be able to utilize existing tags while creating or editing accounts as they are denied from creating their own tags.
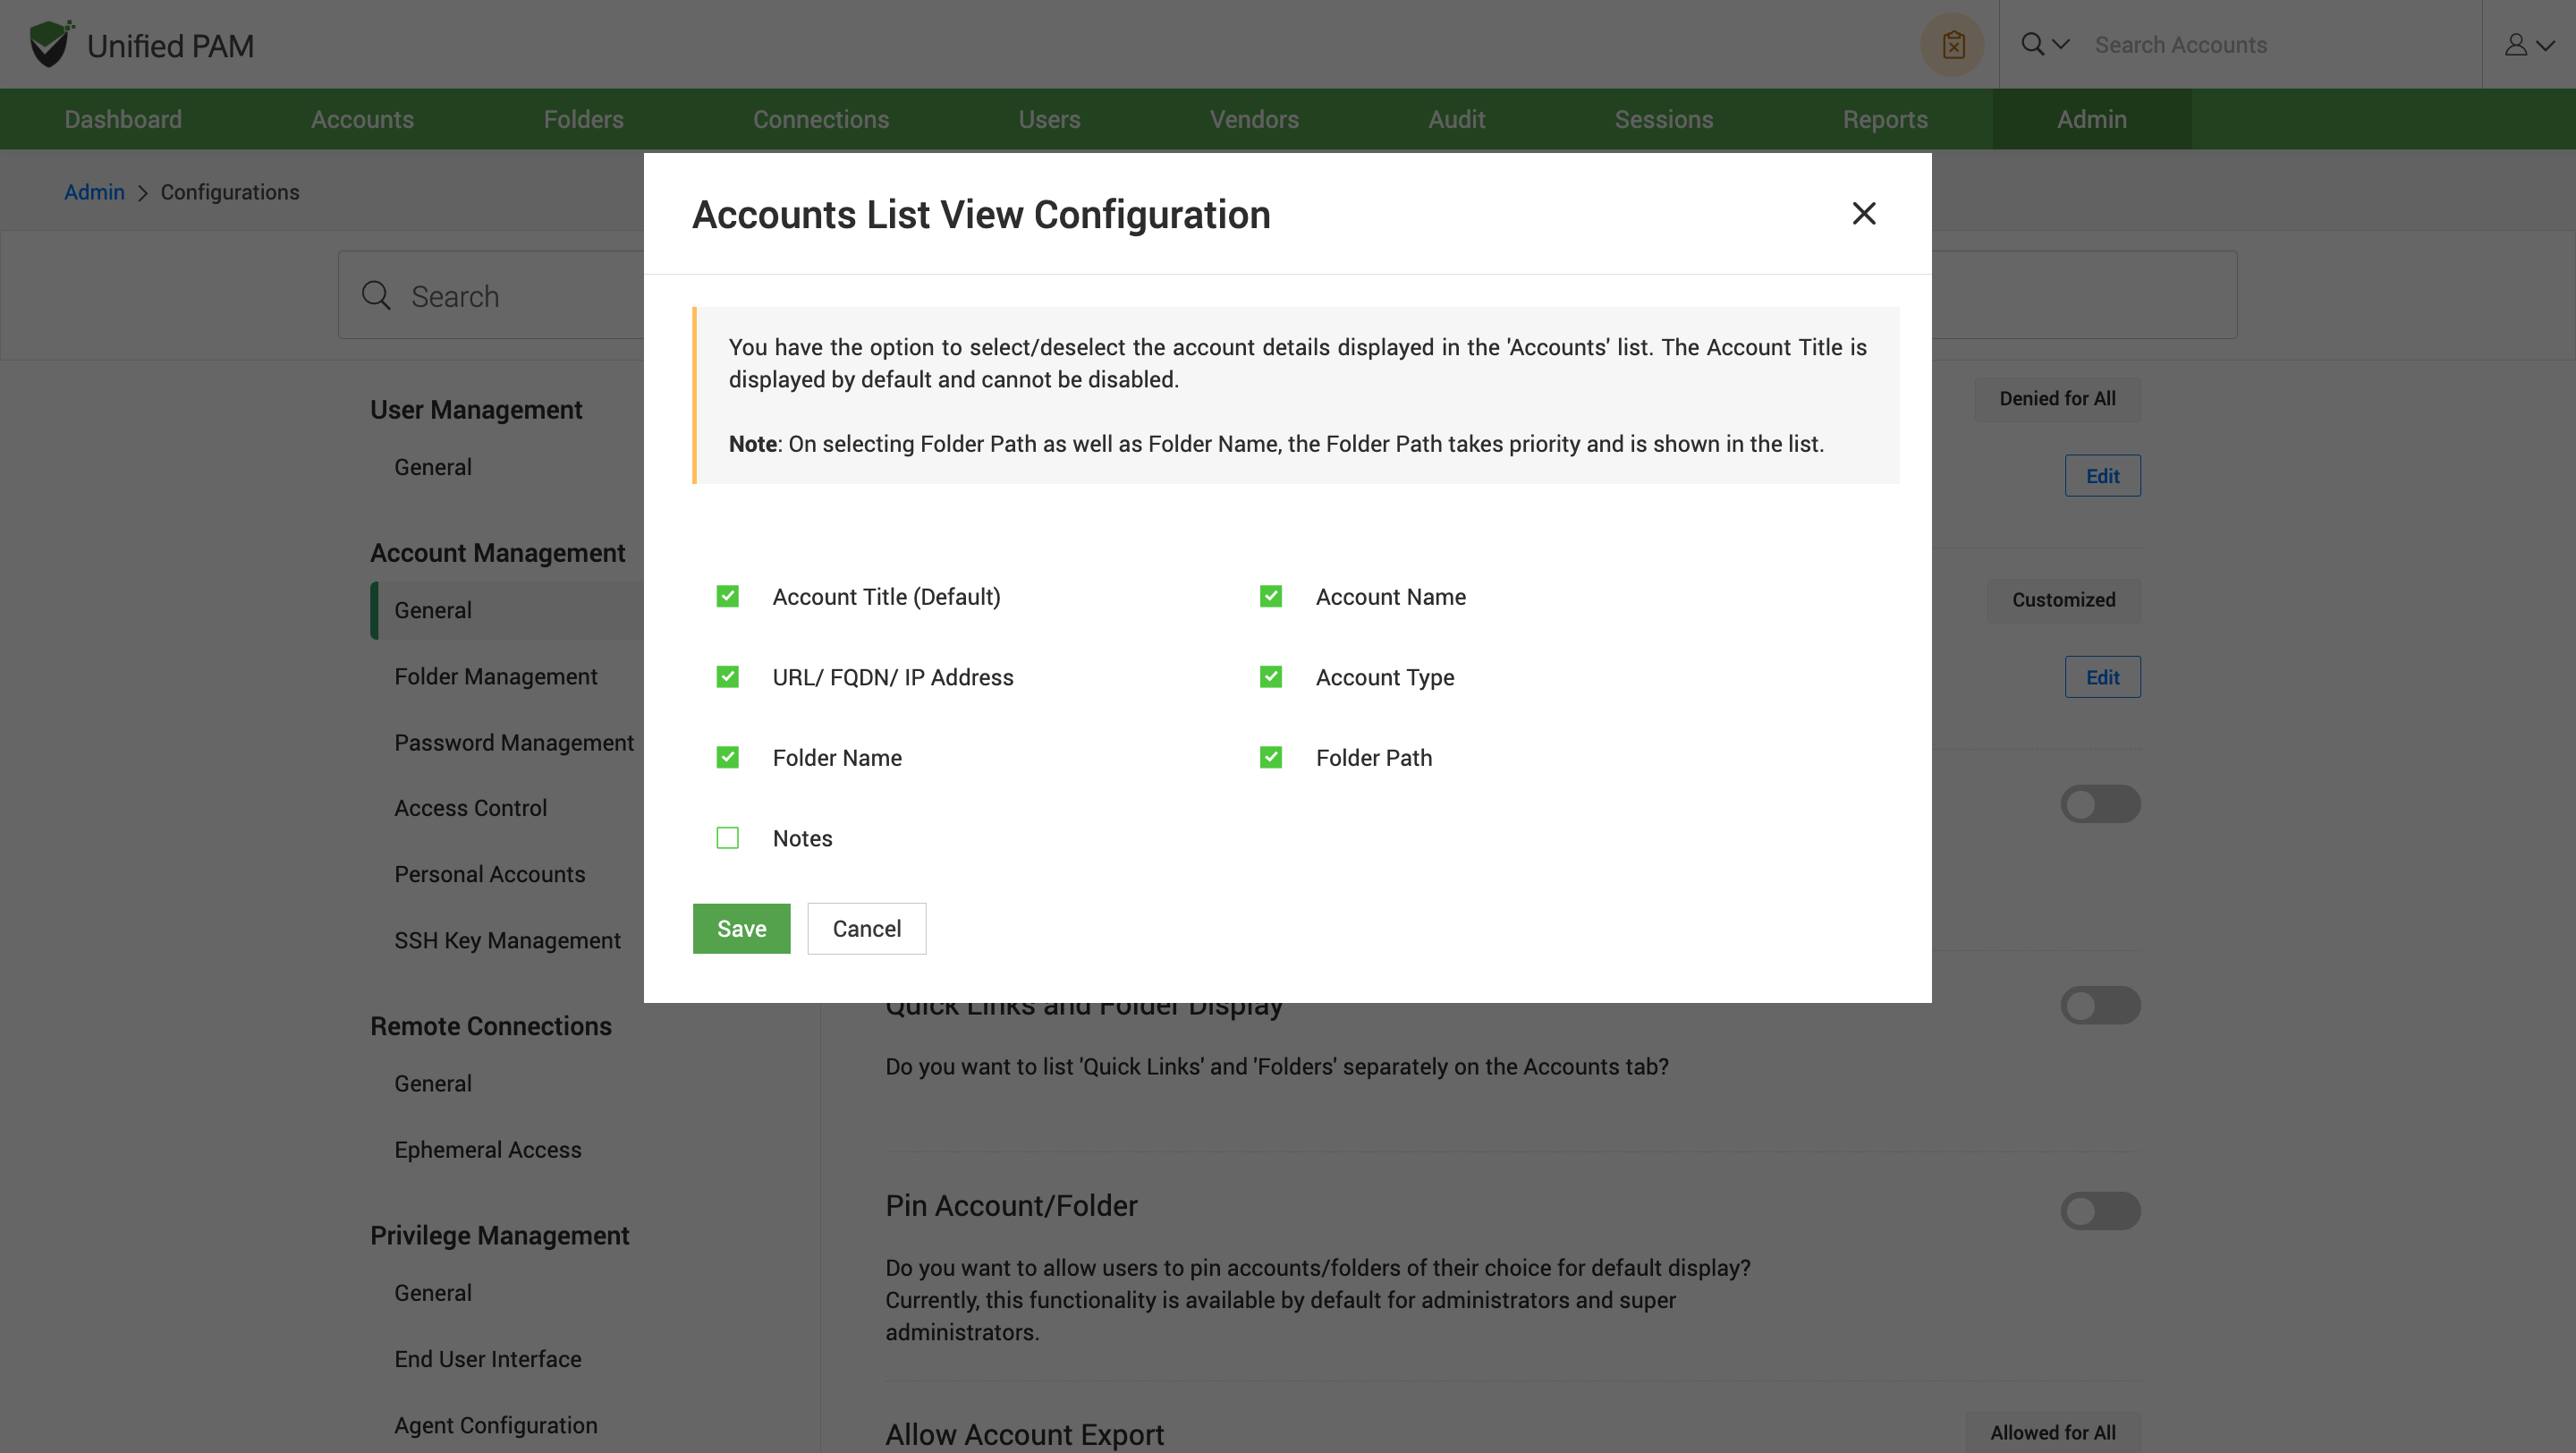
How to customize the account details in the list of accounts?
You can customize the account details displayed in the ‘Accounts’ list view.
To customize the details, navigate to Admin >> Customization >> Configuration >> Account Management >> General, and find the Customize Account Details configuration. Click on the Edit button.
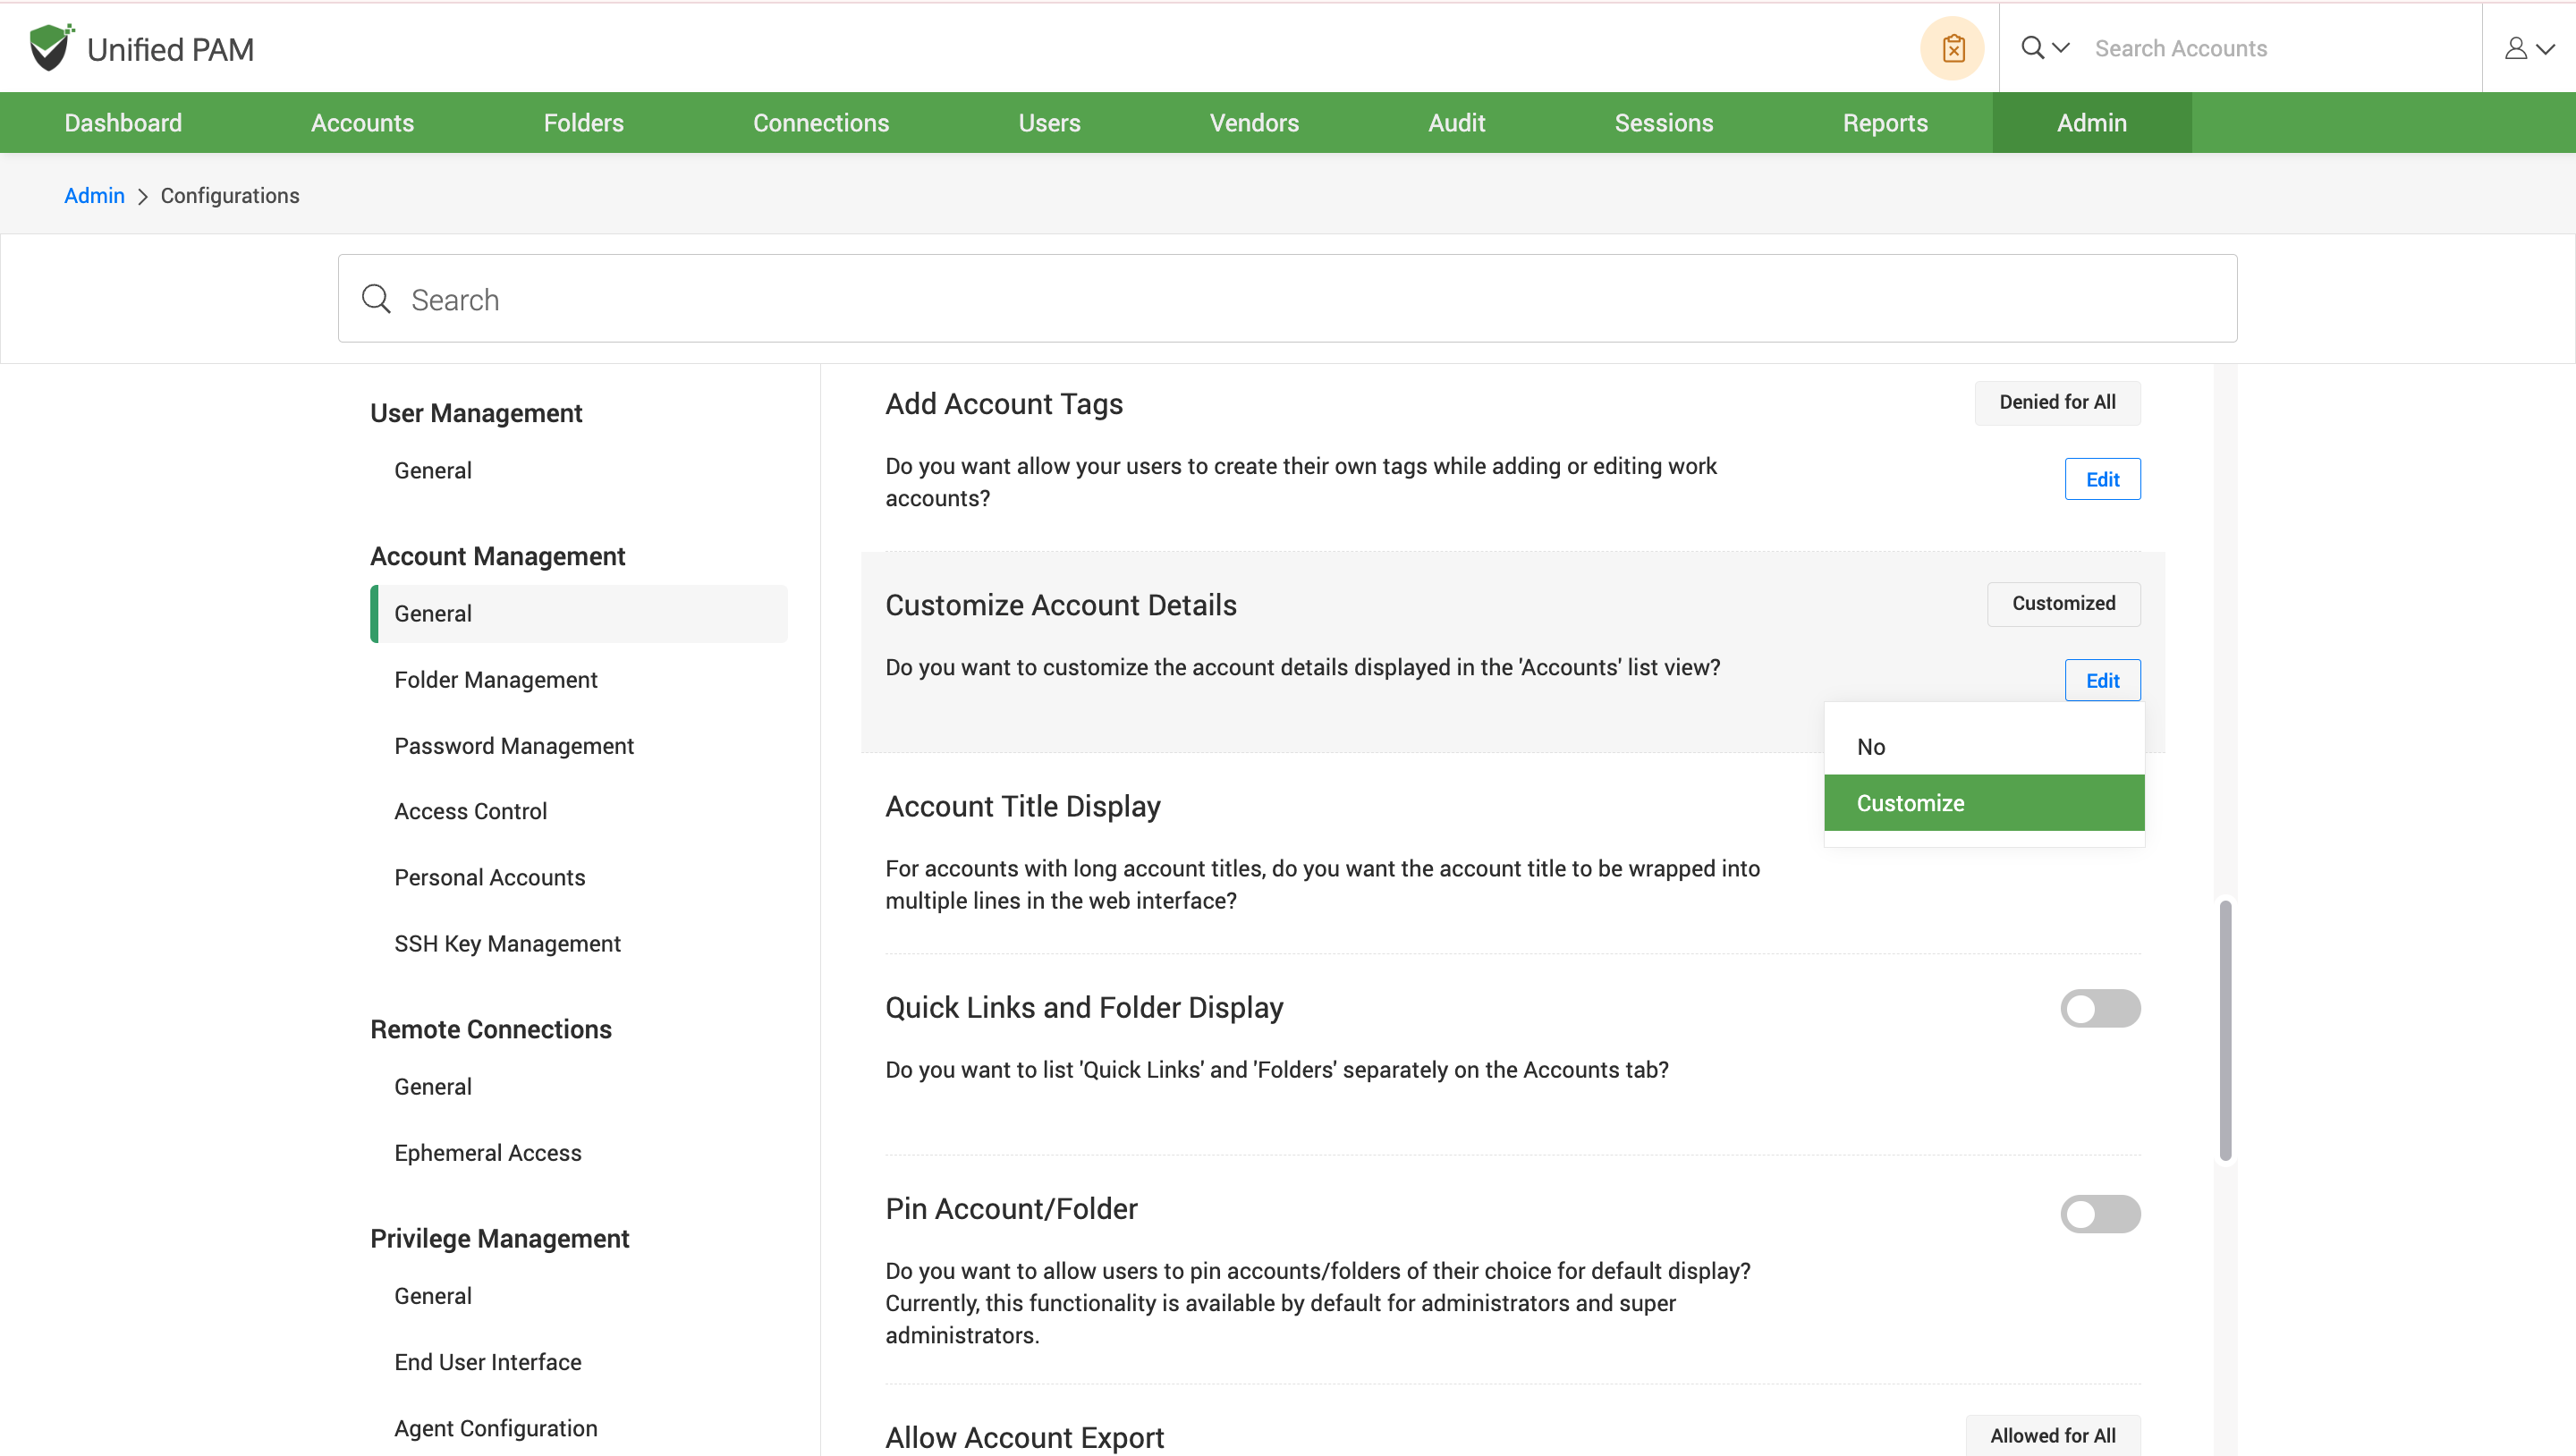
If you choose not to enable the customization of account details, select No. Select the Customize option to select/deselect the account details to be displayed in the 'Accounts' list in accordance with your requirements. Click on the Save button to save the changes.
Note
The Account Title is displayed by default and cannot be disabled. On selecting Folder Path as well as Folder Name, the Folder Path takes priority and is shown in the list.
How to handle long account titles to ensure the full name is visible?
You can display the complete account title by wrapping the title into multiple lines in the web interface.
To enable this, navigate to Admin >> Customization >> Configuration >> Account Management >> General, and find the Account Title Display configuration. Slide the toggle button to the right to configure the feature.
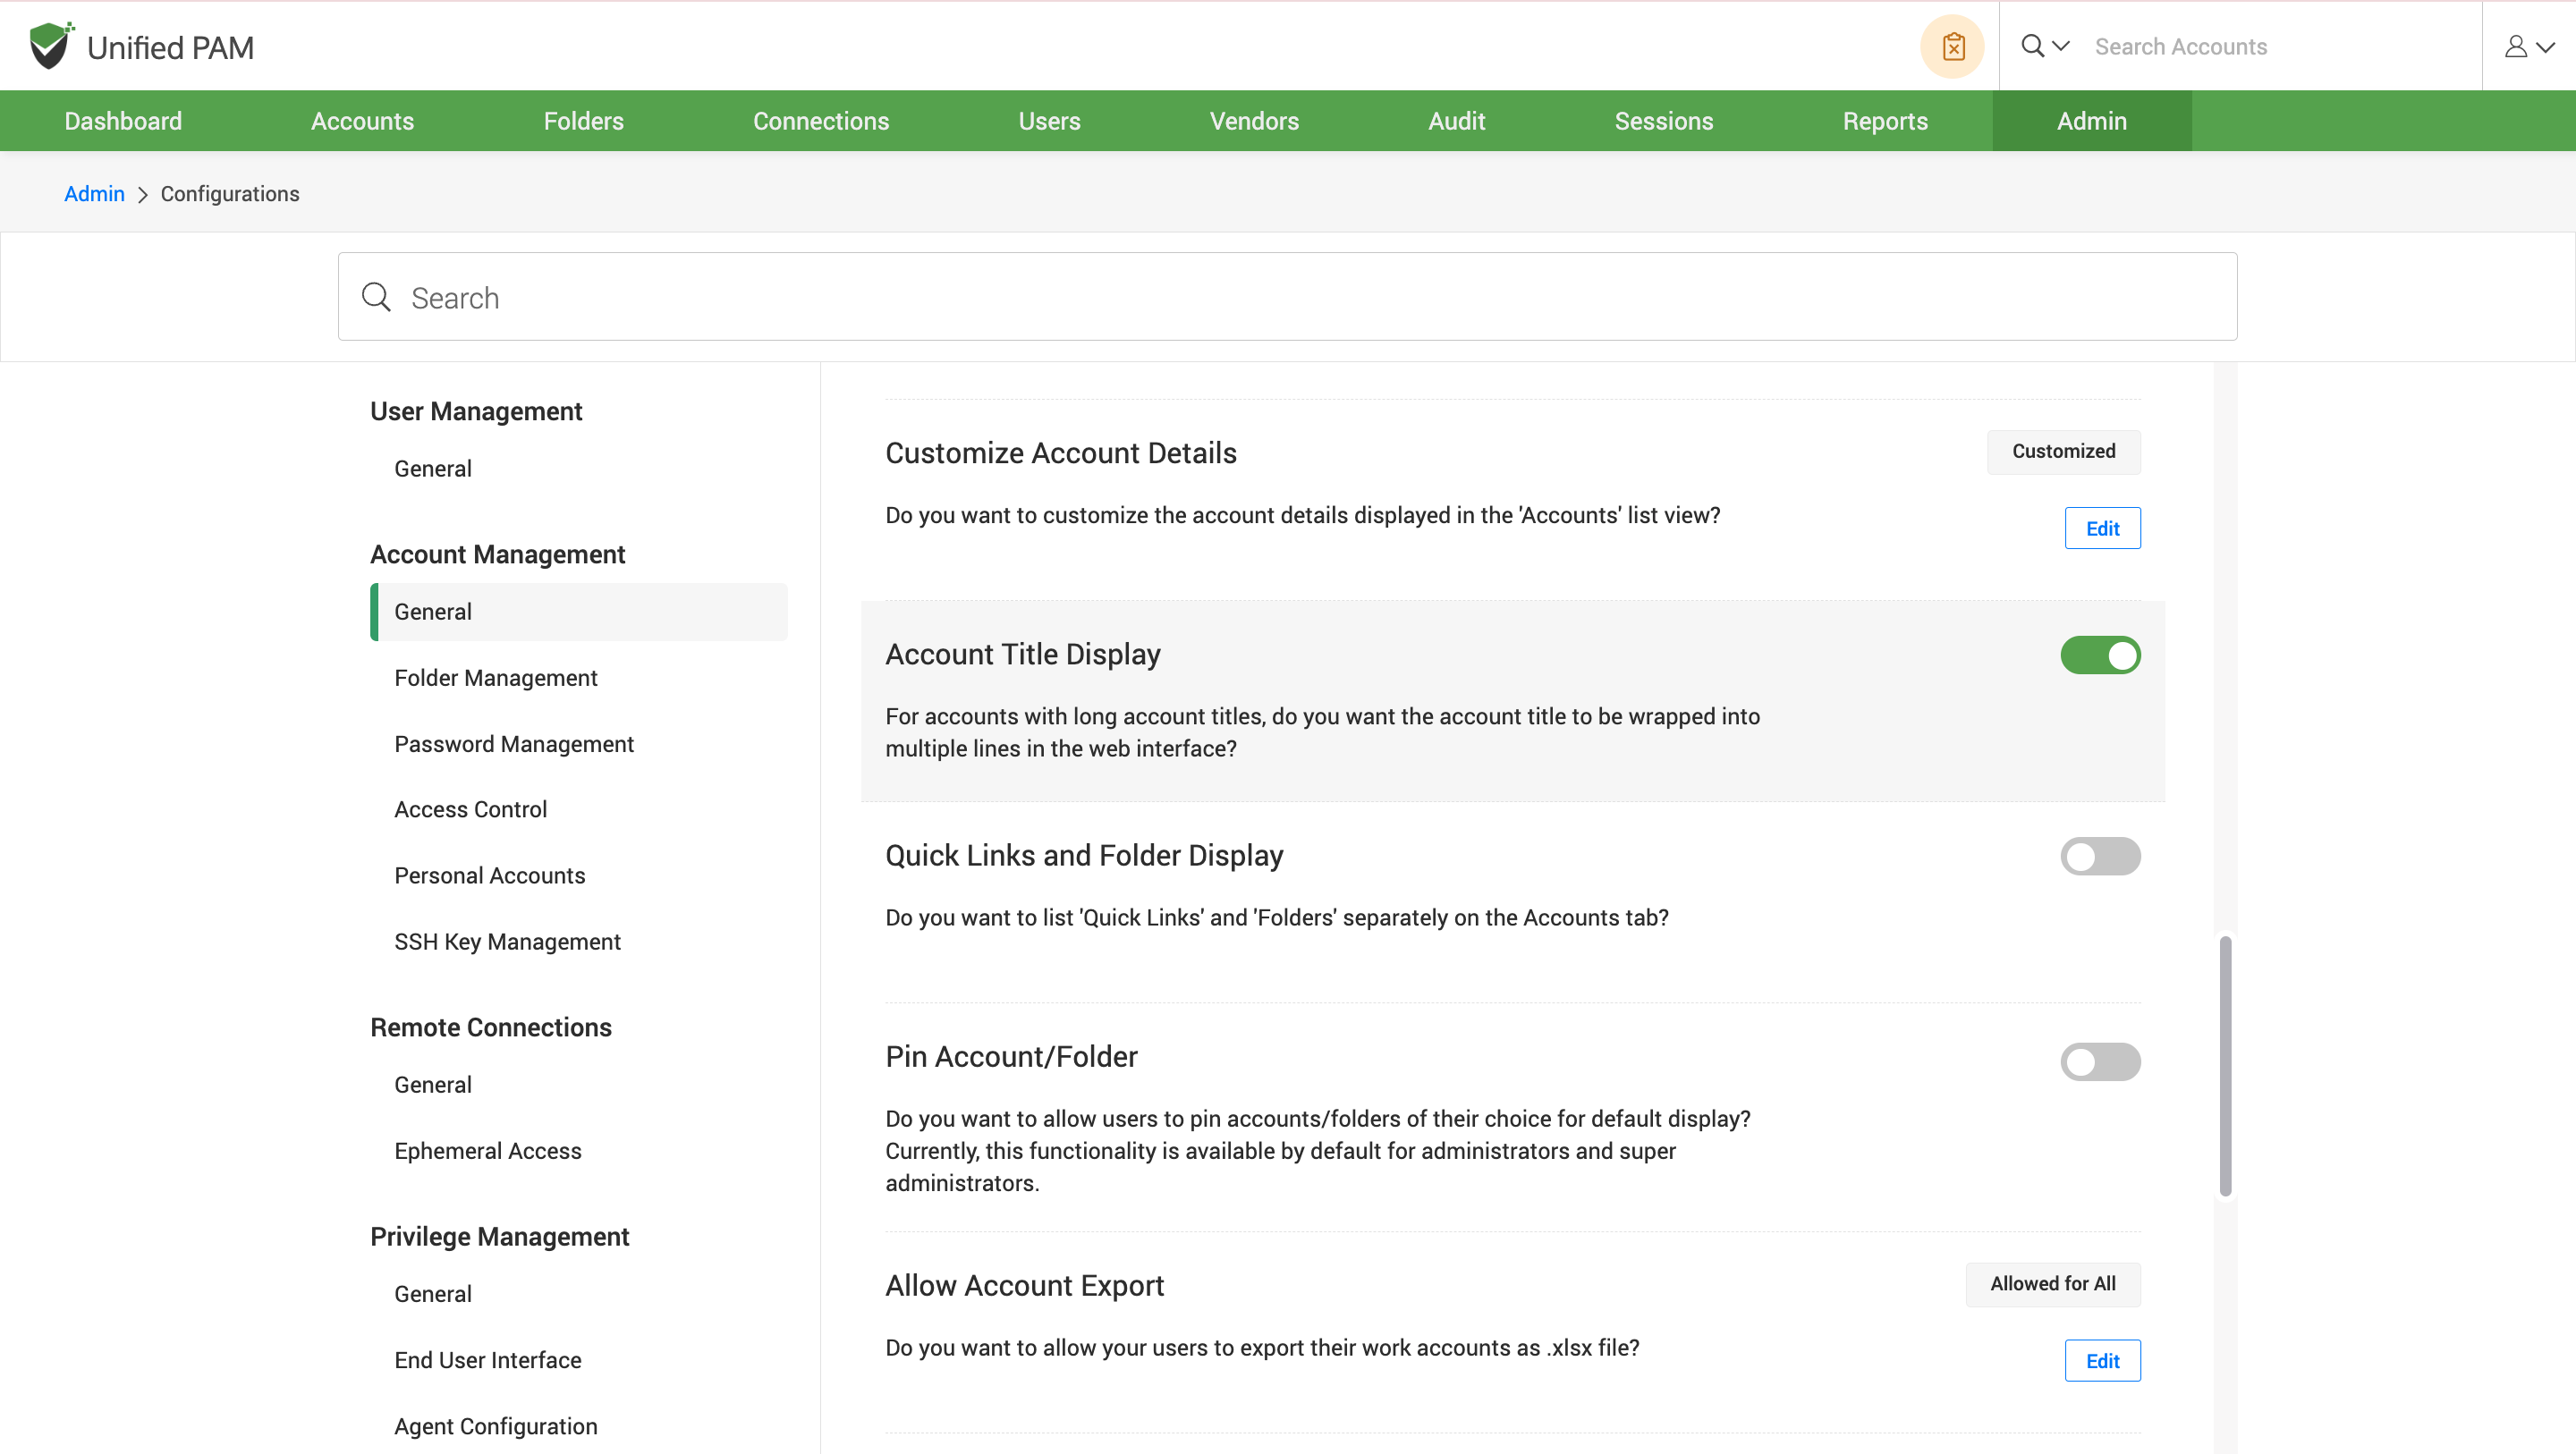
How to list ‘Quick Links’ and ‘Folders’ separately on the Accounts tab?
You can list the quick links and folders in separate sections in the ‘Accounts’ tab.
To enable this, navigate to Admin >> Customization >> Configuration >> Account Management >> General, and find the Quick Links and Folder Display configuration. Slide the toggle button to the right to configure the feature.
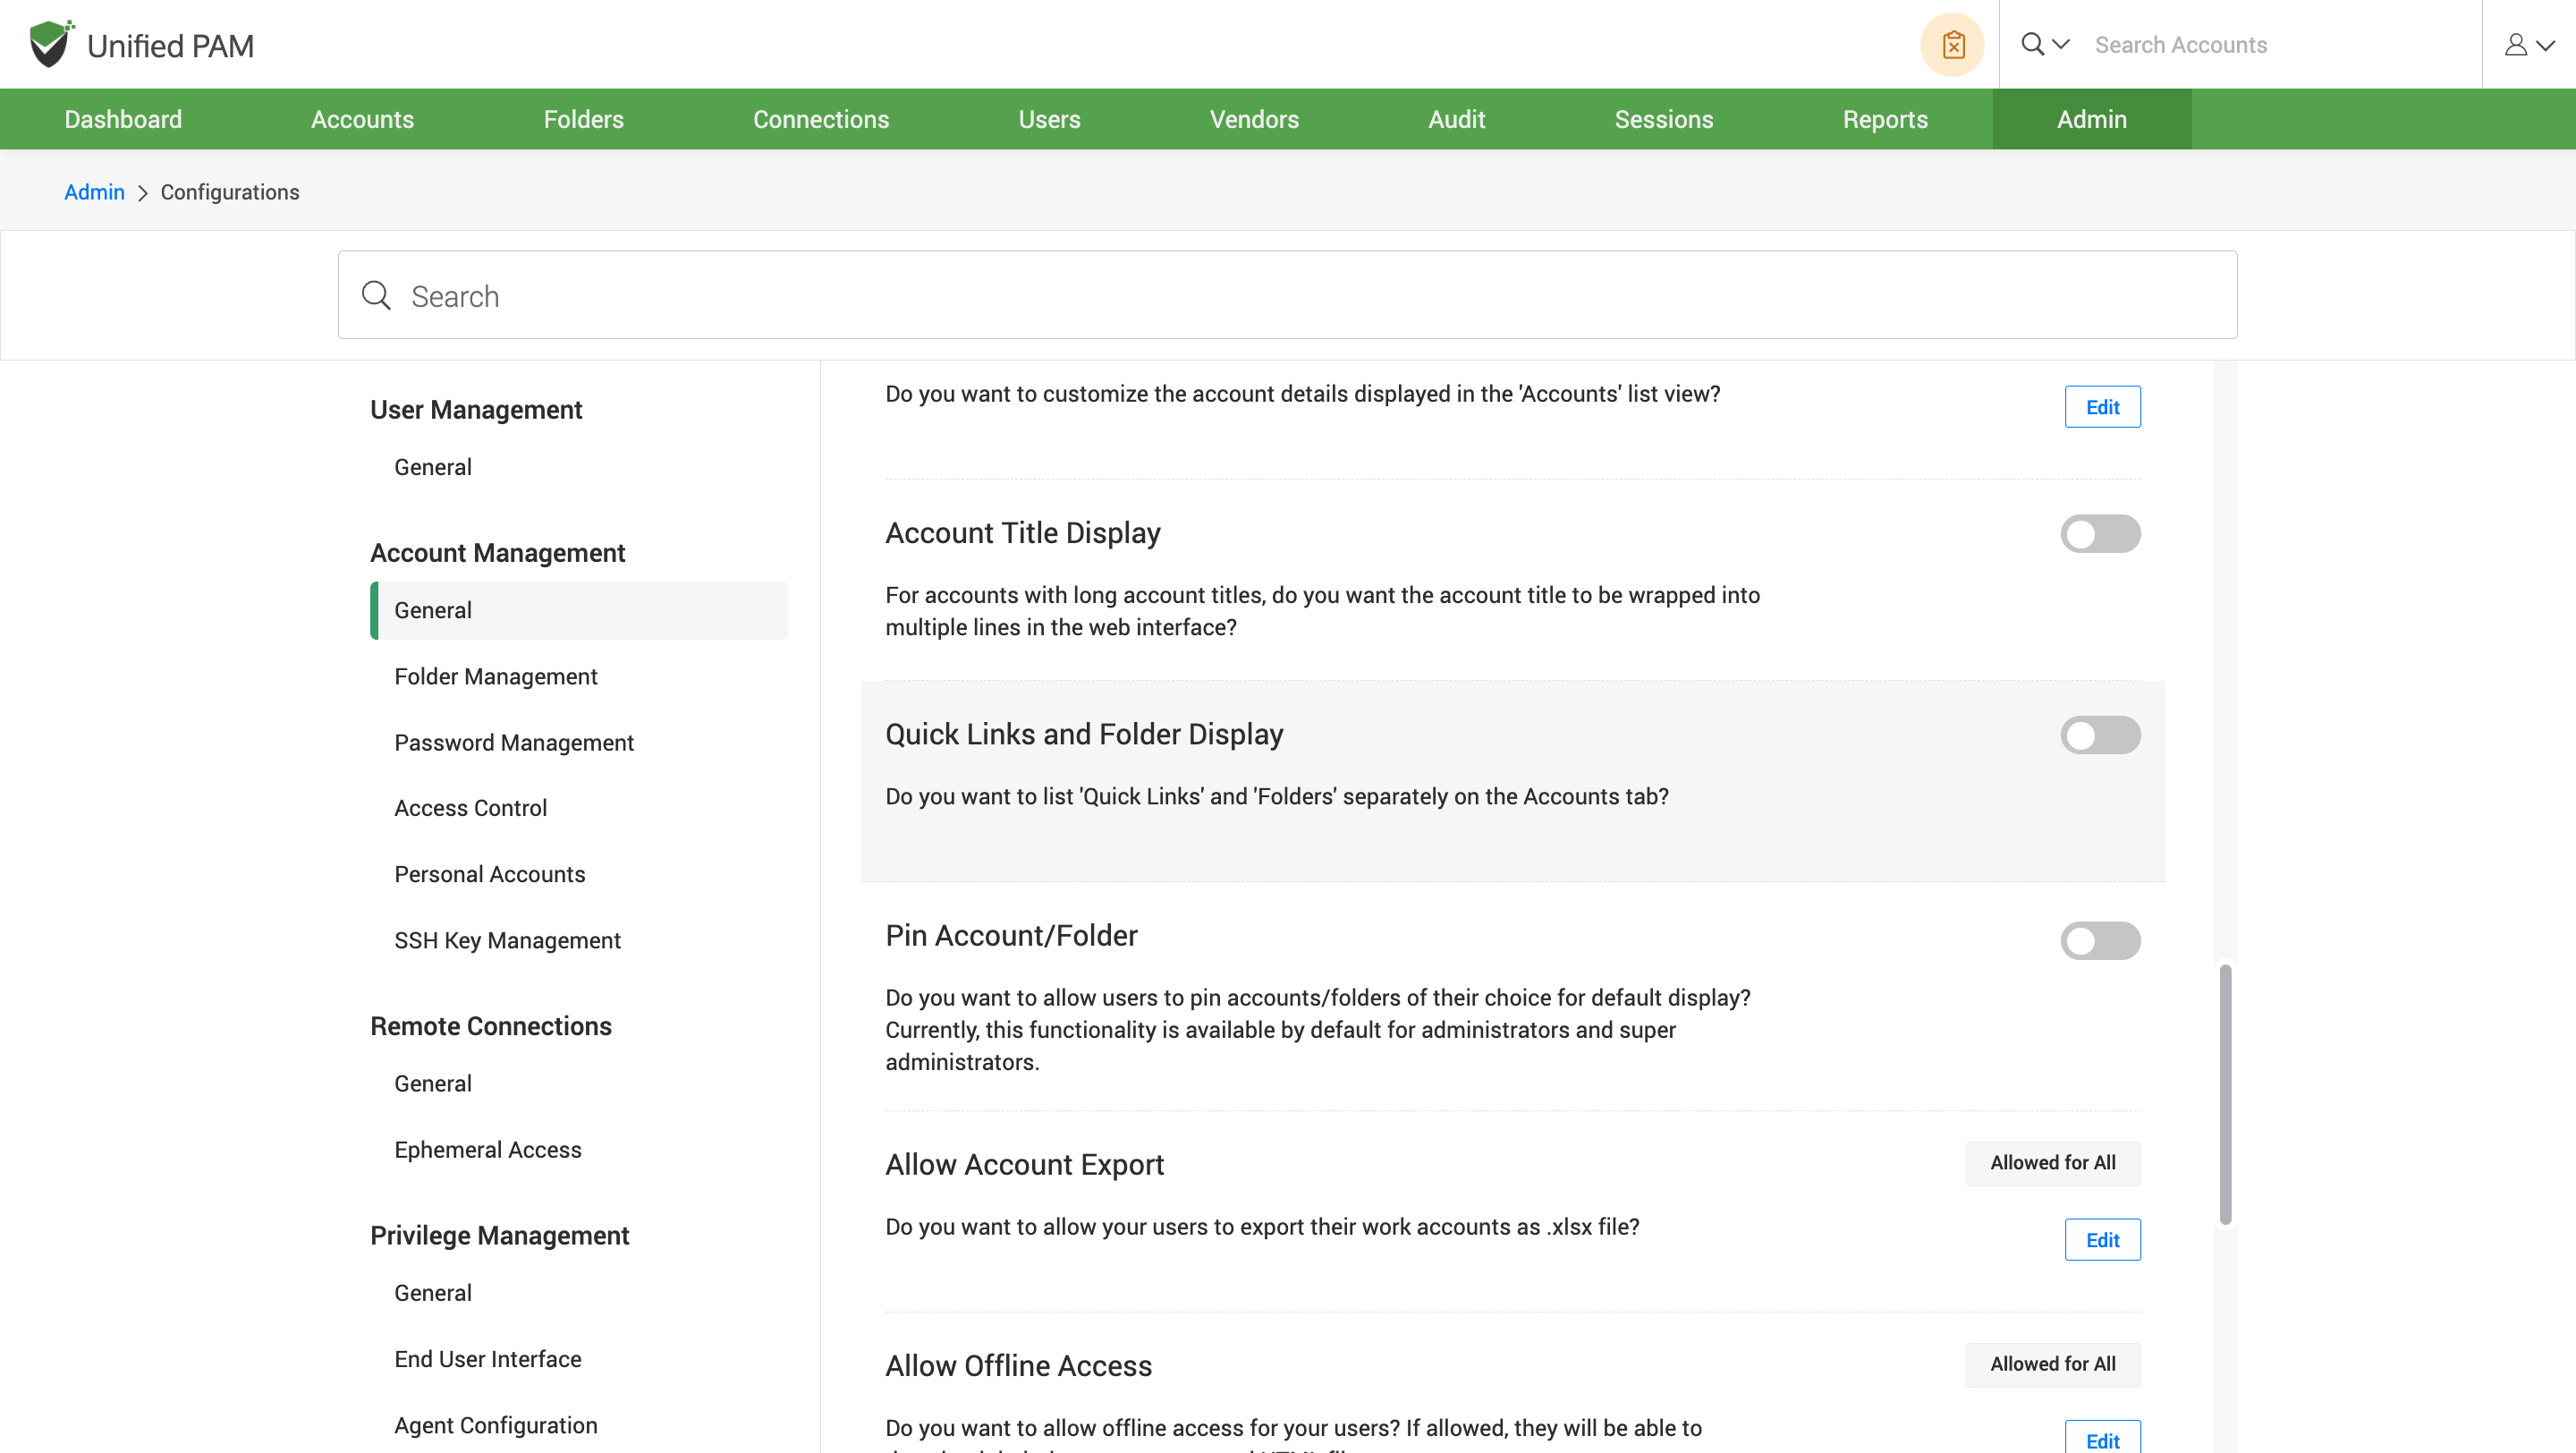
How to Configure Which Users Can Pin Accounts?
By default, only administrator and super administrator roles can pin the accounts to display in the 'Accounts' section.
To modify this configuration, navigate to Admin >> Customization >> Configurations>> Account Management >> General and find the Pin Accounts configuration.
If you want to allow the users to pin the accounts of their choice, slide the toggle button to enable the feature as shown below.
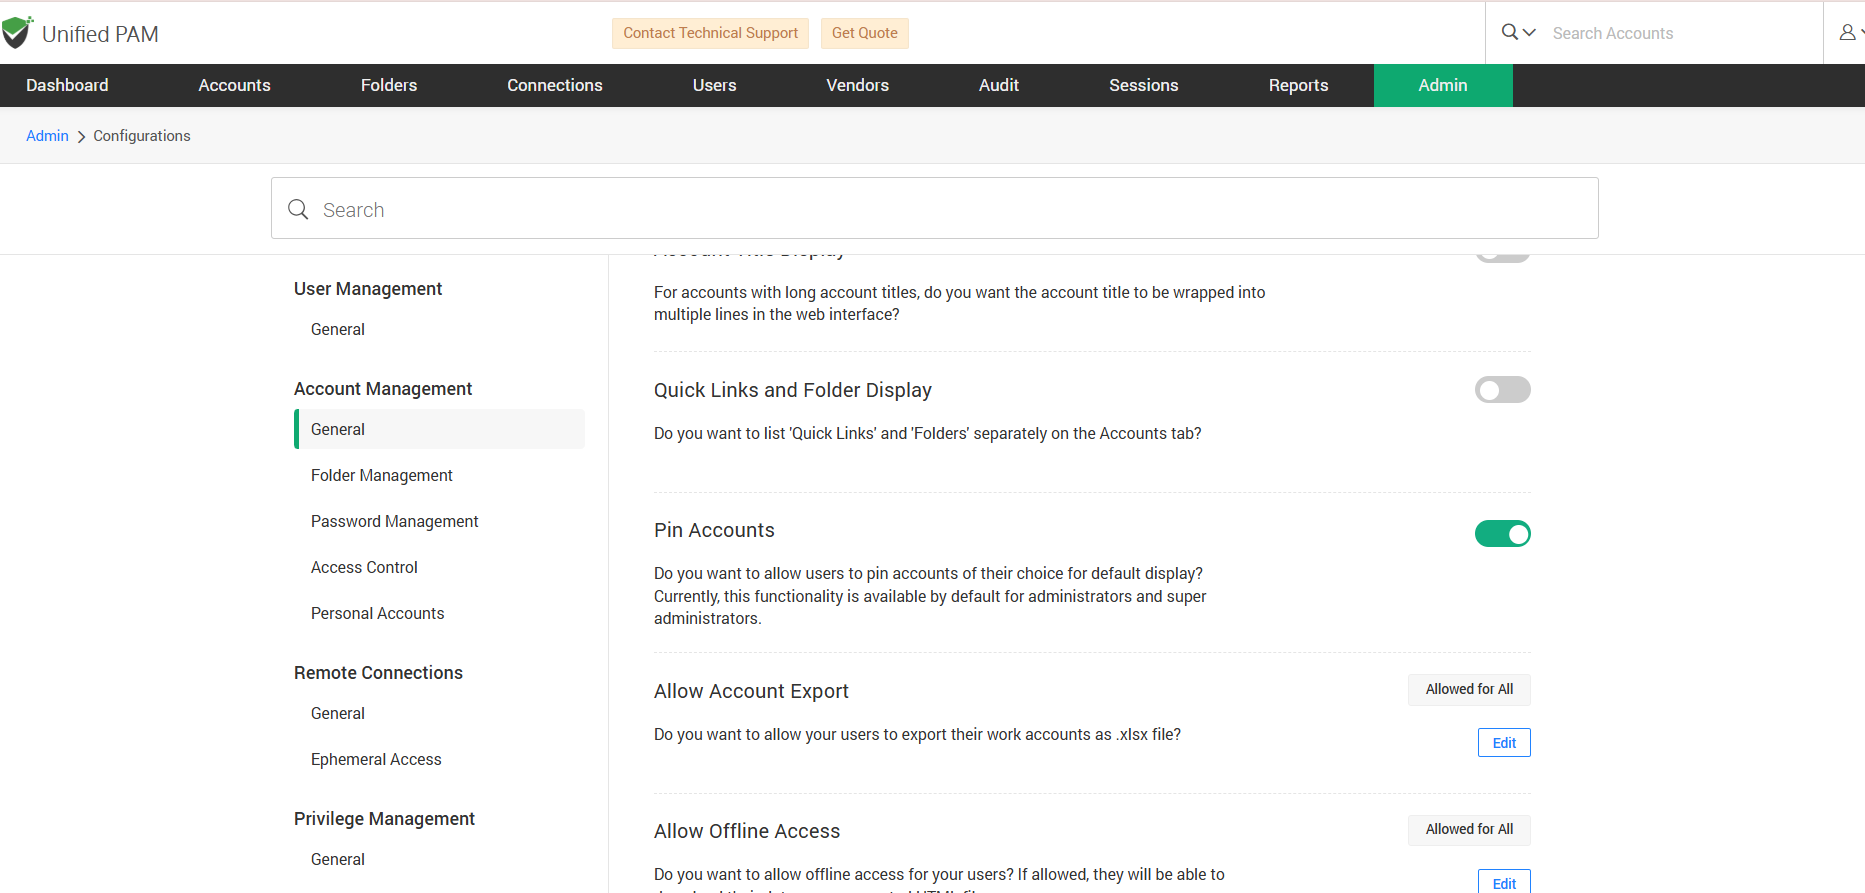
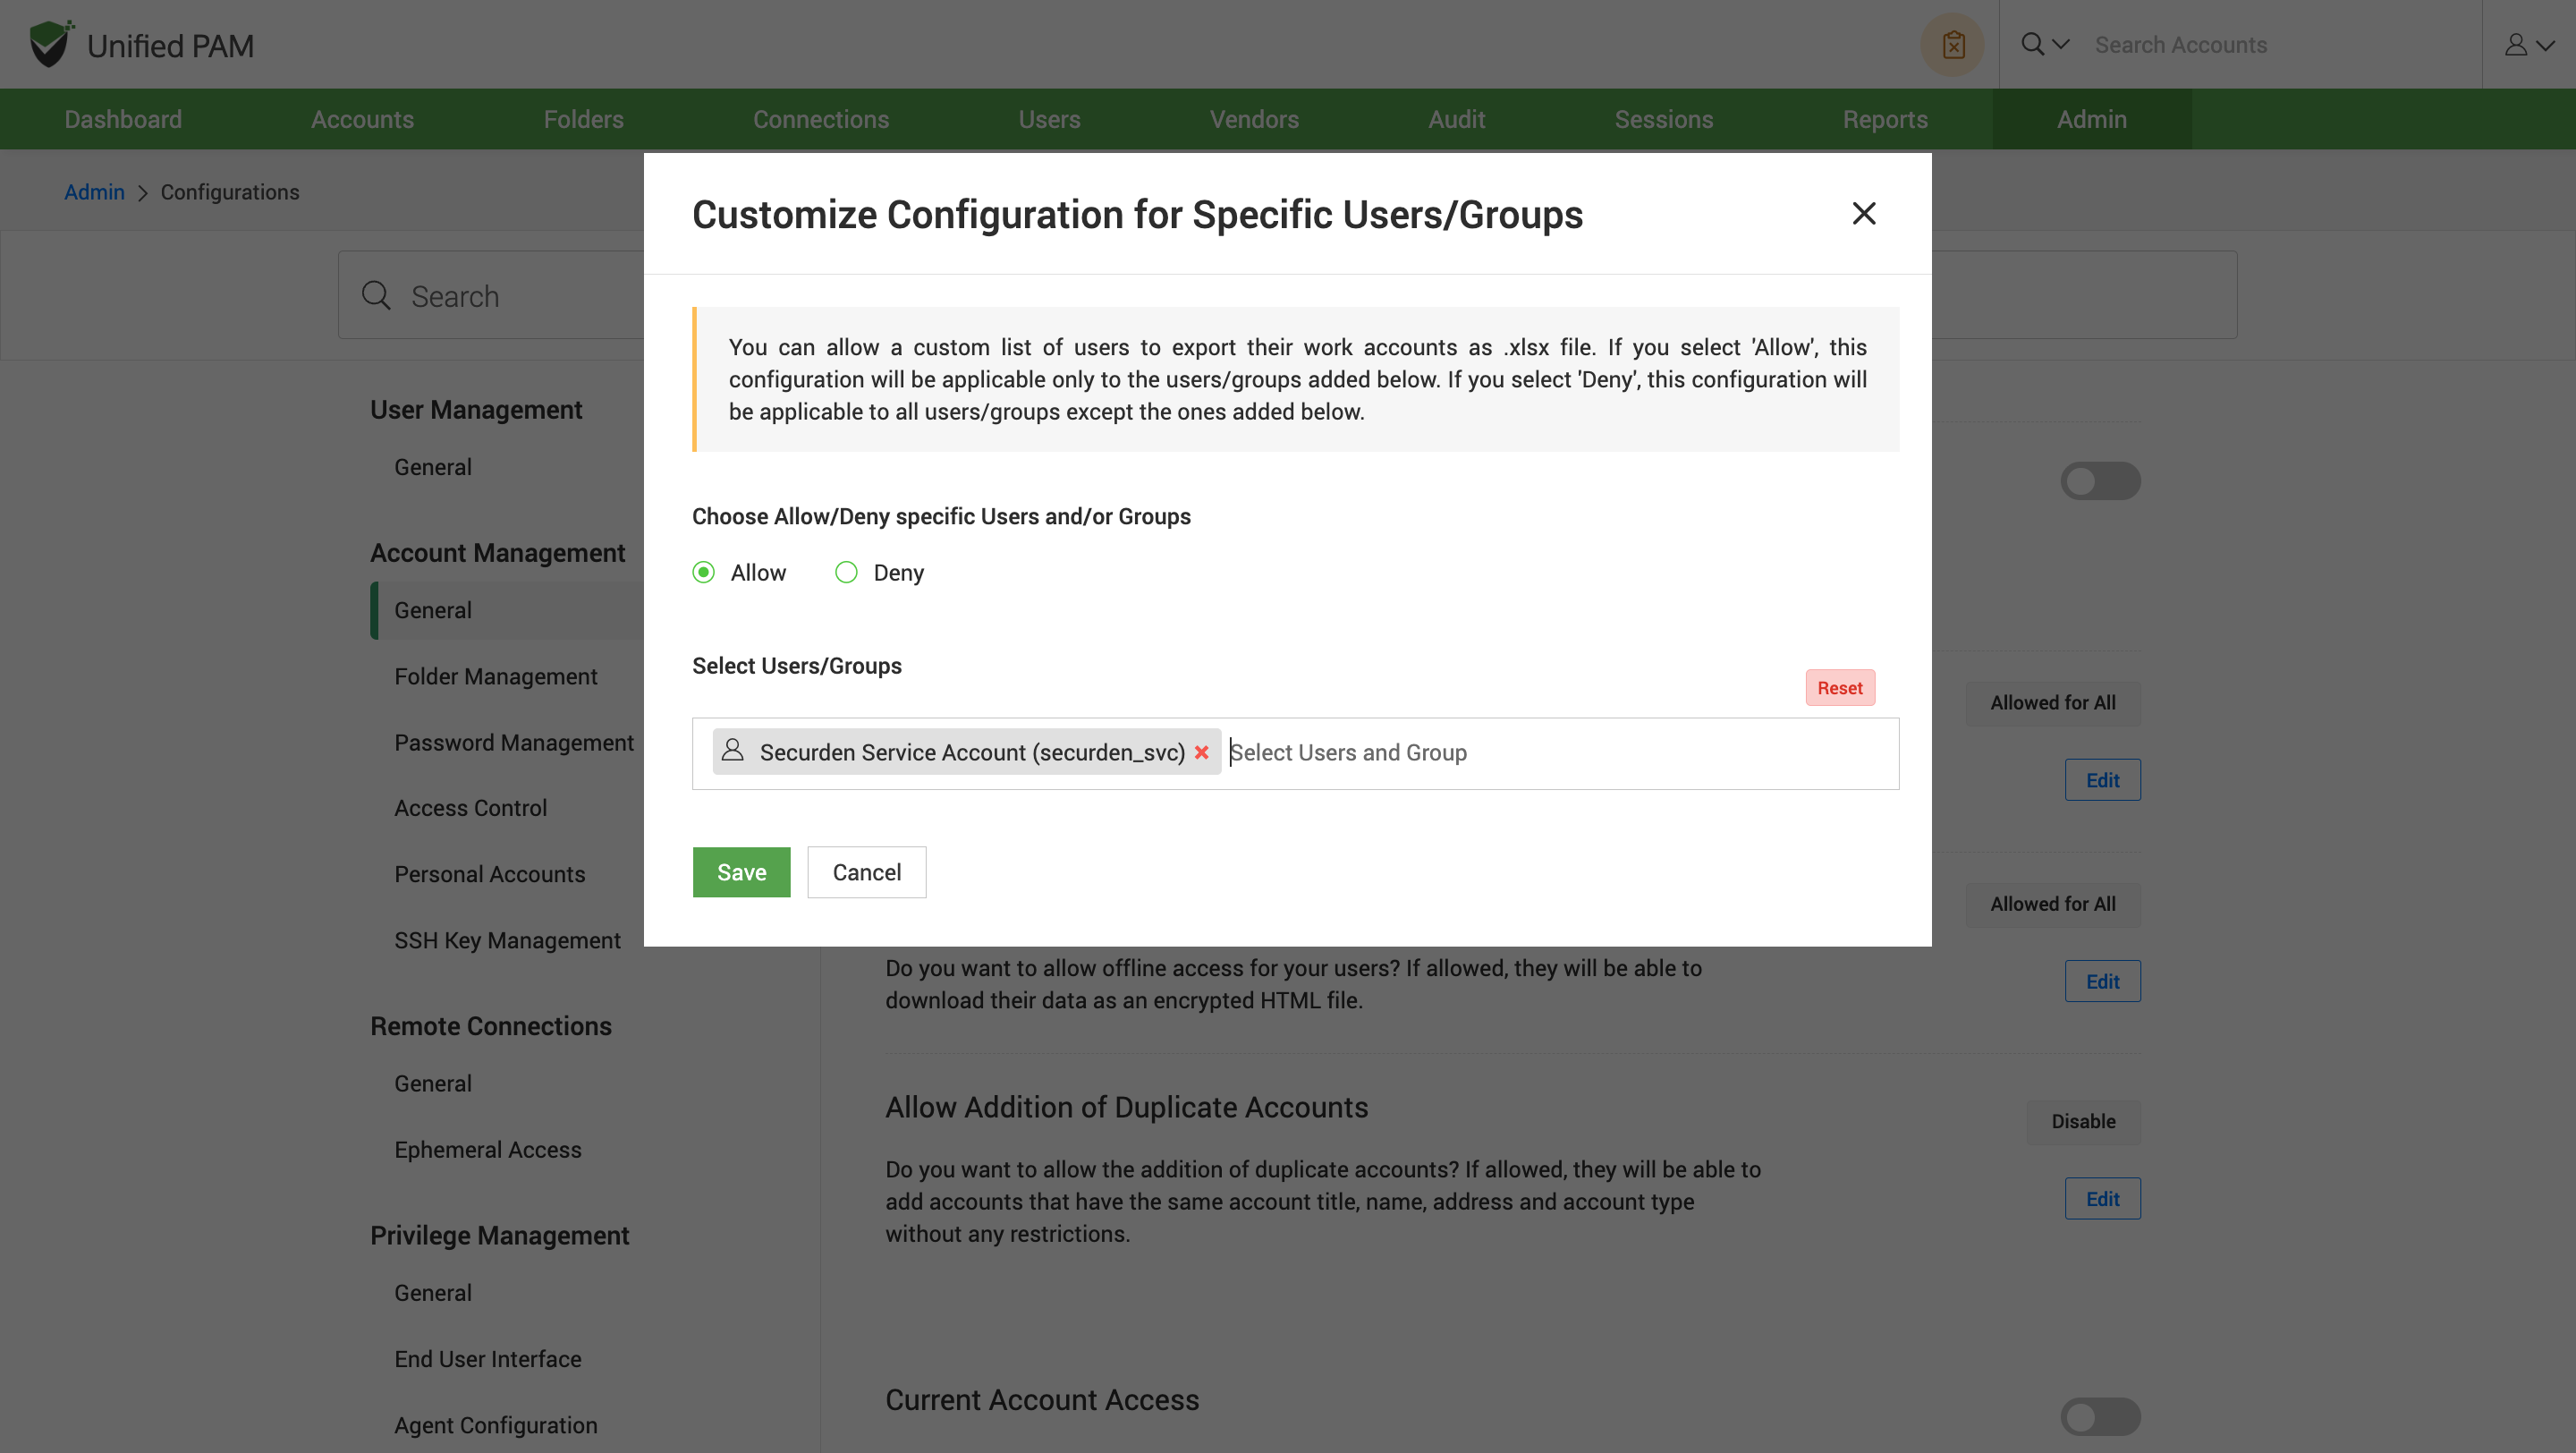
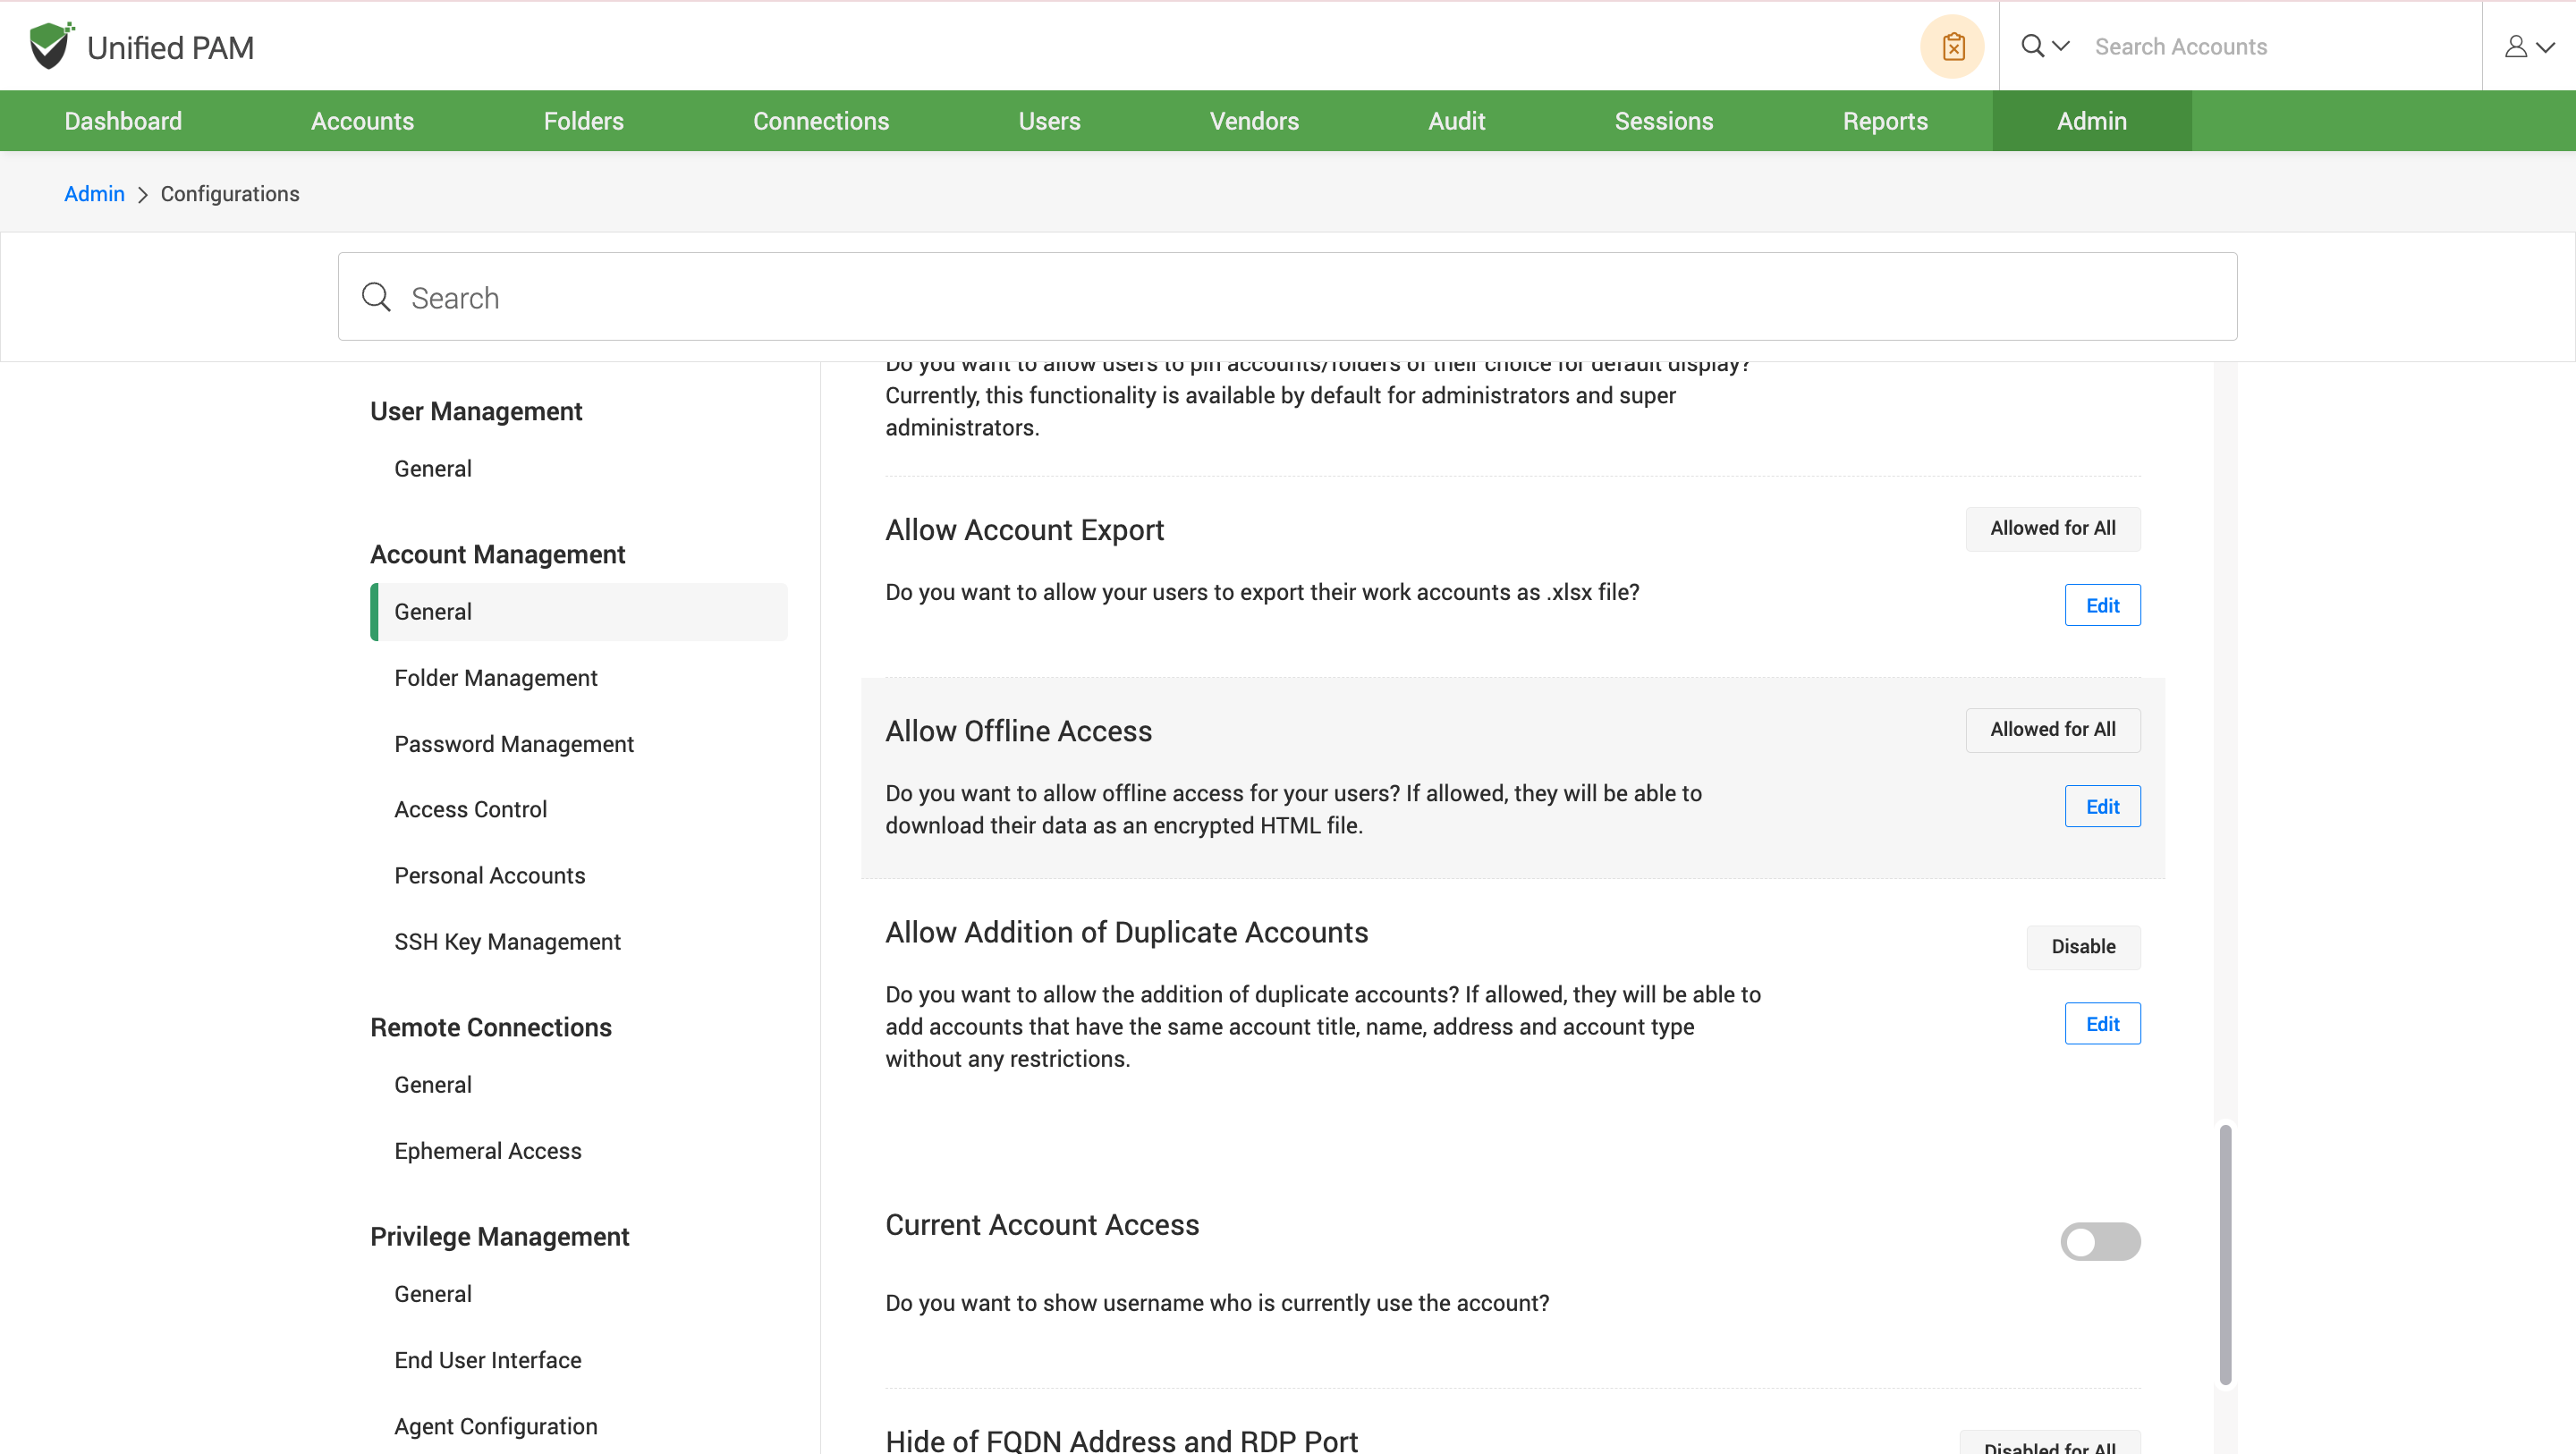
How do users export work accounts?
You can let users export their work accounts in the form of .xlsx file format.
To allow the export of work accounts, navigate to Admin >> Customization >> Configuration >> Account Management >> General, and find the Allow Account Export configuration. Click on the Edit button.
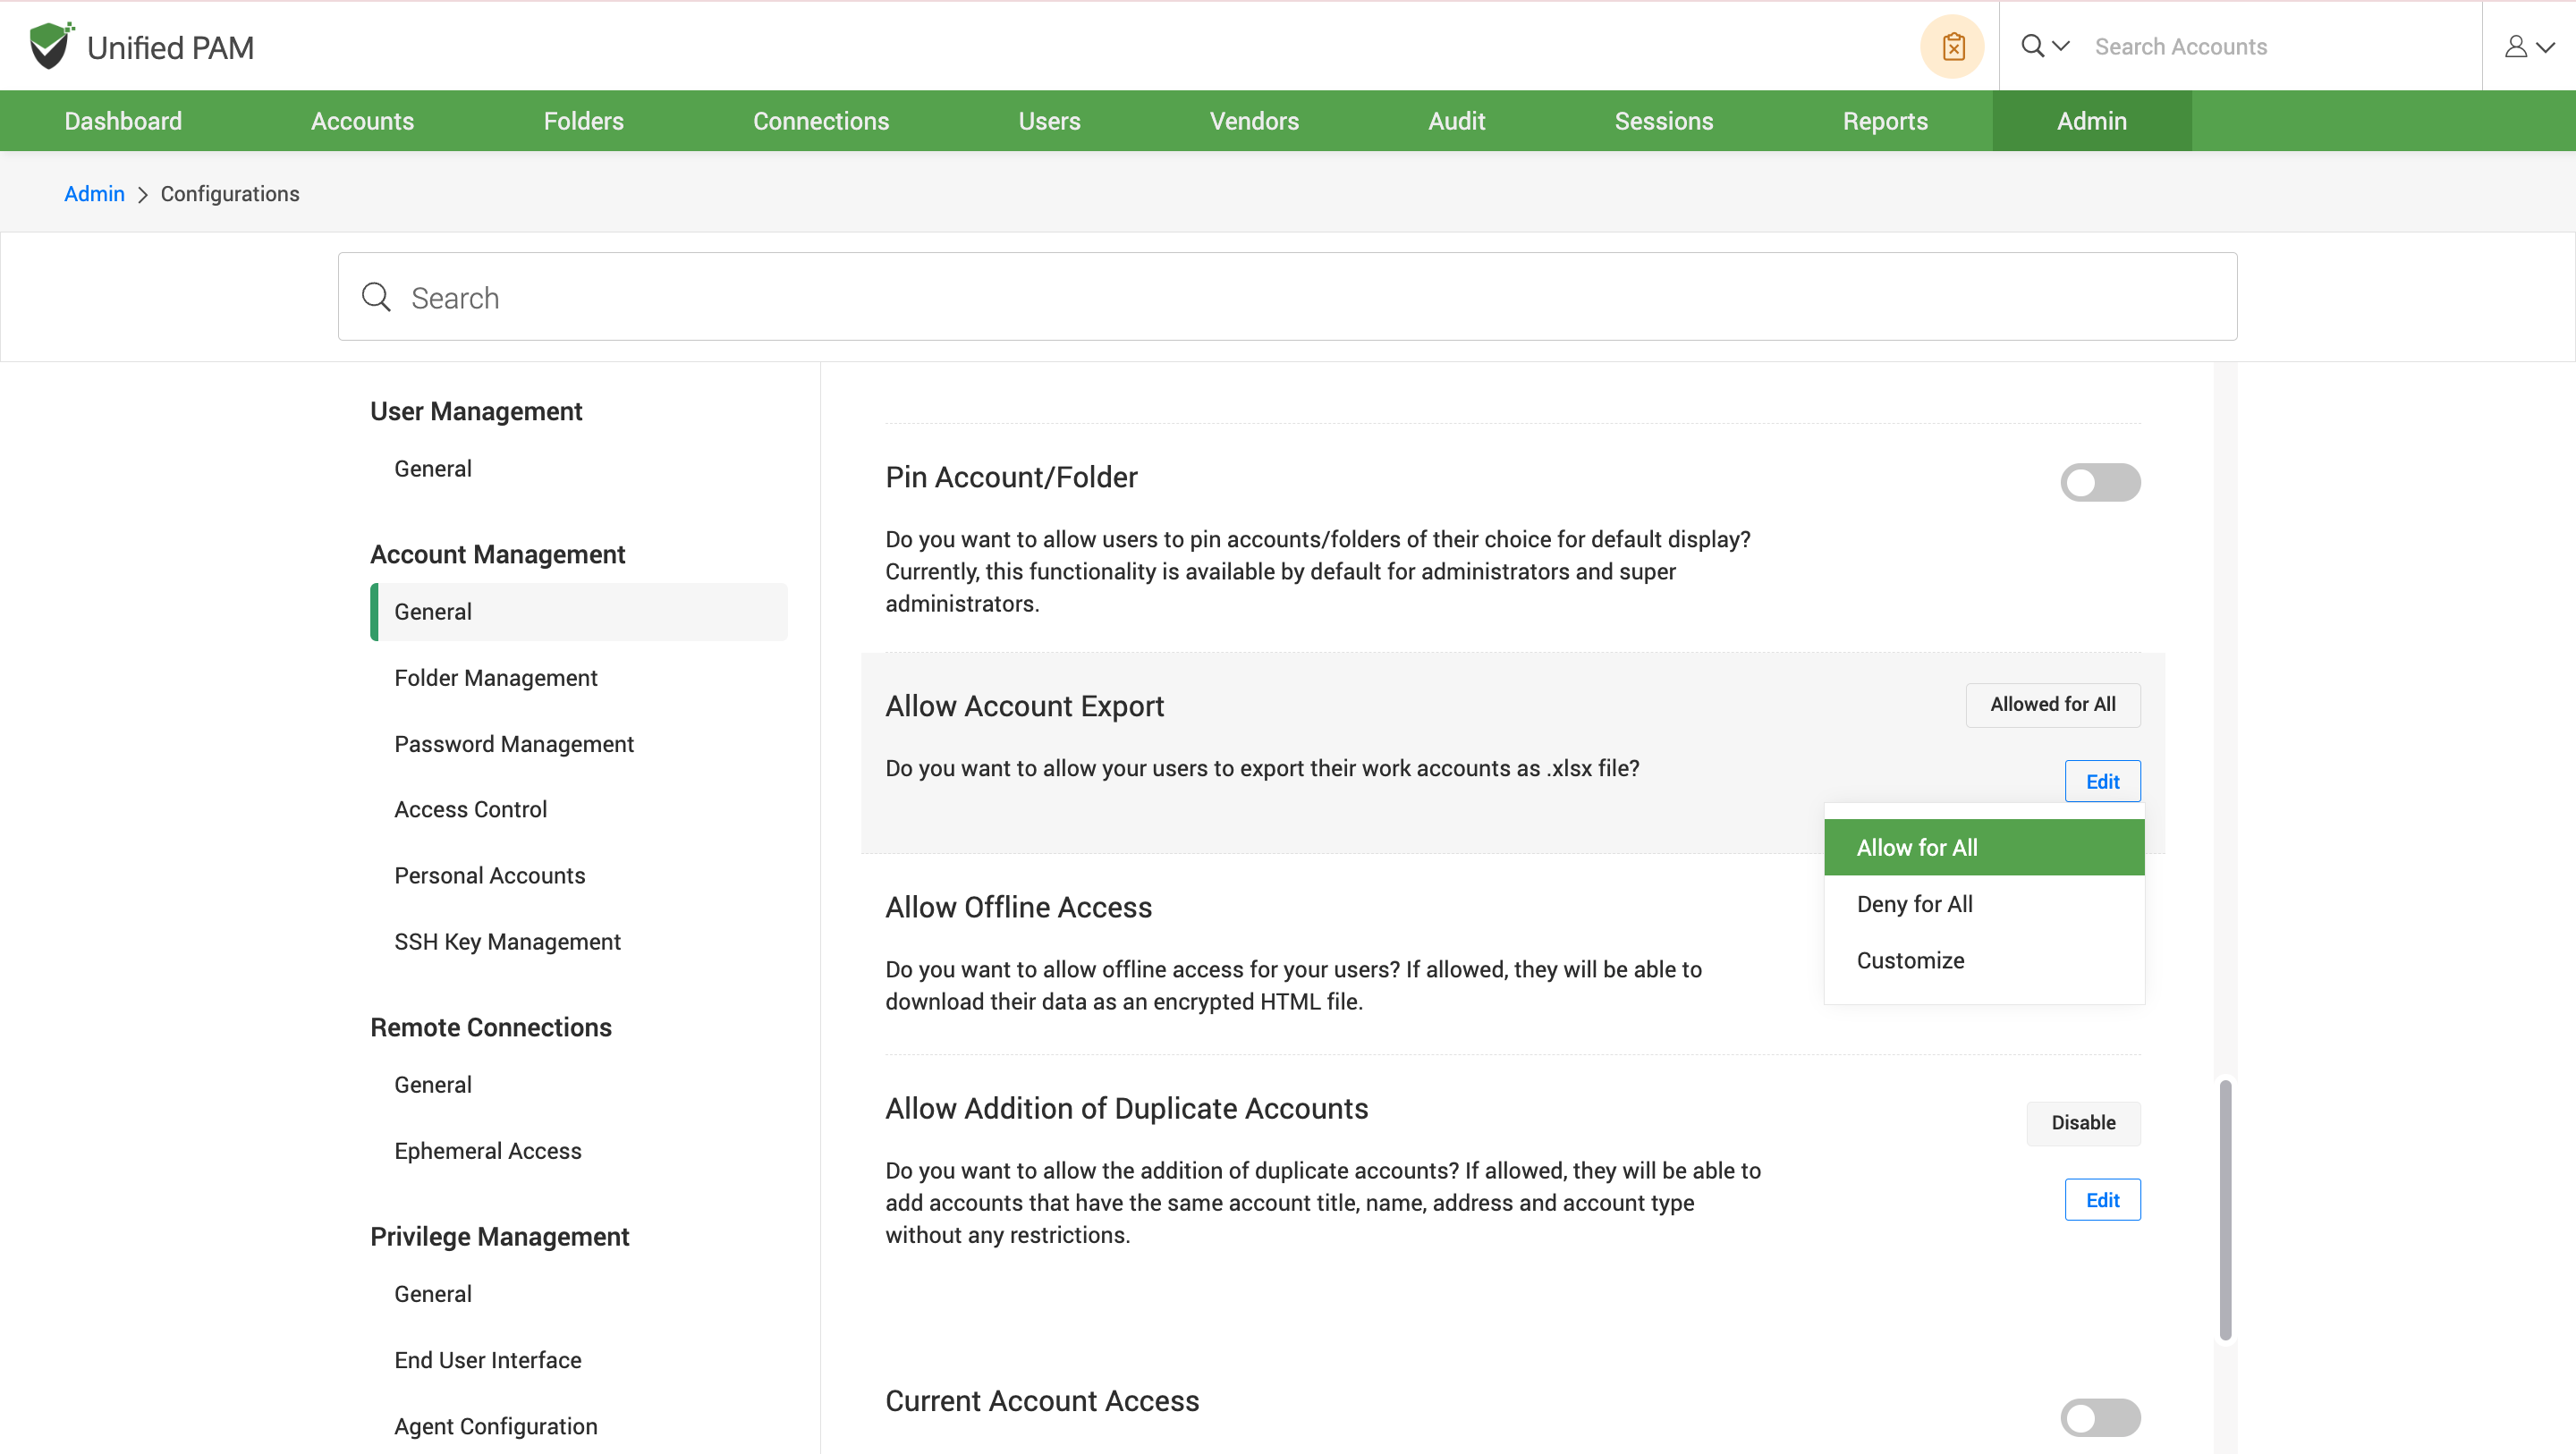
To enable users to export work accounts, select Allow for All and Deny for All to deny users.
To enable or disable export of work accounts for specific users or groups, a custom list of users is created using the Customize option. In accordance with the number of users or groups that require the list of accounts, the list can be customized. Click on the Save button to save the changes.
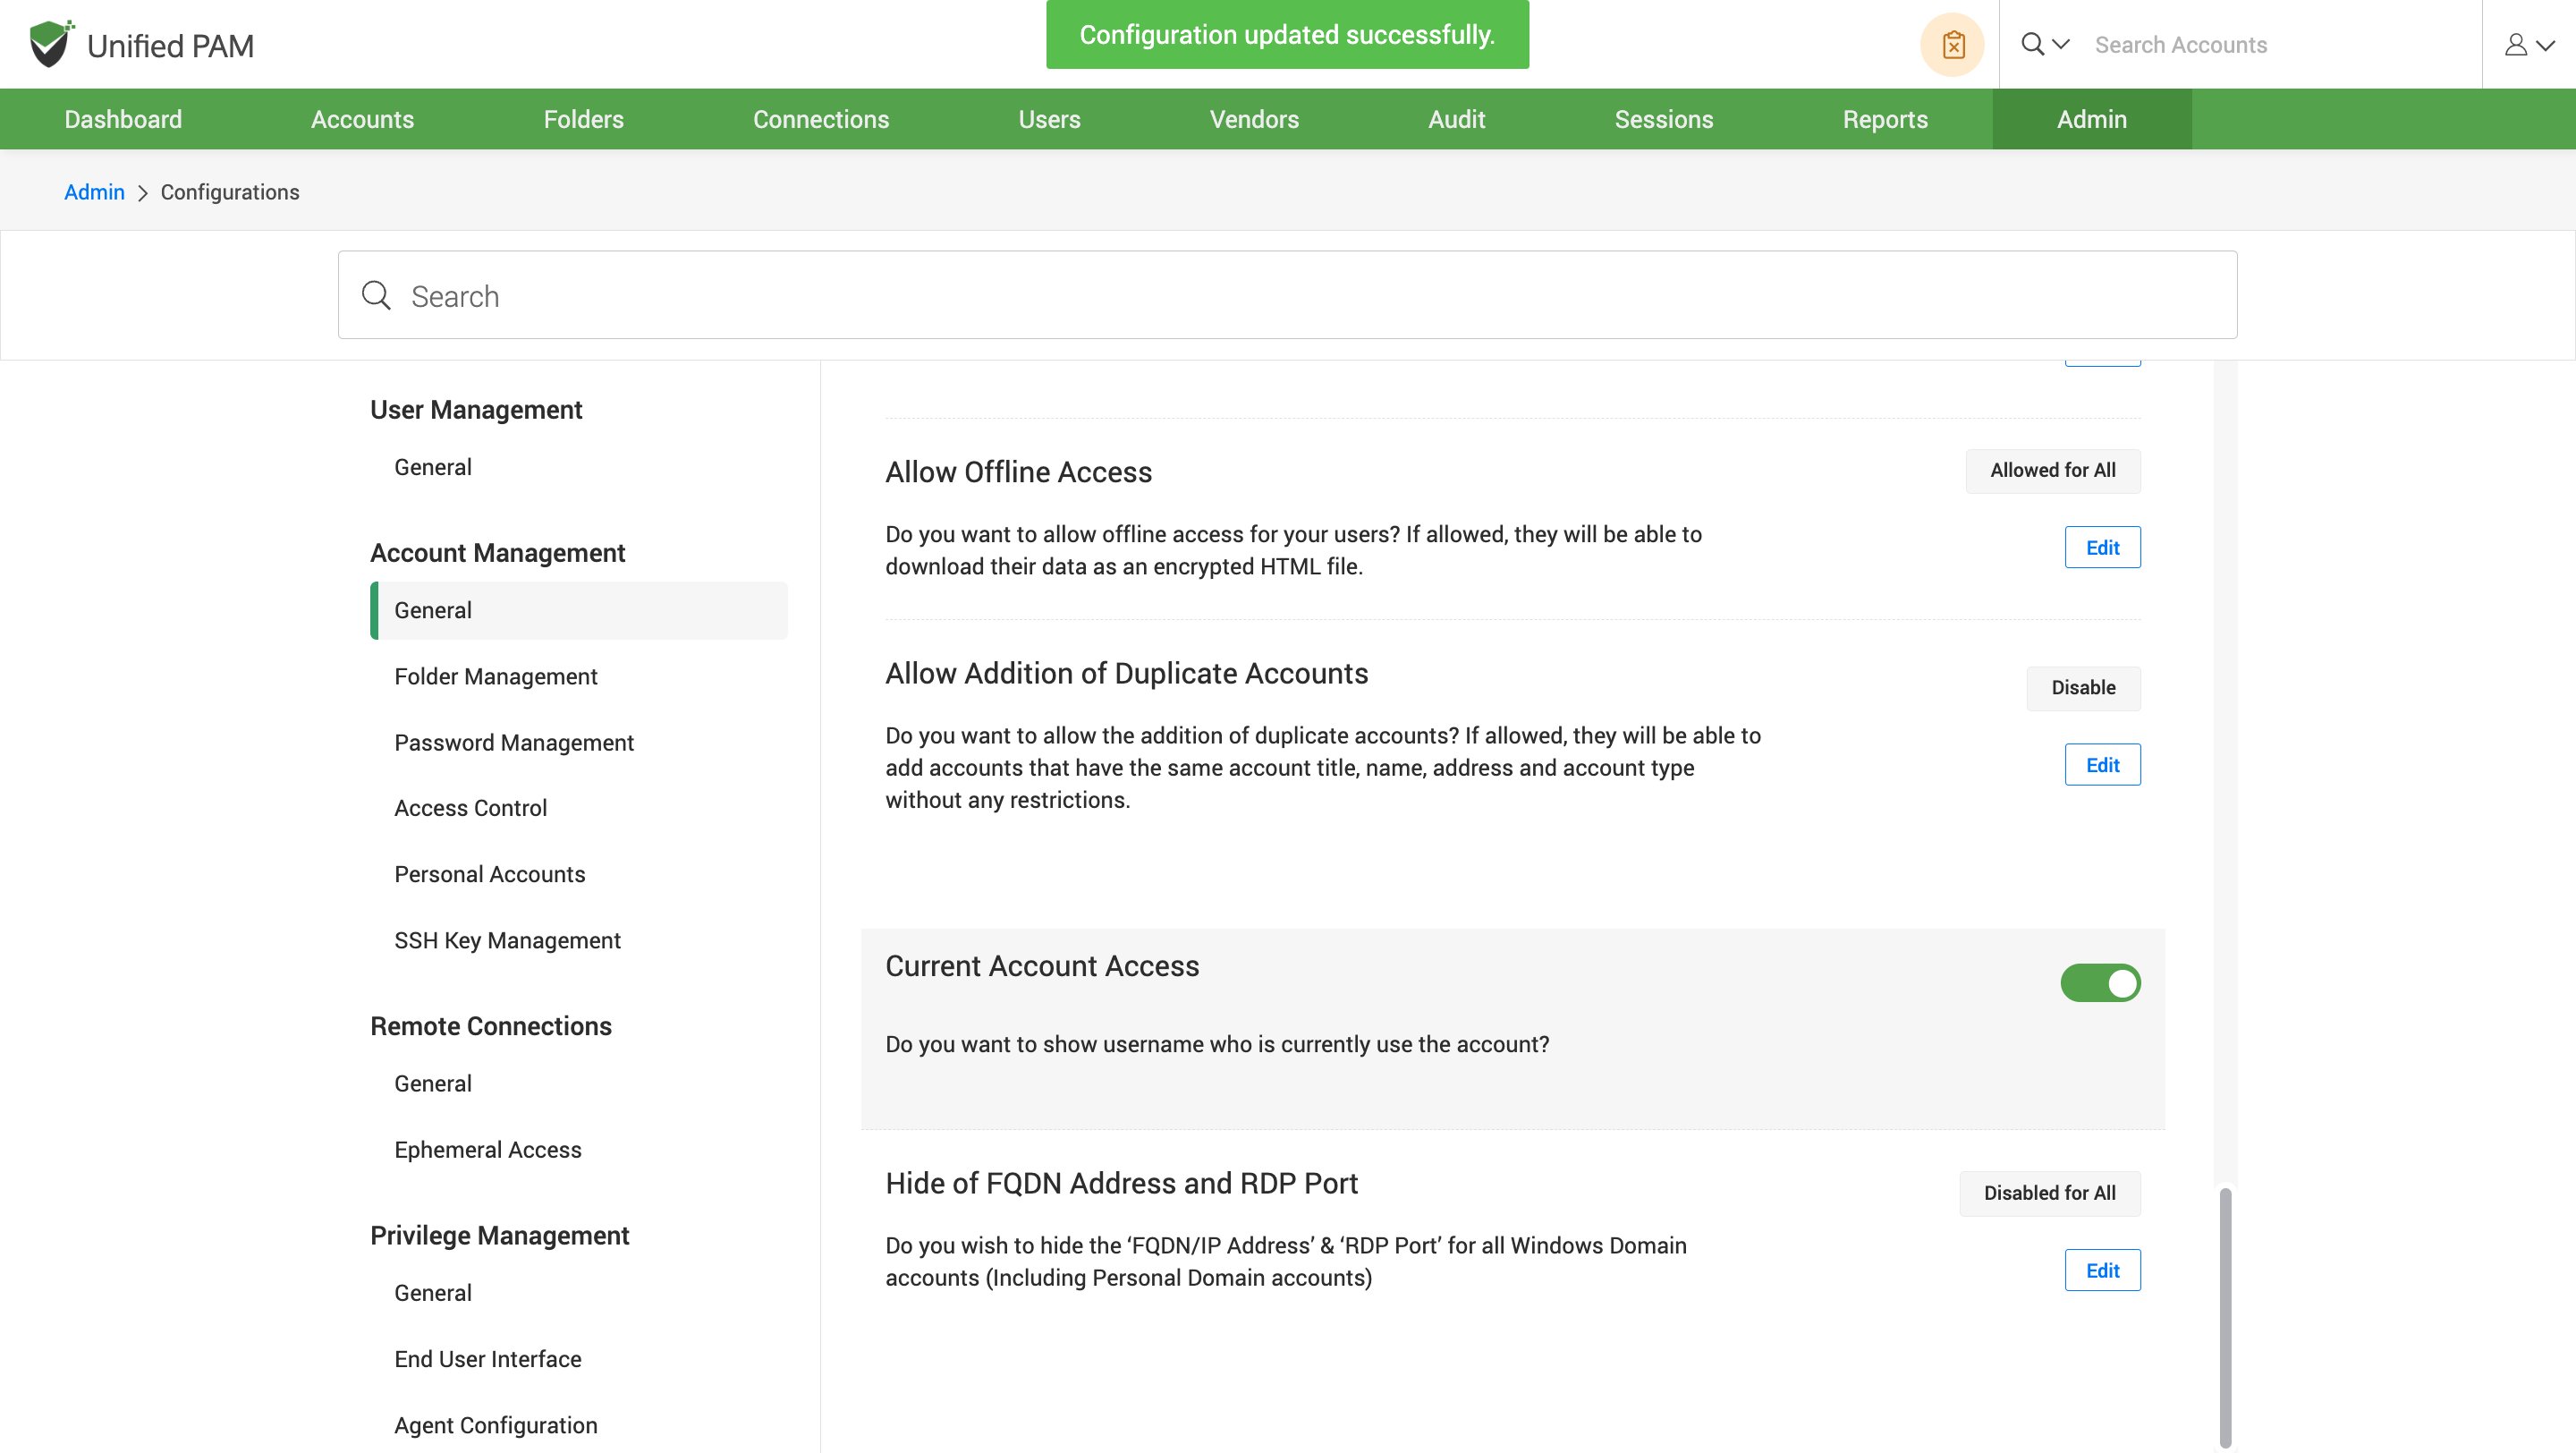
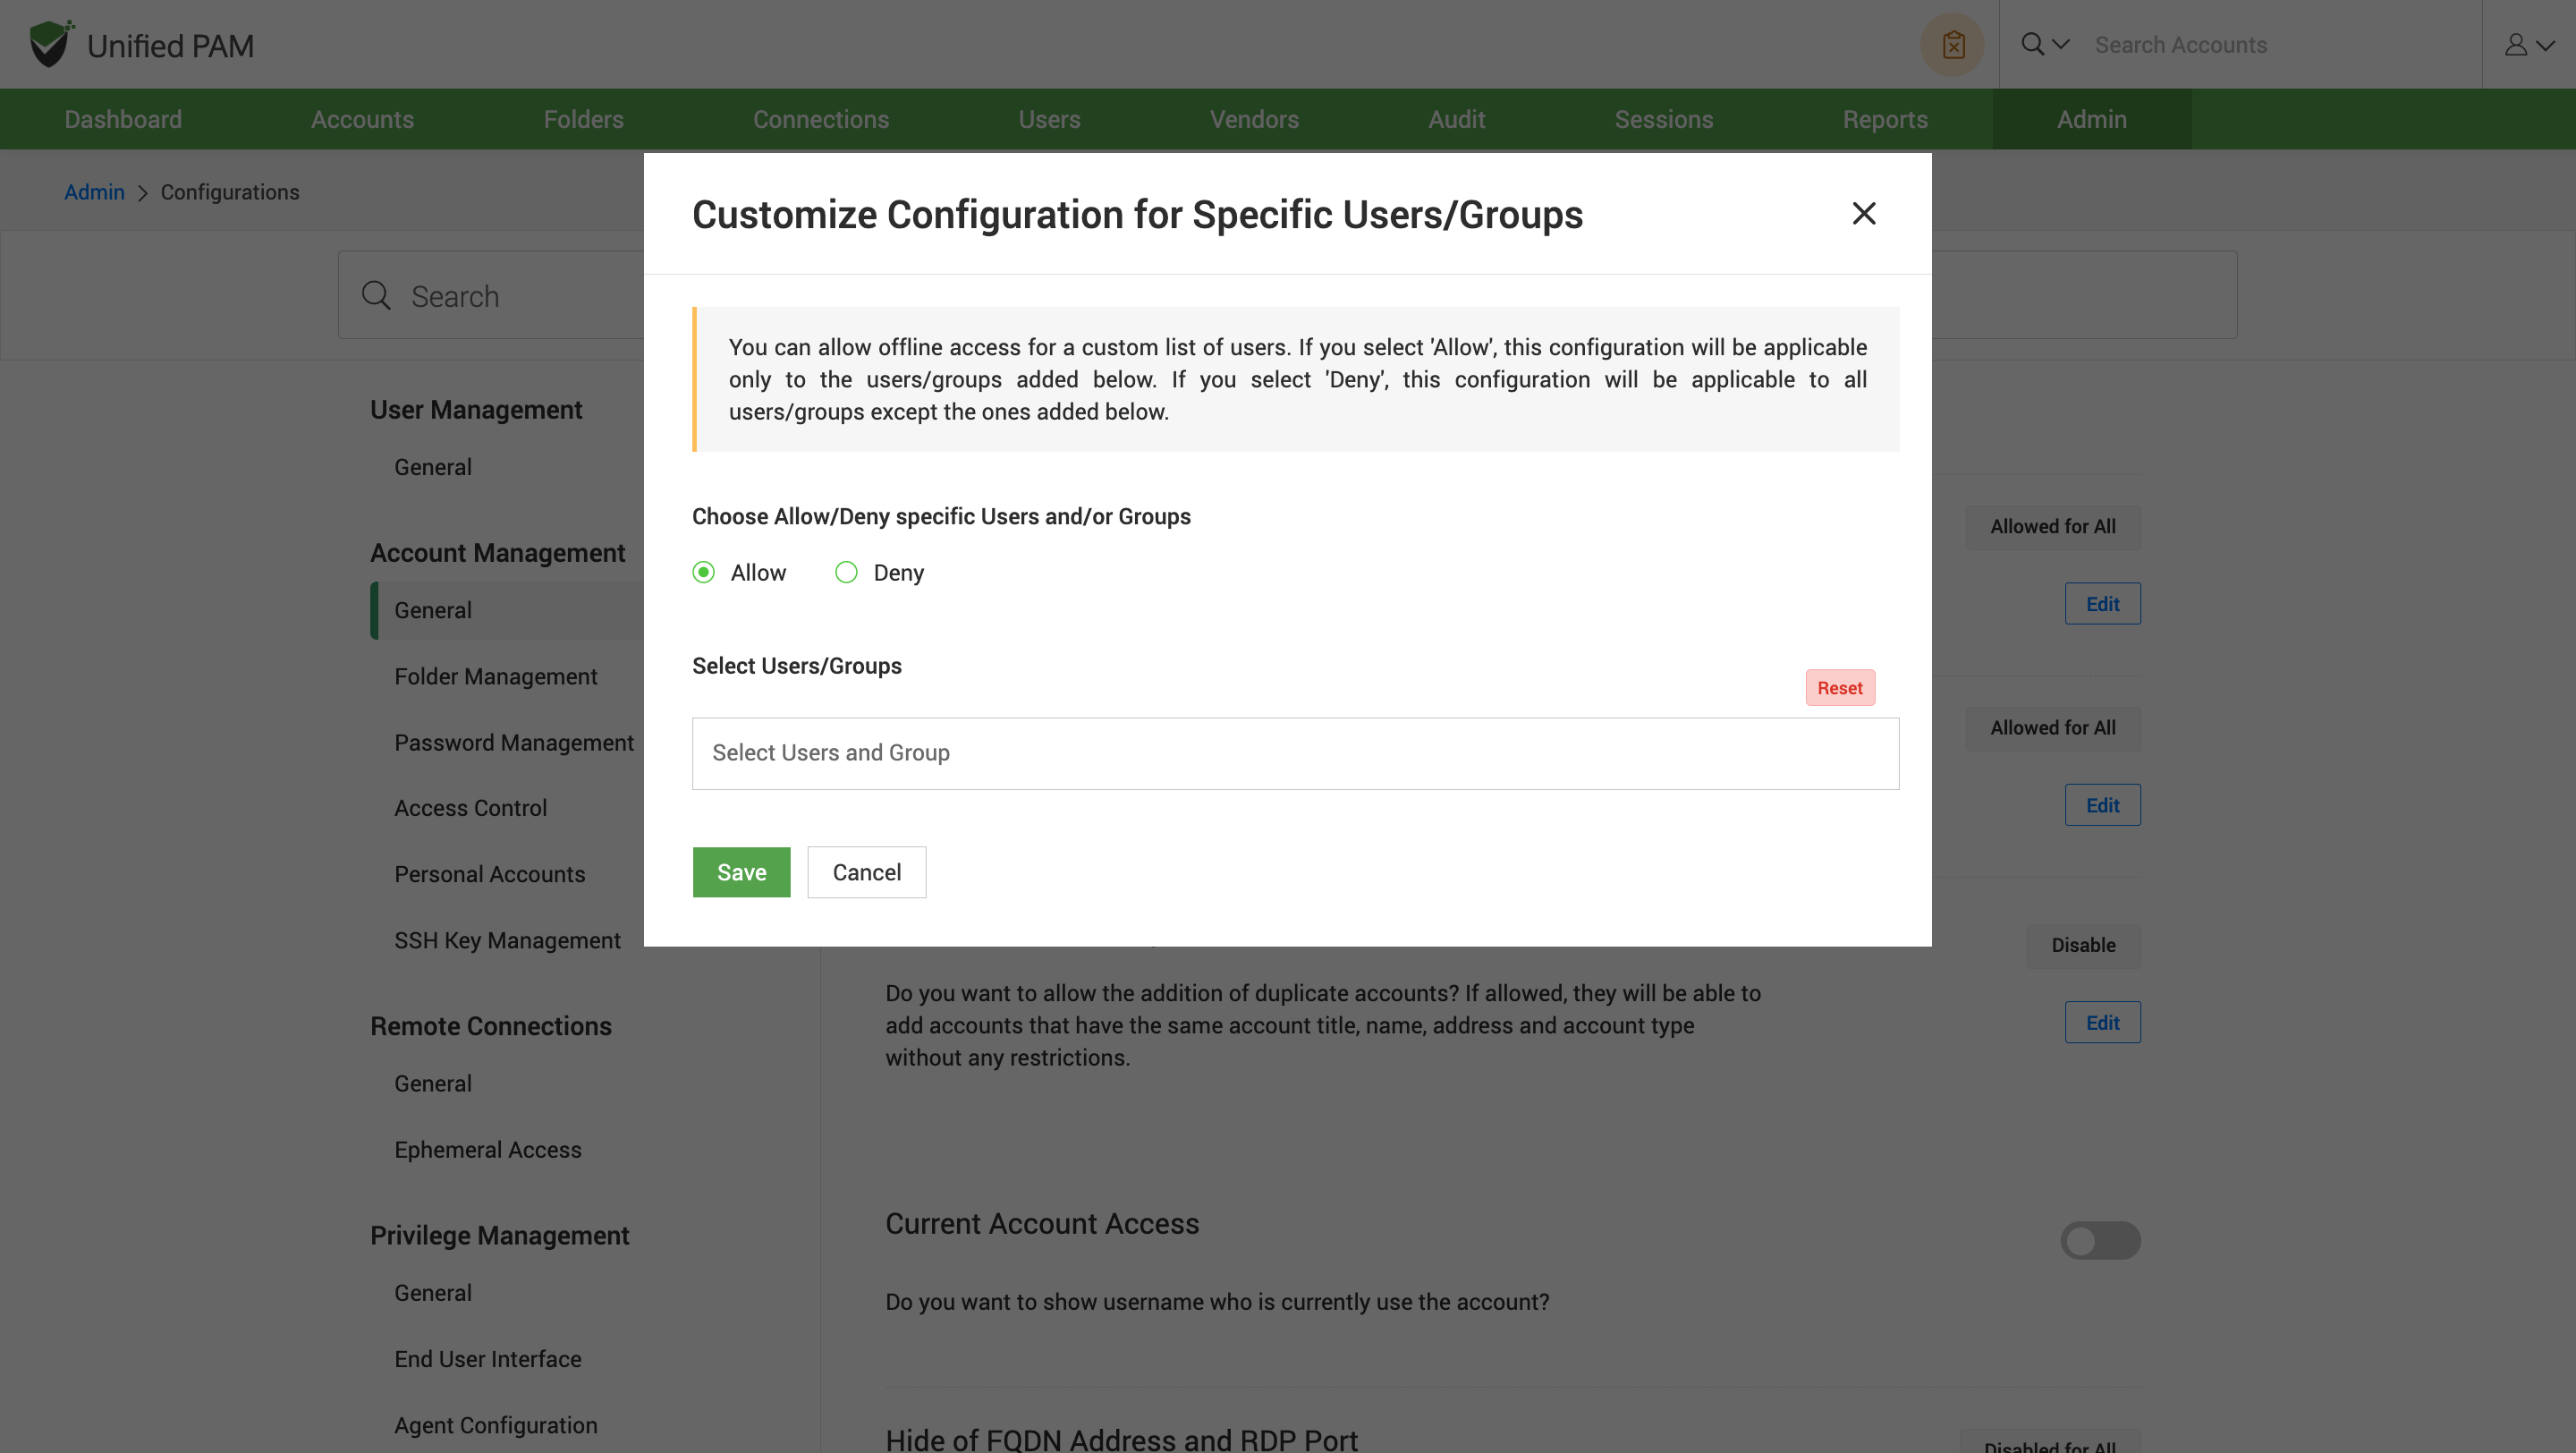
How to allow offline access for users?
You can allow users to access the application in offline mode. If enabled, the users can download their data as an encrypted html file.
To enable this, navigate to Admin >> Customization >> Configuration >> Account Management >> General, and find the Allow Offline Access configuration. Click on the Edit button.
To enable users to access offline mode, select Allow for All and Deny for All to deny users.
To enable or disable offline access for specific users or groups, a custom list of users is created using the Customize option. In accordance with the number of users or groups that require offline access, the list can be customized. Click on the Save button to save the changes.
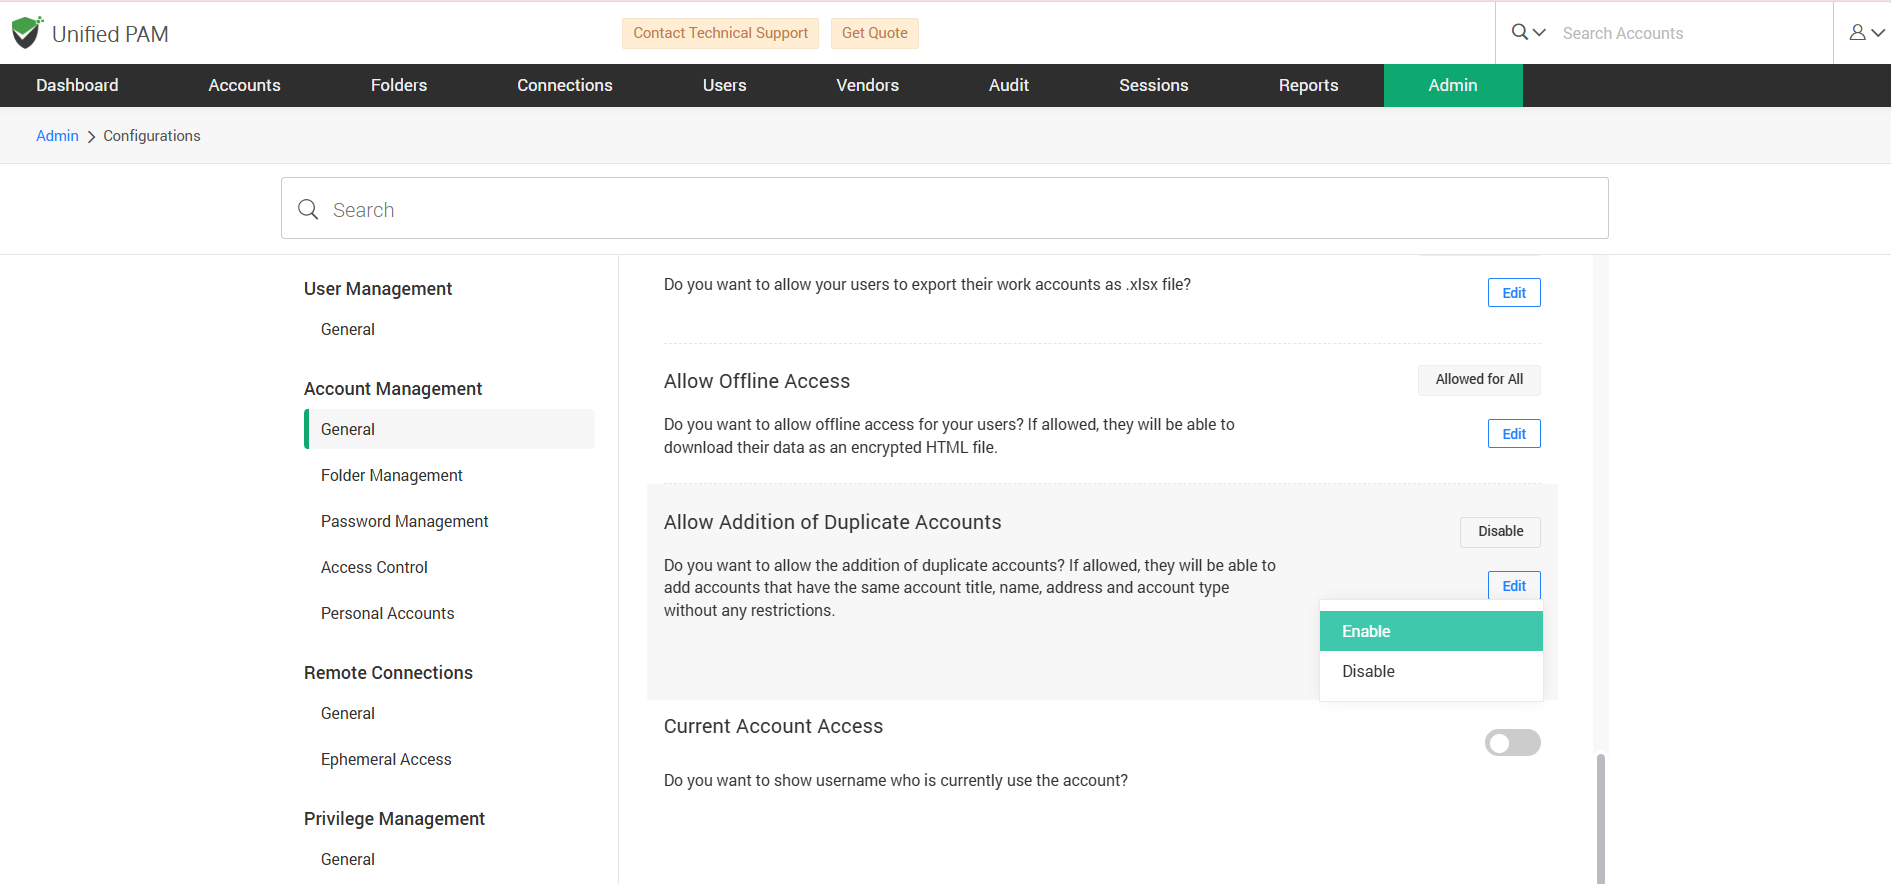
How to Allow the Addition of Duplicate Accounts?
In general, the application would not allow you to create an account with the parameter values which were used in prior.
If you want to allow the addition of an account with the same values such as title, name, address, and account type without any restrictions, navigate to Admin >> Customization >> Configurations >> Account Management >> General and find the Allow Addition of Duplicate Accounts configuration.
Click on the Edit button. Choose the Enable option to allow the creation of duplicate accounts and Disable option to restrict the addition.
How can I view the username of the user currently logged in?
You can display the username of the user who is currently using the account.
To enable this, navigate to Admin >> Customization >> Configuration >> Account Management >> General, and find the Current Account Access configuration. Slide the toggle button to the right to configure the feature.