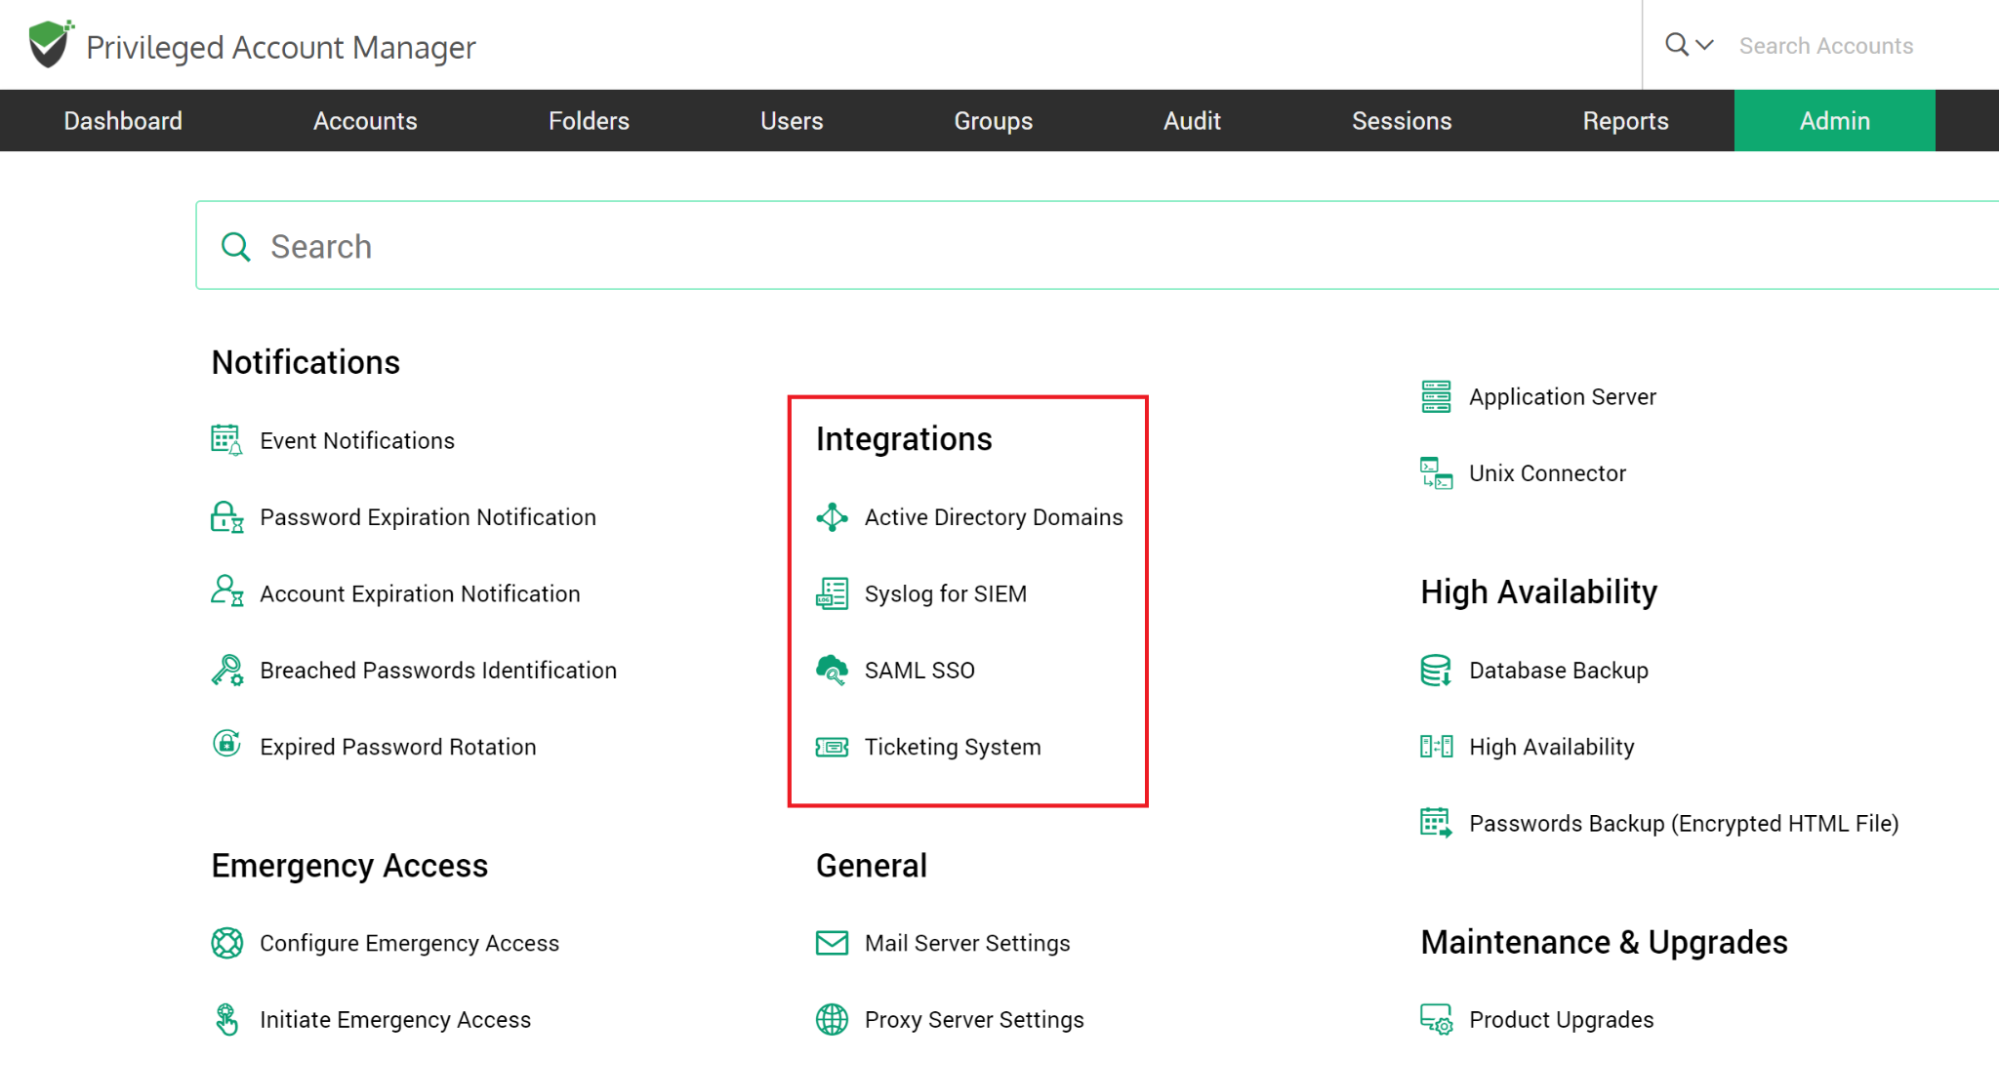
Integrating Securden PAM with Various Enterprise Applications
Securden readily integrates with various enterprise infrastructure such as SIEM solutions, ticketing systems and Single SignOn solutions.
To explore integrations, navigate to Admin >> Integrations.
How to Integrate with Multiple AD Domains?
Securden allows you to manage multiple AD domains. You can add all the domains here. Basically you need to specify the IP address of the domain you want to add and its connectivity details.
To add a new domain, navigate to the Admin >> Integration >> Active Directory Domains. If you have already added a domain, it will appear in the list. Click “Add Domain”.
In the GUI that opens, enter the following details:
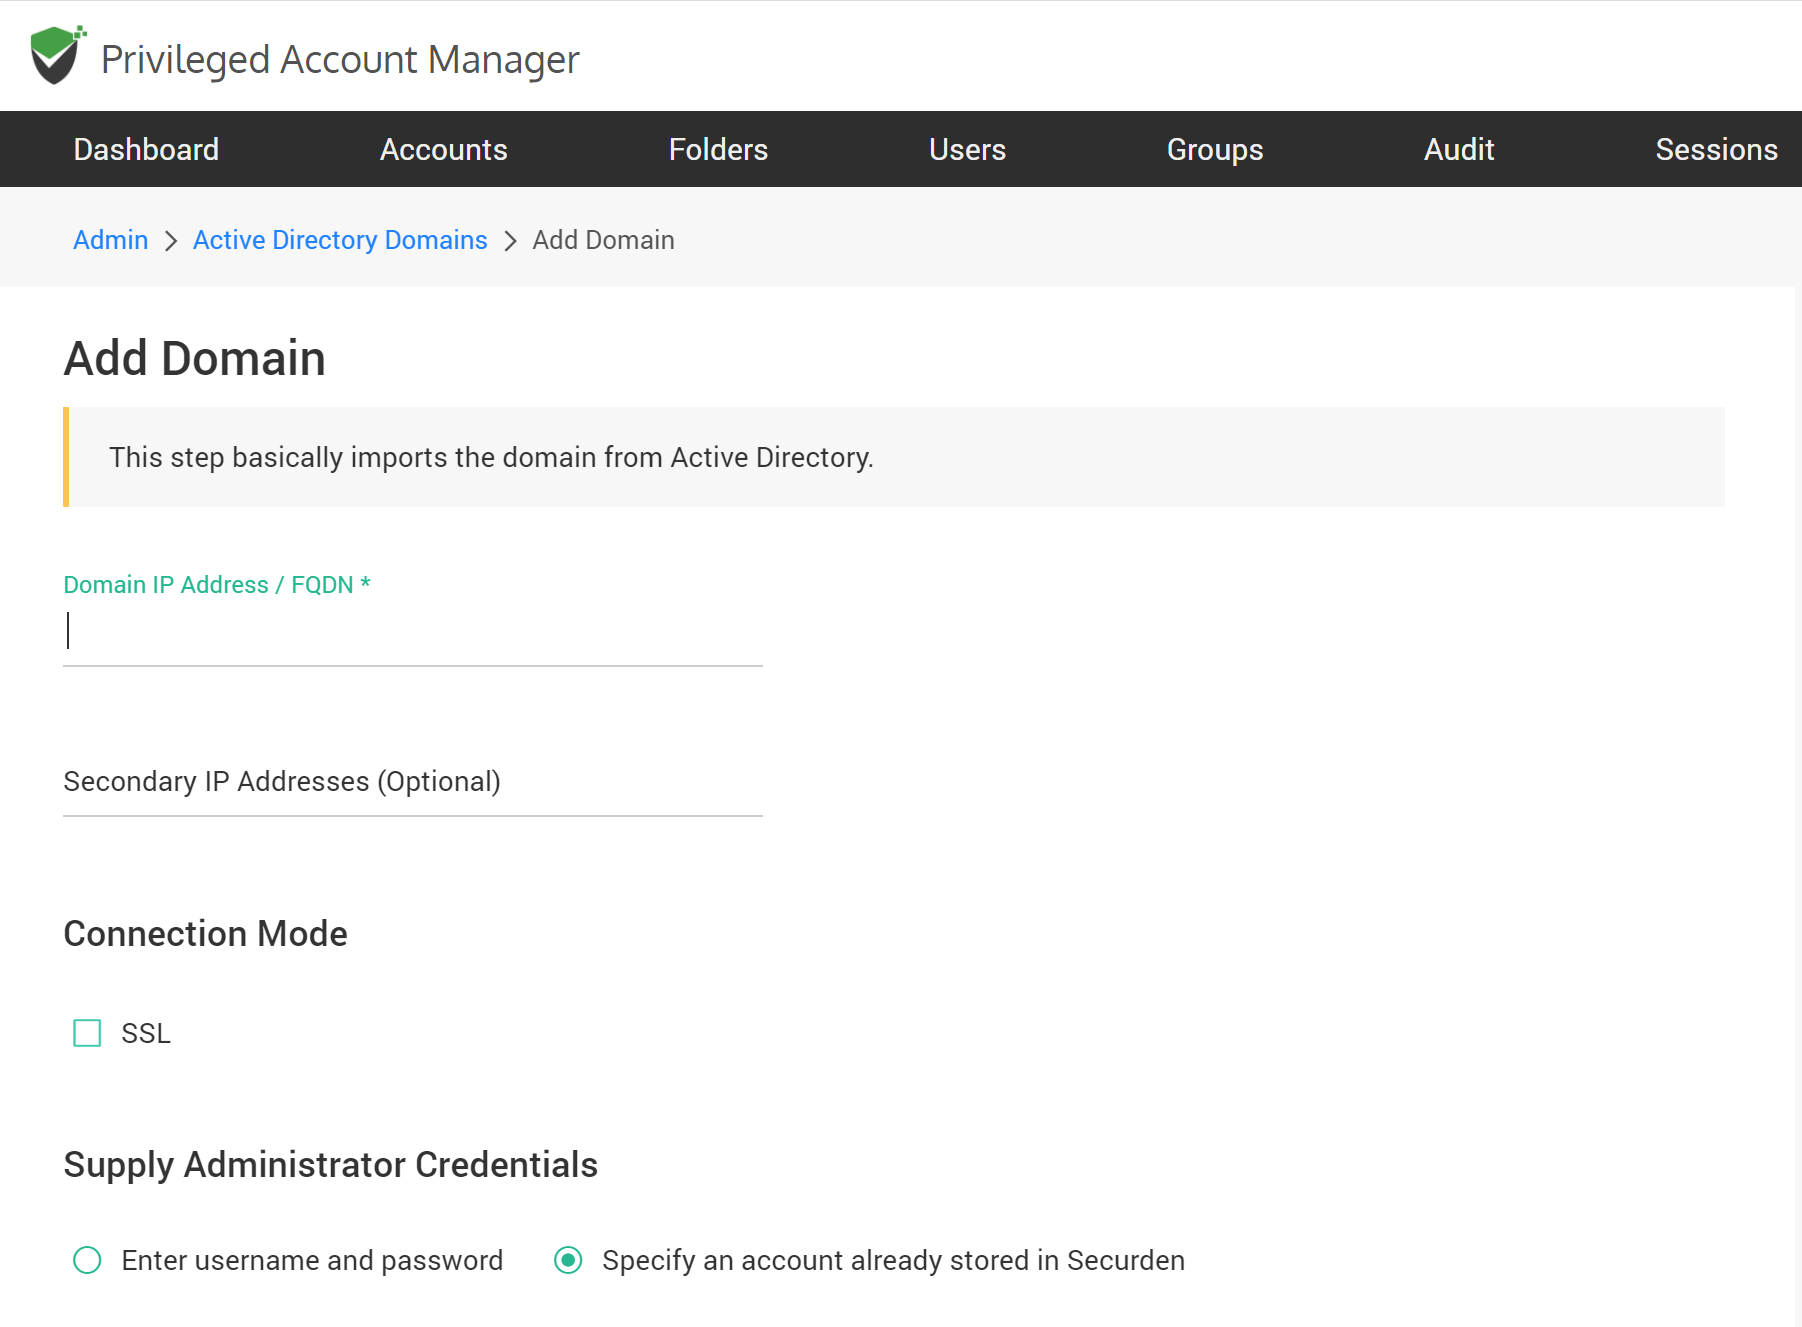
Domain IP Address
Specify the FQDN or IP address of the domain to be scanned. You have the option to enter any number of secondary IP addresses in comma separated form. This will help Securden establish a connection if the primary IP address is not working.
Connection Mode
Specify the mode (SSL/non-SSL) through which Securden has to establish connection with the AD domain. If SSL mode is selected, the domain controller should be serving over SSL in port 636 and the certificate of the domain controller should have been signed by a CA. If the certificate of the domain controller is not signed by a certified CA, you need to import all the certificates that are present in the respective root certificate chain - that is the certificate of the domain controller and all the intermediate certificates if any.
To import the domain controller's certificate into the certificate store of the Securden server machine, we are providing an example below. However, you may use any procedure that you would normally use to import the SSL certificates to the machine's certificate store:
- In the Securden server machine, launch Internet Explorer and navigate to Tools >> Internet Options >> Content >> Certificates.
- In the GUI that pops-up, click "Install Certificate" and then choose "Local Machine" in the next step.
- Browse and locate the root certificate issued by the CA.
- Click "Next" and choose the option "Automatically select the certificate store based on the type of certificate" and install.
- Click "Import" again.
- Browse and locate the domain controller certificate.
- Click "Next" and choose the option "Automatically select the certificate store based on the type of certificate" and install.
- Apply the changes and close the wizard.
- Repeat the procedure to install other certificates in the root chain.
Supply Administrator Credentials
You need to supply administrator credentials so as to enable Securden to scan the members in the domain. You may enter the username and password manually once and this will be stored in Securden for use during subsequent import attempts.
Click “Add Domain”.
How to Integrate with SIEM Solutions?
Securden PAM can be configured to send event logs as Syslog messages to SIEM solutions. You need to configure the Syslog server settings and define what types of events to be sent to the SIEM tools.

To configure SIEM integration, navigate to Admin >> Integration >> Syslog for SIEM. In the GUI that opens, you need to enter your Syslog server details. You need to enter the hostname or IP address of the syslog server, the connection mode (UDP, TCP or TLS) and the Syslog server port.
Securden forwards Syslog messages in the following format:
[ACTIVITY_TYPE] [ACCOUNT_NAME, ACCOUNT_TITLE, ADDRESS] [PERFORMED_FROM] [REASON] [PERFORMED_BY]
Ex: [Activity Type: Account password retrieved] [Account Name: Test1, Account Title: Account1, Address: address1] [Performed From: DESKTOP-PP5629I] [Reason: password changed] [Performed By: Securden Administrator]
You can define the ‘Severity Level’ to be associated with the messages being forwarded. Select one of the options from the ‘Severity Type’ drop-down.
For the purpose of SIEM integration, Securden can convert application event logs in two formats - RFC5424 and CEF. Select the required ‘Syslog Format’.
Finally, you need to define the scope - what are all the events that are to be sent to the SIEM solutions. You have the option to simply select “All Events”. Securden will generate Syslog messages and forward all events. You can also select specific events that you consider important. In that case, select the option ‘Specific Events’ and search and select the required event logs from the fields ‘Account Activities’ and ‘User Activities’.
Click “Save”.
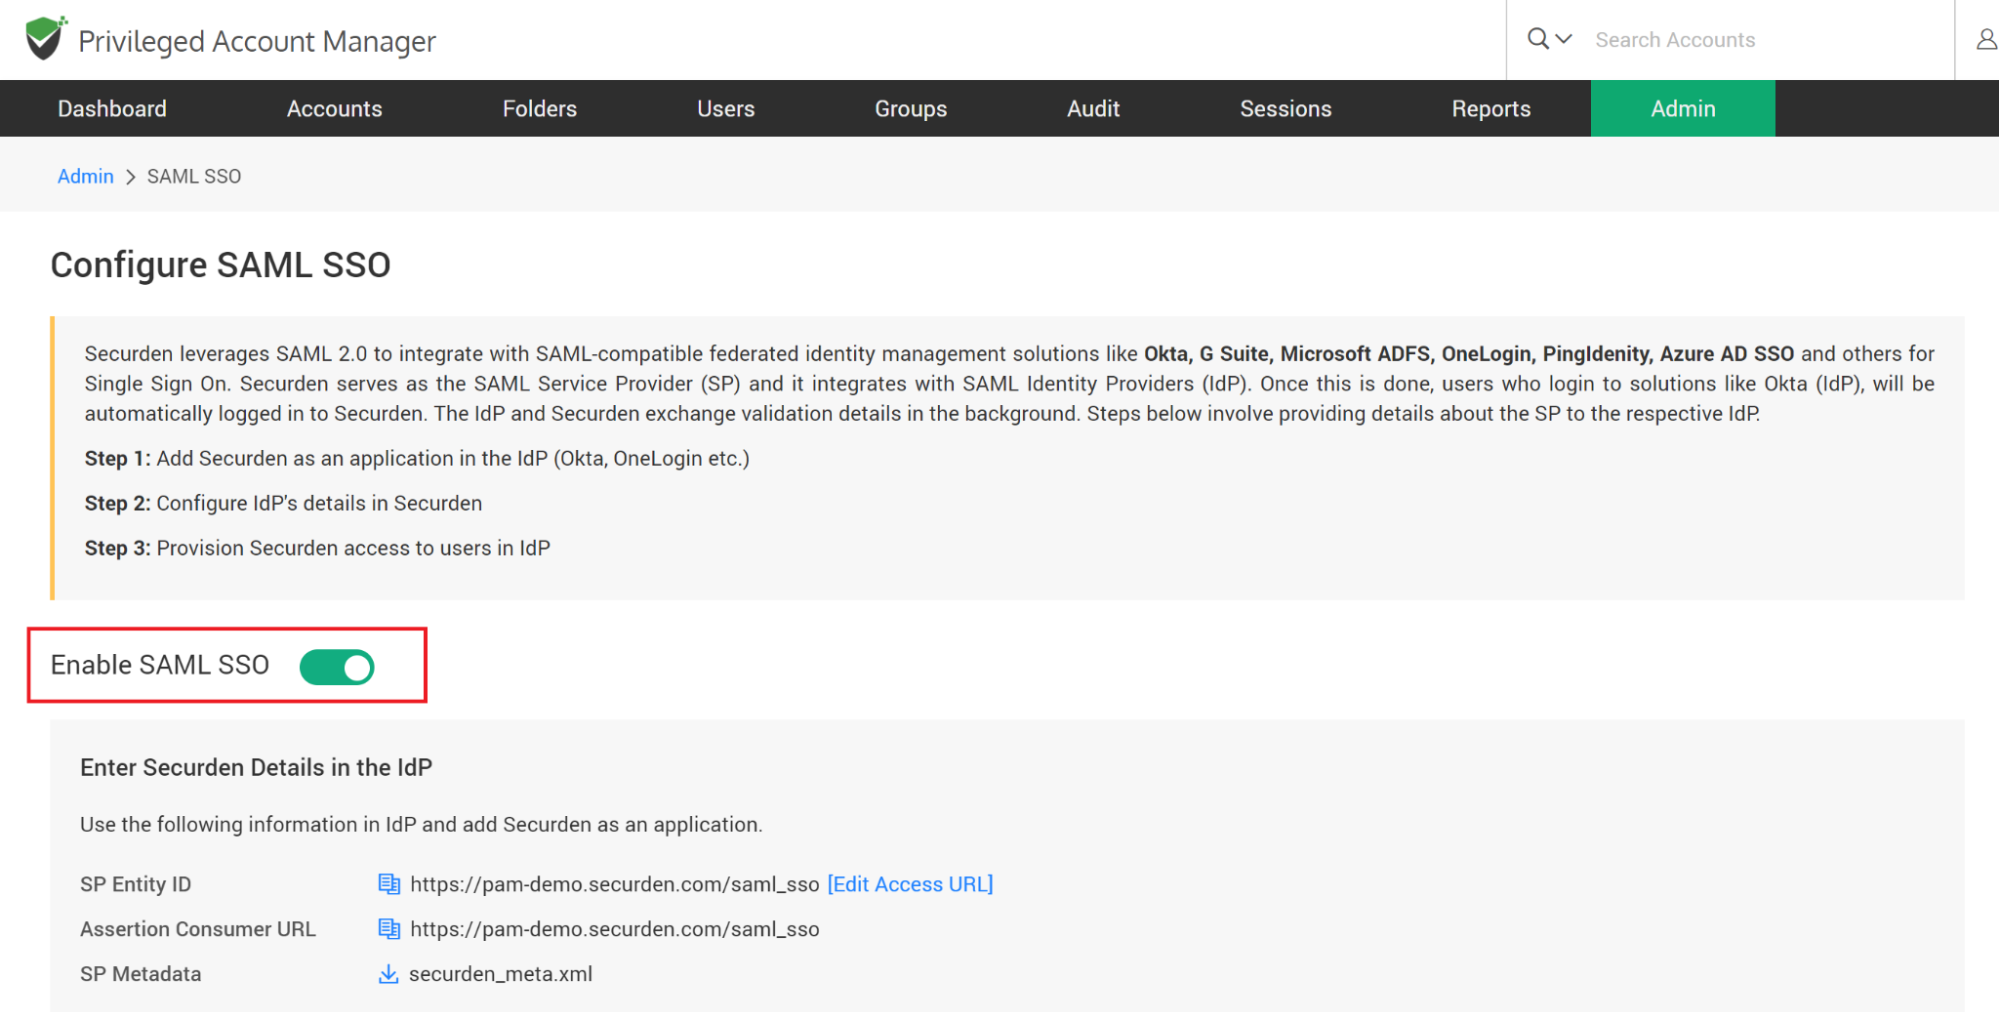
How to Configure SSO for Securden?
Securden leverages SAML 2.0 to seamlessly integrate with SAML-compatible federated identity management solutions like Okta, G Suite, Microsoft ADFS, OneLogin, PingIdentity, Entra ID (Azure AD) SSO and others for Single Sign On. Securden serves as the SAML Service Provider (SP) and it integrates with SAML Identity Providers (IdP). Once the integration is done, you can give your users the Single SignOn experience to access Securden.
Securden integrates with any SAML-based SSO solution. The integration process involves three steps:
- Step 1: Add Securden as an application in the IdP (Okta, OneLogin etc.)
- Step 2: Configure IdP's details in Securden
- Step 3: Provision access to Securden for your users in the IdP
To start the integration, you would require certain details about Securden, which you can obtain from the product interface as explained below:
Navigate to Admin >> Integration >> Configure SAML SSO. In the GUI that opens, move the toggle “Enable SAML SSO” to green.
Step 1: Add Securden as an application in your SSO solution (known as the IdP)
You need to perform this step on your SSO solution. For adding Securden as an application, you would typically require the following details. Securden is referred to as the ‘Service Provider’.
- Service Provider Entity ID
- Assertion Consumer URL
- Service Provider’s Metadata
All these details are available in the ‘Configure SAML SSO’ page on the Securden interface.
Step 2: Configure IdP's details in Securden
Once you have completed step 1 and added Securden as an application in your SSO solution, you would have certain details obtained from the IdP like IdP Entity ID, IdP login URL, and protocol type. You need to supply those details in the ‘Configure SAML SSO’ page on the Securden interface.
You have two options here -
- Enter IdP details manually (or)
- Upload IdP’s Metadata file
Select the option that is best suited for you. If you select the option ‘Enter IdP details’, enter the IdP details that you got after completing step 1. You need to enter an ‘Identifier’ text that will appear on the Securden login screen.
As part of the integration, one of the important aspects is the ‘login name’ format. The Identity Provider) returns a login name, which Securden uses as the username for logging in to the application. If you want to map the name returned by the identity provider with a different name, you can create custom rules. Basically, you can make use of the following string functions to create custom rules to manipulate the login name returned by the identity provider. In the string function, 'loginname' denotes the name returned by the identity provider.
| Function | Input Parameters | Example | Output |
|---|---|---|---|
stringAppend |
(String str, String suffix) |
stringAppend('This is', ' a test') |
This is a test |
toUpperCase |
(String str) |
toUpperCase('This is a test') |
THIS IS A TEST |
toLowerCase |
(String str) |
toLowerCase('This is a test') |
this is a test |
substringBefore |
(String str, String searchString) |
substringBefore('abc@securden.com', '@') |
abc |
substringAfter |
(String str, String searchString) |
substringAfter('abc@securden.com', '@') |
securden.com |
Step 3: Provision access to Securden for your users in the IdP
After completing the integration, remember to provision access to Securden to your users in the IdP.
Troubleshooting Tip
After integration, if you get invalid user response, you need to use the ‘Custom Rule for Securden Login Name’.
- The username format could be the cause of this issue. For authentication, Securden validates the value against the username in Securden.
- When you import users from AD, Securden maintains the username as DomainName\username. (When you add users locally instead of importing from AD, it will be just username alone).
- So, in SSO configuration page, if you change the Custom rule for Securden login as below, the issue might be resolved: stringAppend('DOMAINNAME\', loginname)
- Example: stringAppend('SECURDENDEV\', loginname)
In addition, there might be an email mismatch with username.
If an email is received from SSO, the domain name has to be trimmed from the value:
stringAppend('DOMAINNAME\', substringBefore(loginname, '@'))For extracting username from email:
substringBefore(loginname, '@')
The above steps typically apply for integrating any SAML-based SSO solution. If you need any assistance in integrating with any specific IdP, write to support@securden.com .
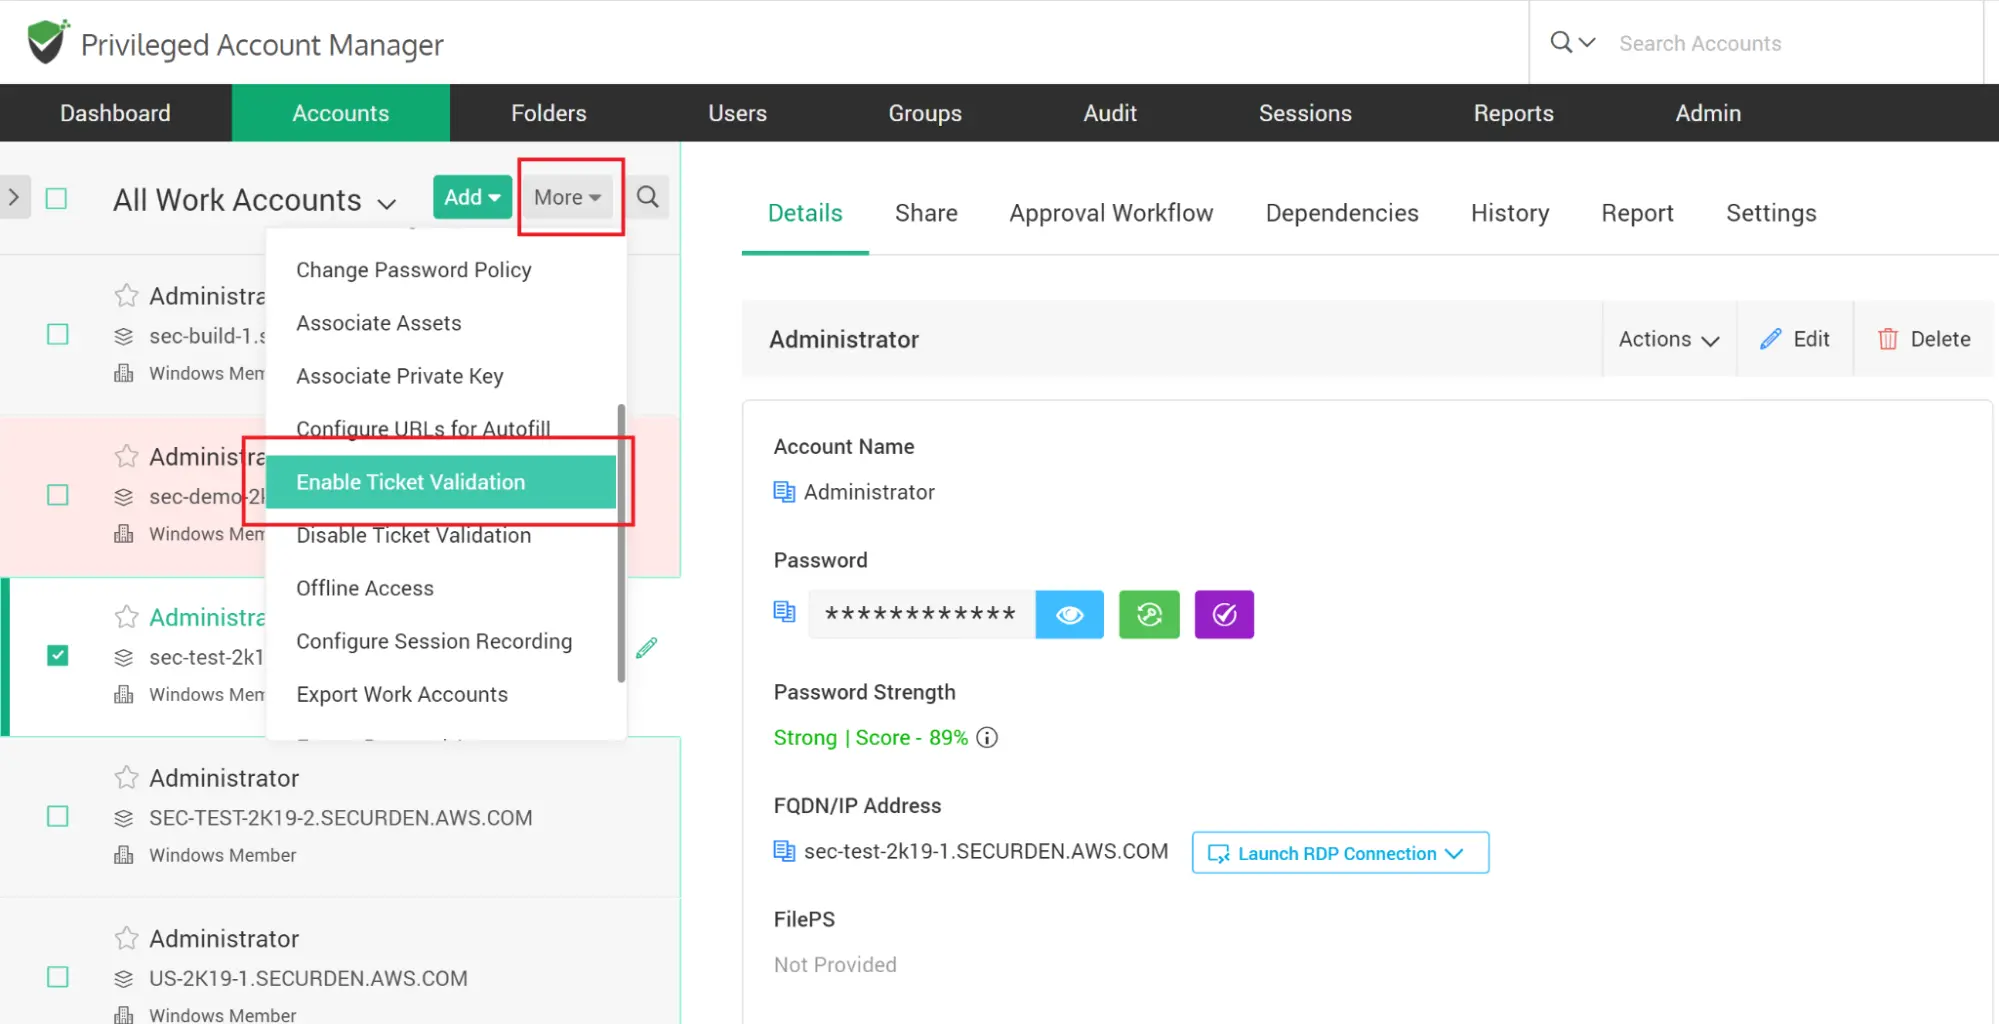
How to Integrate with Ticketing Systems?
Securden integrates with web-based ticketing systems. The integration helps trace specific activities like password retrieval in Securden to corresponding entries in the ticketing system. Securden validates the ticket ID provided by users either by matching the RegEx pattern of the ticket ID or directly accessing the ticketing system through API calls to see if there is a matching ticket found open.
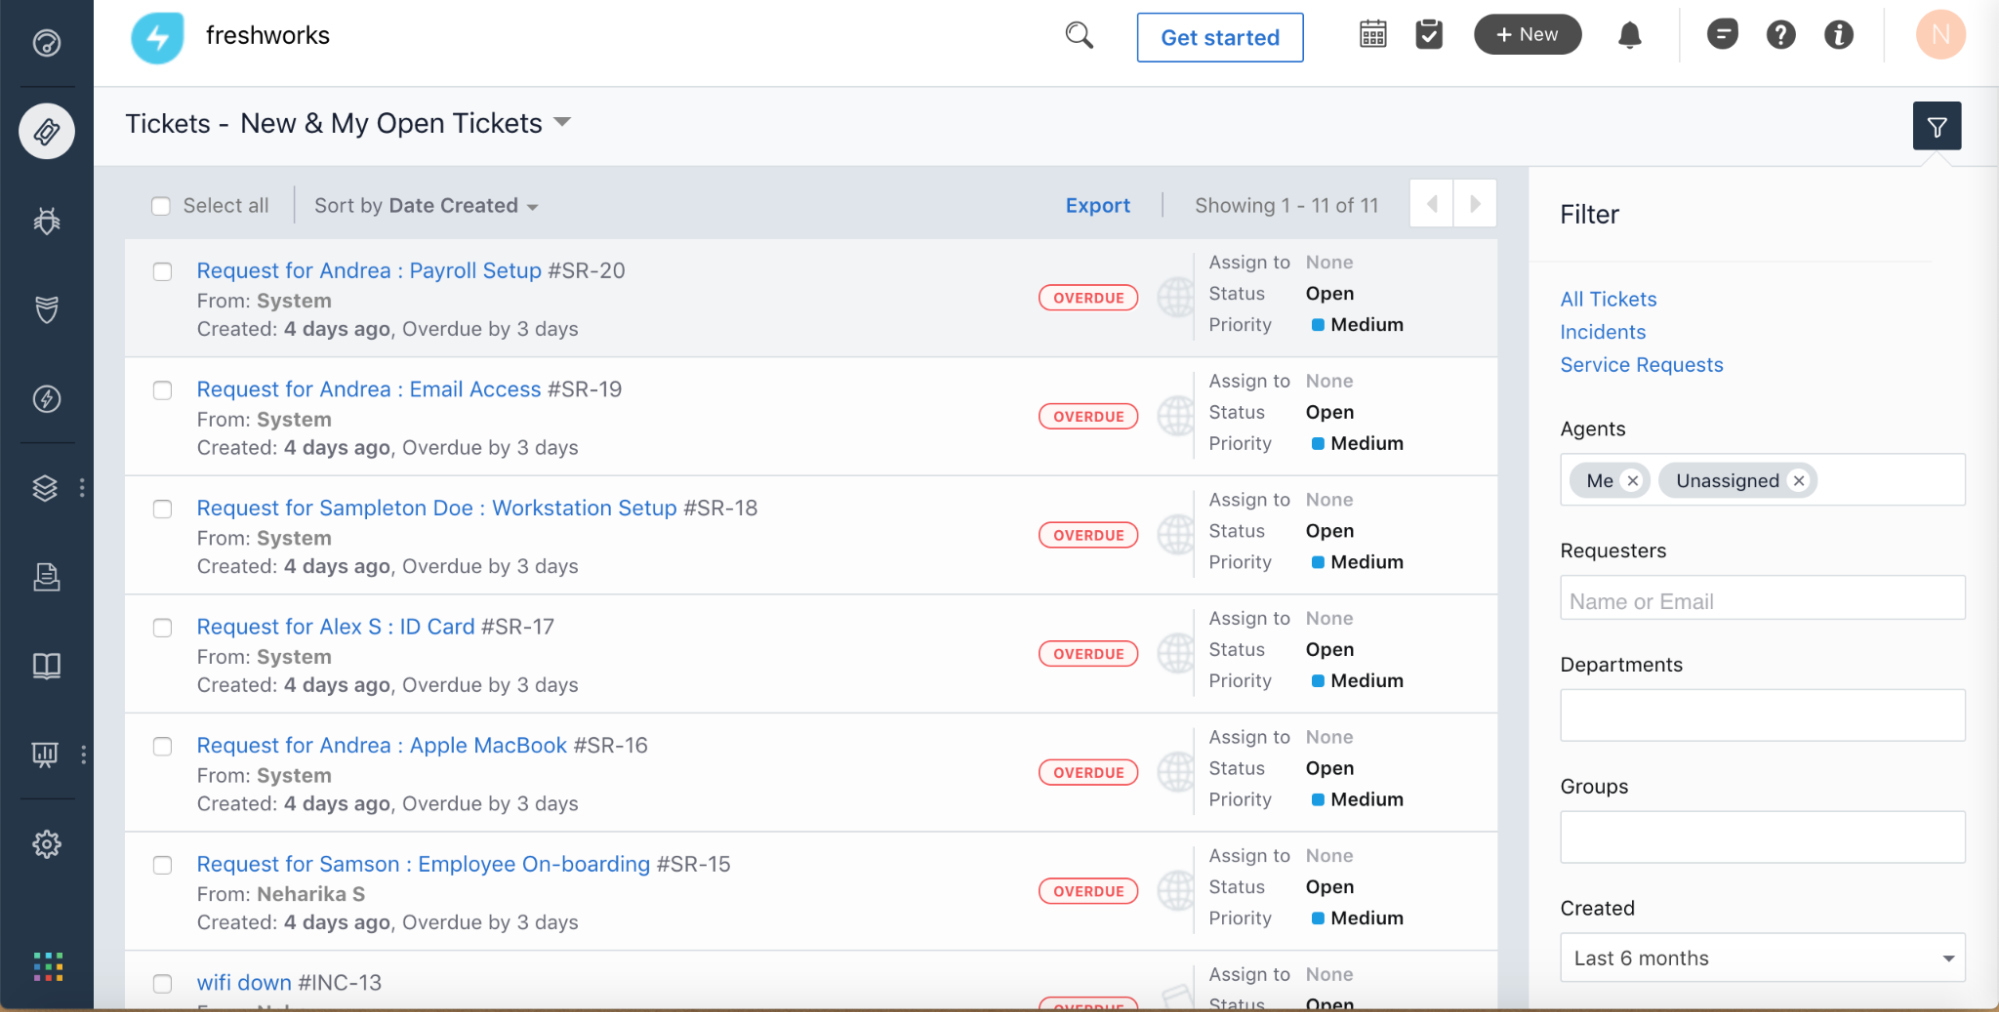
By default, Securden integrates with Freshservice, Zendesk, and ServiceNow. You may integrate any other ticketing system you are using in your organization.
Integration with ticketing system is two-step process:
- Configure the required ticketing system
- Enable/enforce ticket id validation at the account/folder level for the required accounts/folders.
To configure the ticketing system, navigate to Admin >> Integrations >> Ticketing System. In the GUI that opens, move the toggle “Activate Ticketing System” to green.
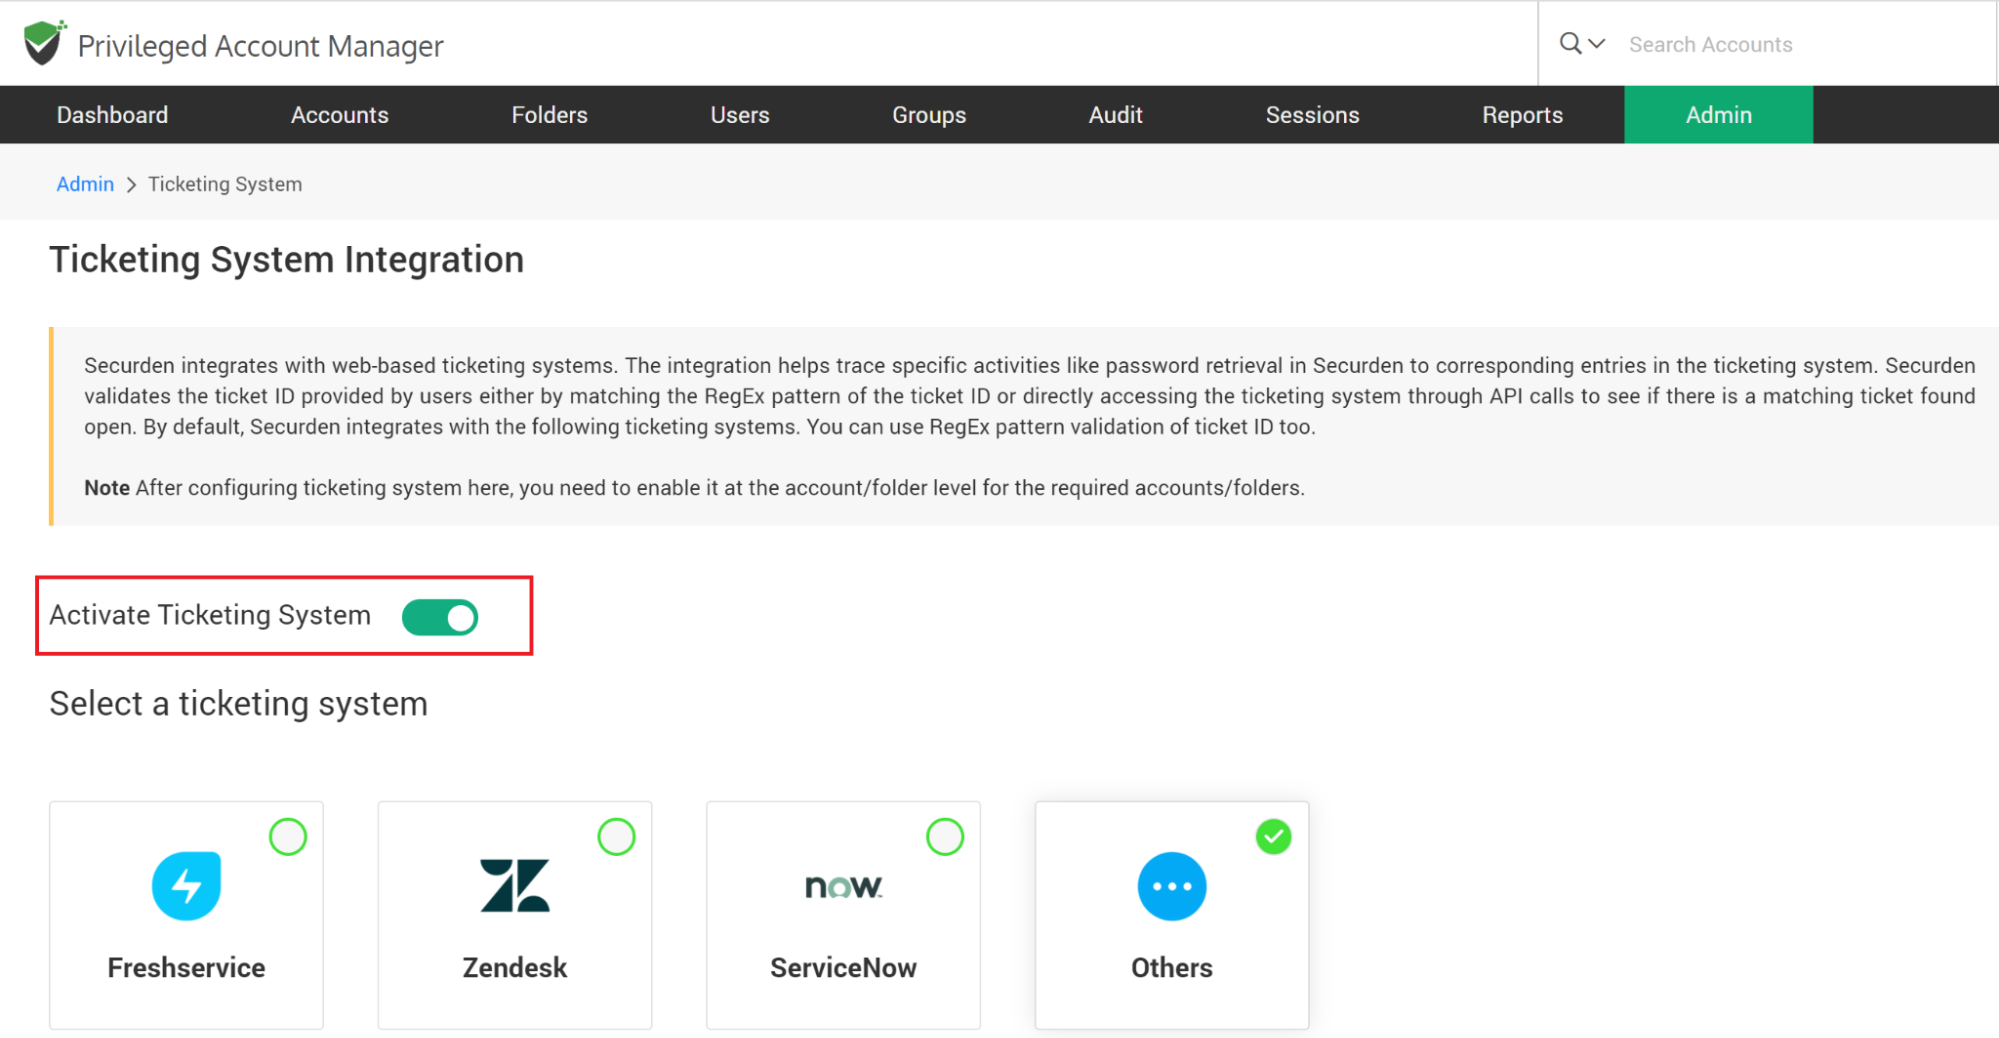
Then, select the ticketing system you want to use. If the one you are using at your organization is not supported out of the box, select ‘Others’ to self-support.
When integrating with the ticketing systems that are supported out-of-the-box - Freshservice, Zendesk, and ServiceNow, the steps involved include specifying the ticketing system connectivity details and defining how Securden should do the ticket validation. There are two options to do this:
- Checking with the ticketing system directly. This requires specifying certain other things like the API key, token, username/password along with the ticketing system URL
- Validating only ticket ID pattern. Securden can validate Ticket IDs by making use of search patterns defined through regular expressions. Once you define the regex, Securden will check the ticket IDs to ascertain if they conform to the pattern specified. For example, if you define the pattern as ^[1-9]+, it will verify if the ticket ID follows a numeric pattern with numbers from 1 to 9. and then Securden checks if it obeys the ticket pattern configured.
The following section explains how to do this each of the ticketing systems:
Freshservice
For information on how to check with the ticketing system directly, visit the following link:
https://support.freshservice.com/support/solutions/articles/50000000306-where-do-i-find-my-api-key-To validate the ticket ID pattern, refer to this article: https://support.freshservice.com/support/solutions/articles/234435-working-with-tickets
Zendesk
For information on how to check with the ticketing system directly, visit the following link: https://support.zendesk.com/hc/en-us/articles/4408889192858-Managing-API-token-access-to-the-Zendesk-API

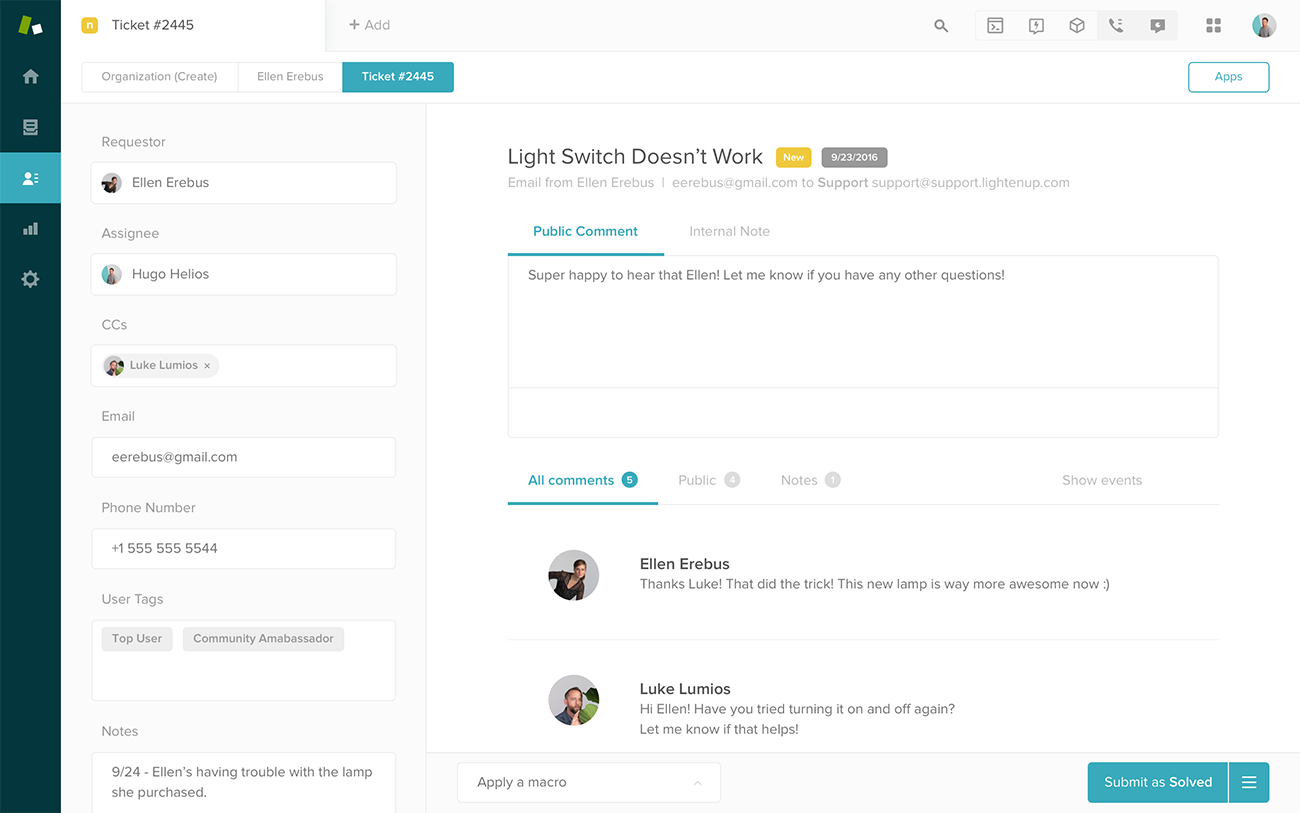
To validate the ticket ID pattern, refer to this article: https://support.zendesk.com/hc/en-us/articles/4408881752346-How-do-I-find-the-ID-of-a-ticket-form
Servicenow
Servicenow requires the username and password to be specified to check with the ticketing system directly. Refer to the article below for more details: https://community.servicenow.com/community?id=community_question&sys_id=ef1ccf25db9cdbc01dcaf3231f9619bb
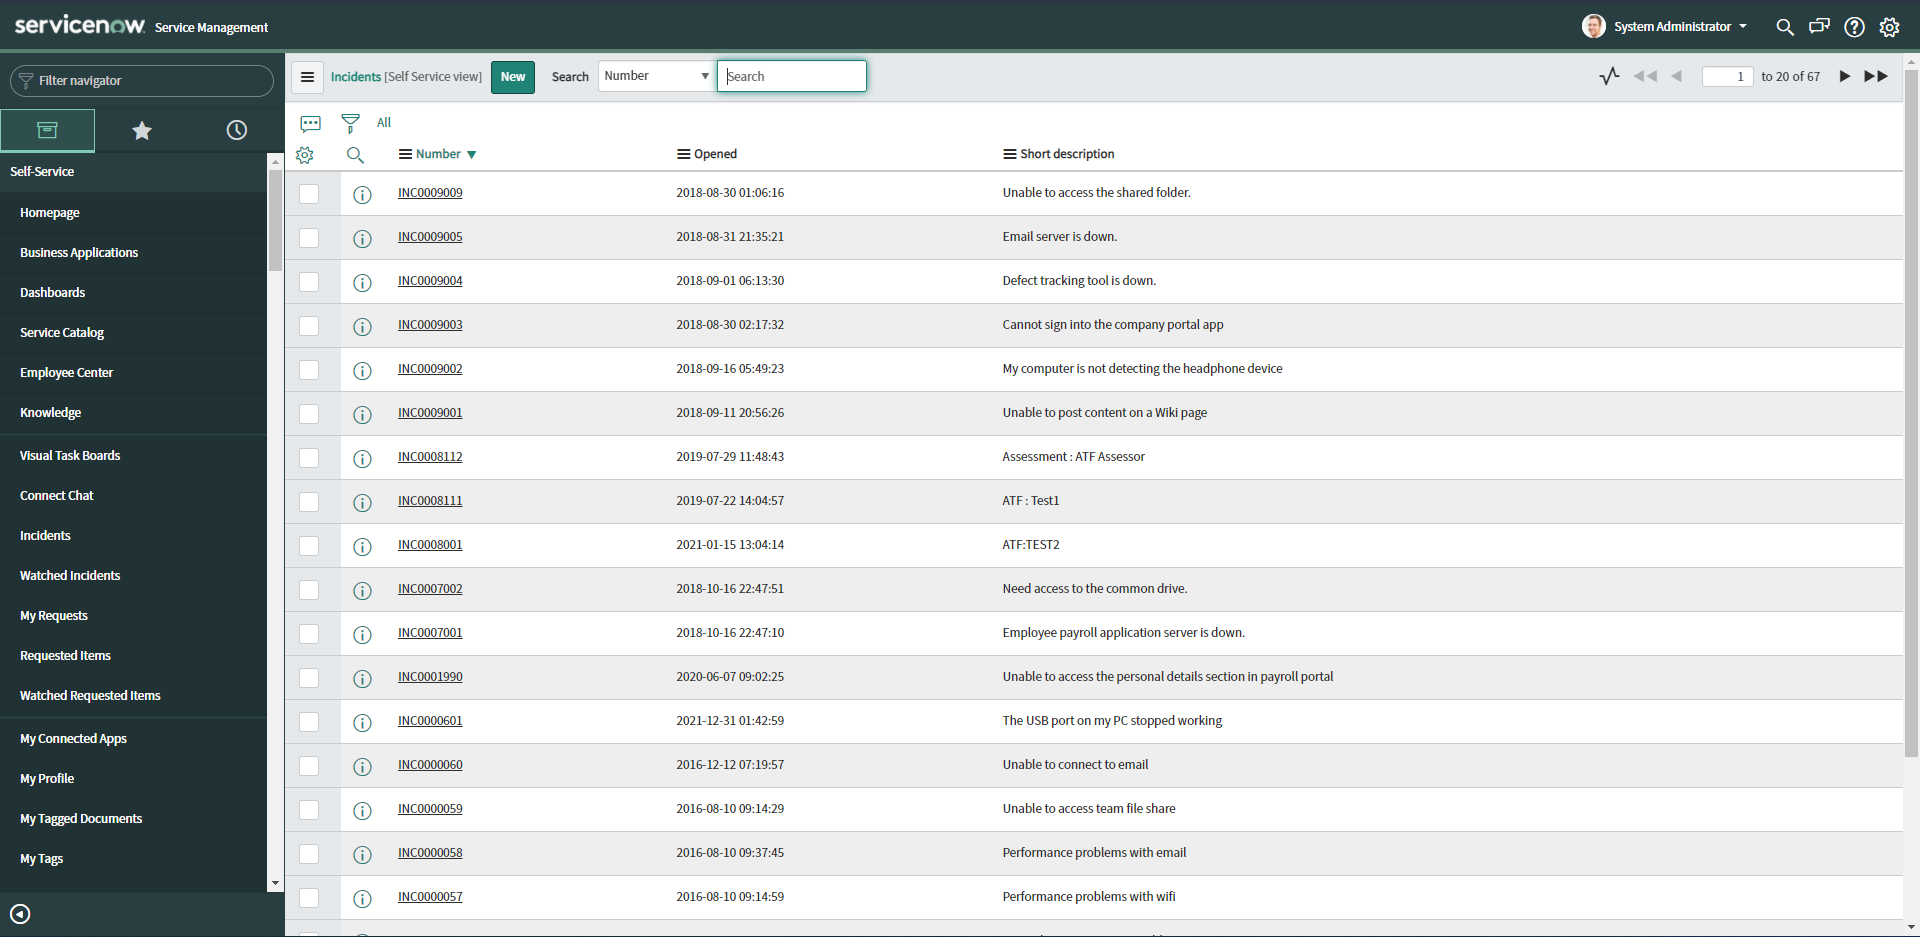
To validate the ticket ID pattern, refer to this article: https://docs.servicenow.com/bundle/paris-servicenow-platform/page/build/service-portal/concept/standard-ticket-page.html
Self-support for other ticketing systems
You can add support for any other ticketing system by clicking the “Others” option. You need to supply the ticketing system URL and the pattern for ticket ID verification.
Securden can validate Ticket IDs by making use of search patterns defined through regular expressions. Once you define the regex, Securden will check the ticket IDs to ascertain if they conform to the pattern specified. For example, if you define the pattern as ^[1-9]+, it will verify if the ticket ID follows a numeric pattern with numbers from 1 to 9. and then Securden checks if it obeys the ticket pattern configured.
“Ticket ID” is the terminology used by Securden. If you are familiar with any other name that refers to ticket identification in your organization, you may use that in the place of “Alternative Label for ticket ID”.
Enforce Ticketing System Verification at Accounts/Folder Level
After configuring the ticketing system here, you need to enable it at the account/folder level for the required accounts/folders. You can do that from Accounts (or Folders) >> Select the Account / Folder >> More Drop-down >> Enable Ticket Validation.