Security Settings in PAM
You can carry out certain security settings to protect the Securden installation and control access to the interface.
How to Monitor Changes in the Domain Admin Group?
Manipulating a domain administrator group such as the 'Domain Admins' could make the organization susceptible to security risks. You can create a scheduled task to get notified if there is any modification to the domain administrator groups.
When new members get added to or removed from the domain administrator groups, you will get notified about the change. Securden can monitor the changes to the domain admin groups of all the Active Directory domains added to the product. You can create a scheduled task to periodically monitor and send notifications.
How to Schedule Notifications?
To Schedule Notifications, Navigate to Admin >> Security >> Domain Administrator Groups section. In the GUI that opens, click the button ‘Schedule Notify’.
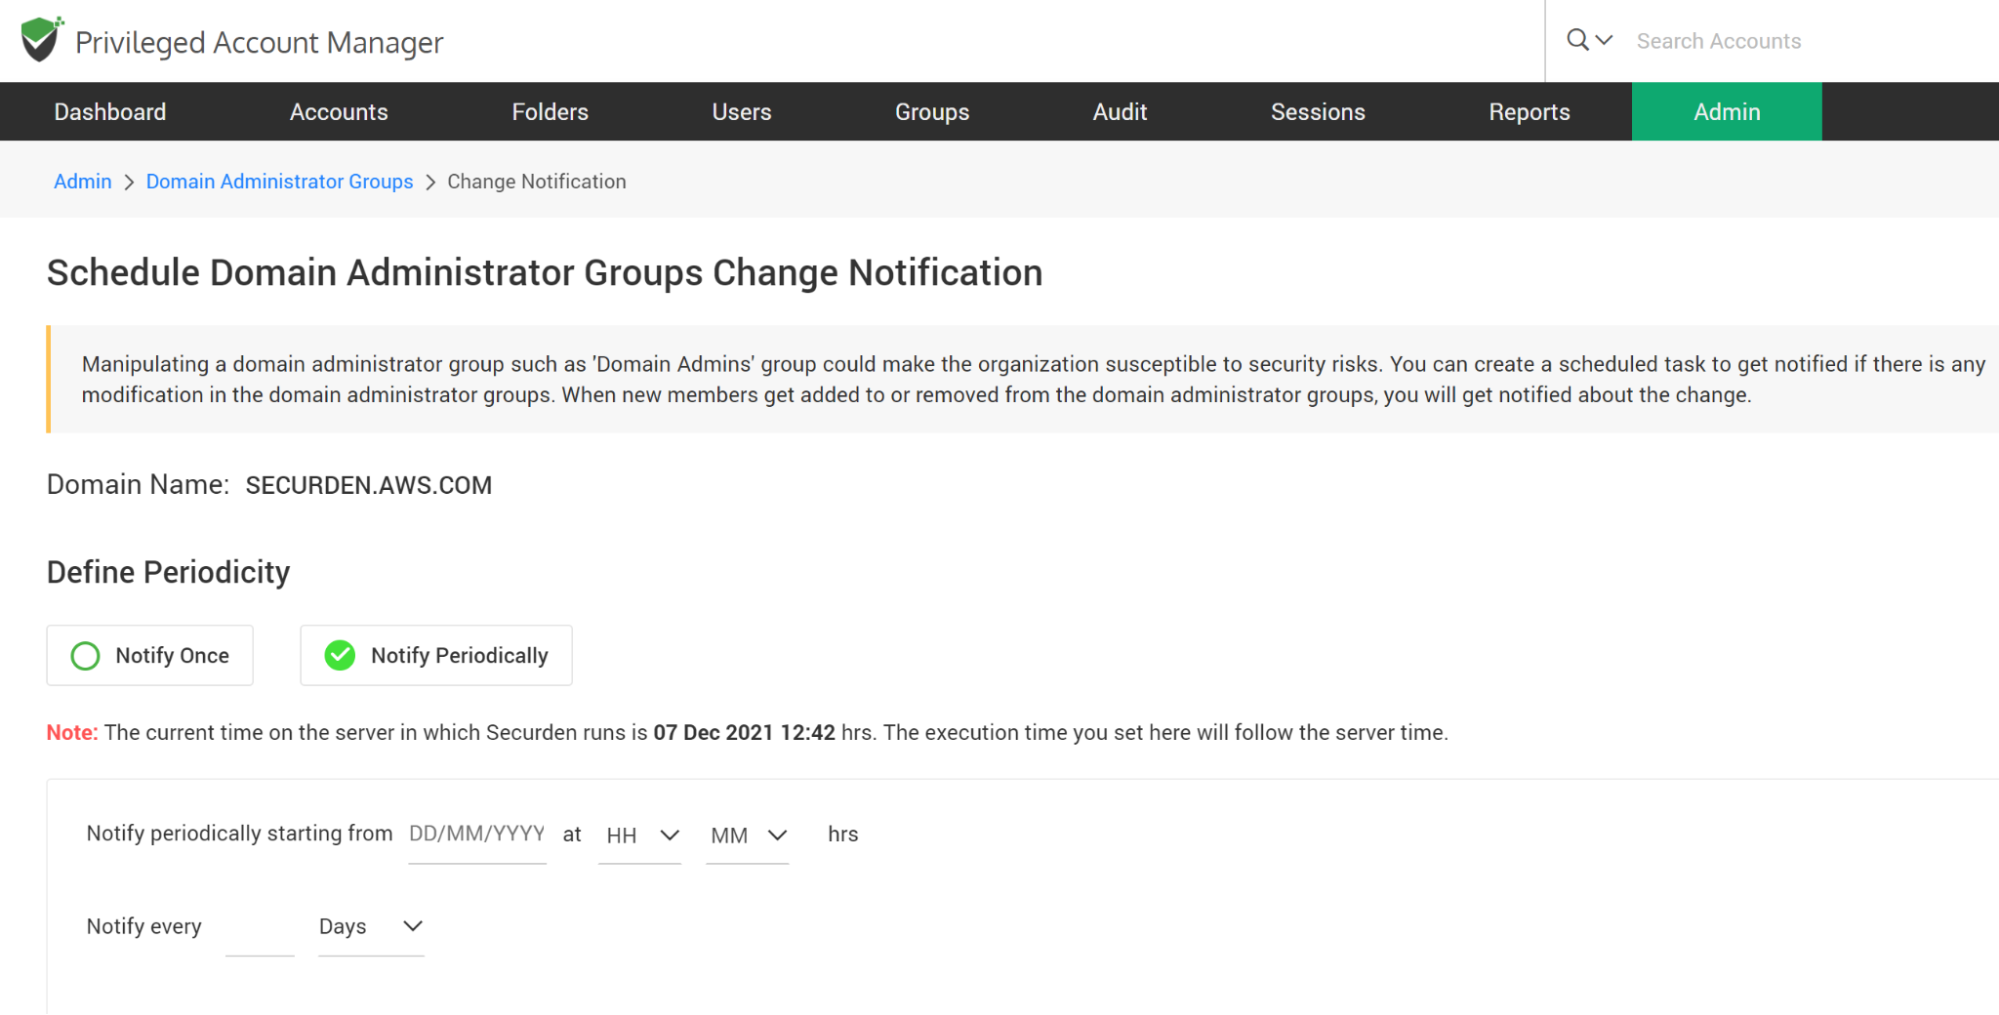
You have two options here - carry out the check once (Notify Once) at the required timeslot and trigger notification (or) carry out the check at periodic intervals (Notify Periodically). Select the required option in the GUI.
You can choose to send notifications to all ‘Administrators’ or all ‘Super administrators’ or to both administrators and super administrators. Select the checkbox as needed. You can even add email addresses directly in comma separated form in the ‘Specific Email Address’ field.
When you navigate to Admin >> Security >> Domain Administrator Groups section in the GUI, it typically shows the list of all administrator groups present in the selected domain. You can click the button “Sync Members” to view the latest data anytime.
As mentioned above, you can monitor the changes to domain admin groups for multiple domains. You can add the domains to be monitored by clicking the button “Add New Domain”.
How to Change the Encryption Key’s Location?
Every installation of Securden is protected with a unique encryption key. By default, this encryption key is located at ∠securden installation folder>/conf/securden.key for evaluation purposes.
Securden doesn’t allow the encryption key and the encrypted data to reside in the same location to ensure security. Hence, the key has to be moved outside the Securden installation folder.
When deploying the product to production, Securden enforces moving the key out of the installation folder.
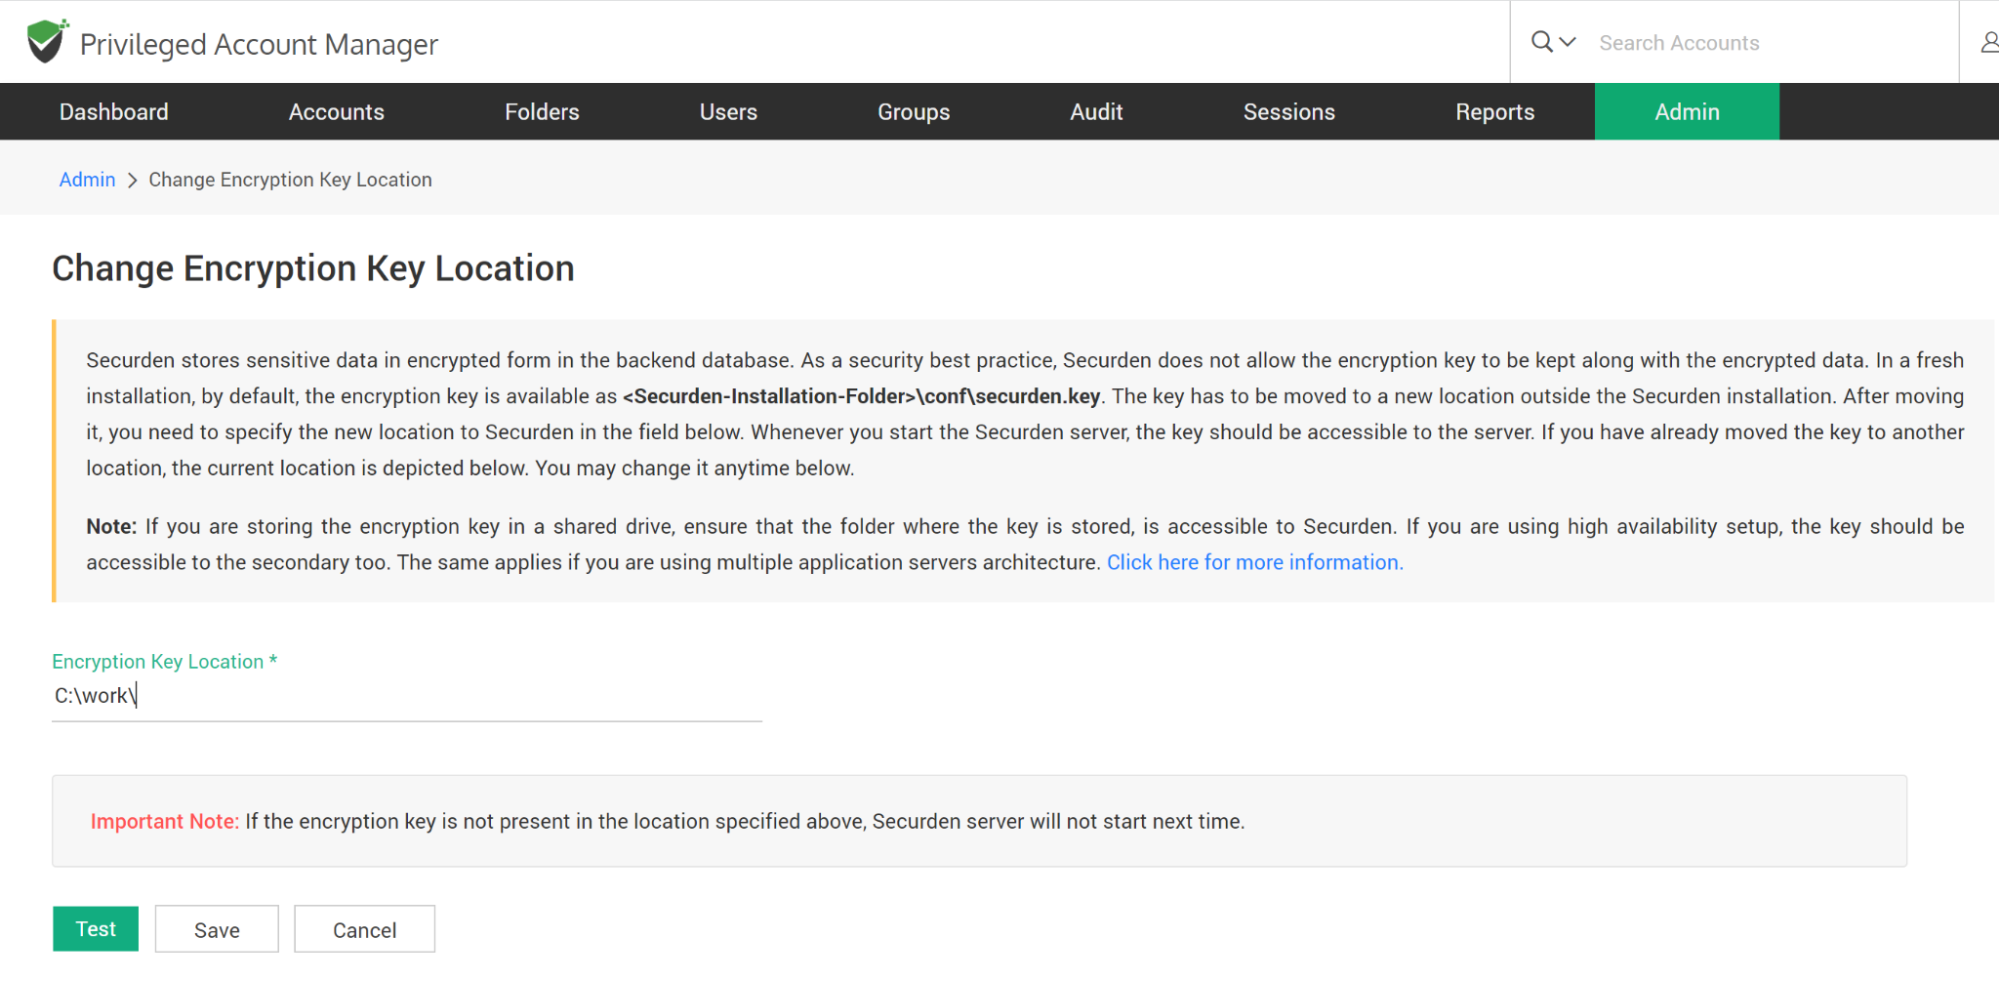
The encryption Key is essential to start the Securden server. If the key is not present in the new location, Securden server won’t start. After moving the key to some other secure location, you need to specify the new location as explained below:
To specify the new location,
- Navigate to Admin >> Security >> Change Key location.
- Specify the location.
- Click ‘Test’ to check whether the key is found in the specified location.
- If the floating screen states “Securden encryption key not found in the path specified”, check if the key is found in the new location.
- If the encryption key was found in the specified location, A floating screen will appear containing a message stating “Encryption key found in the path specified”.
- Click Save.
Note: If the server fails to start, you can view the current location of the encryption key by opening the Securden_key.location file using any text editor. This file is located at ∠Securden Installation folder>/conf/Securden_key.location. You need to have the encryption key in the location specified in this file for the Securden server to start.
How to Enforce/Impose IP Address Restrictions?
Securden gives you the option to control and restrict access to Securden Server based on the user’s IP address. You can either enter specific IP addresses or an IP range that is allowed or denied. Users belonging to the locations or networks that fall only under allowed IP addresses or range will be able to access Securden.
Enable IP Restrictions
To Enable IP Restrictions, navigate to Admin >> Security >> IP Address Restrictions >> Enable IP Restrictions and move the toggle “Enable IP Restrictions” to green.
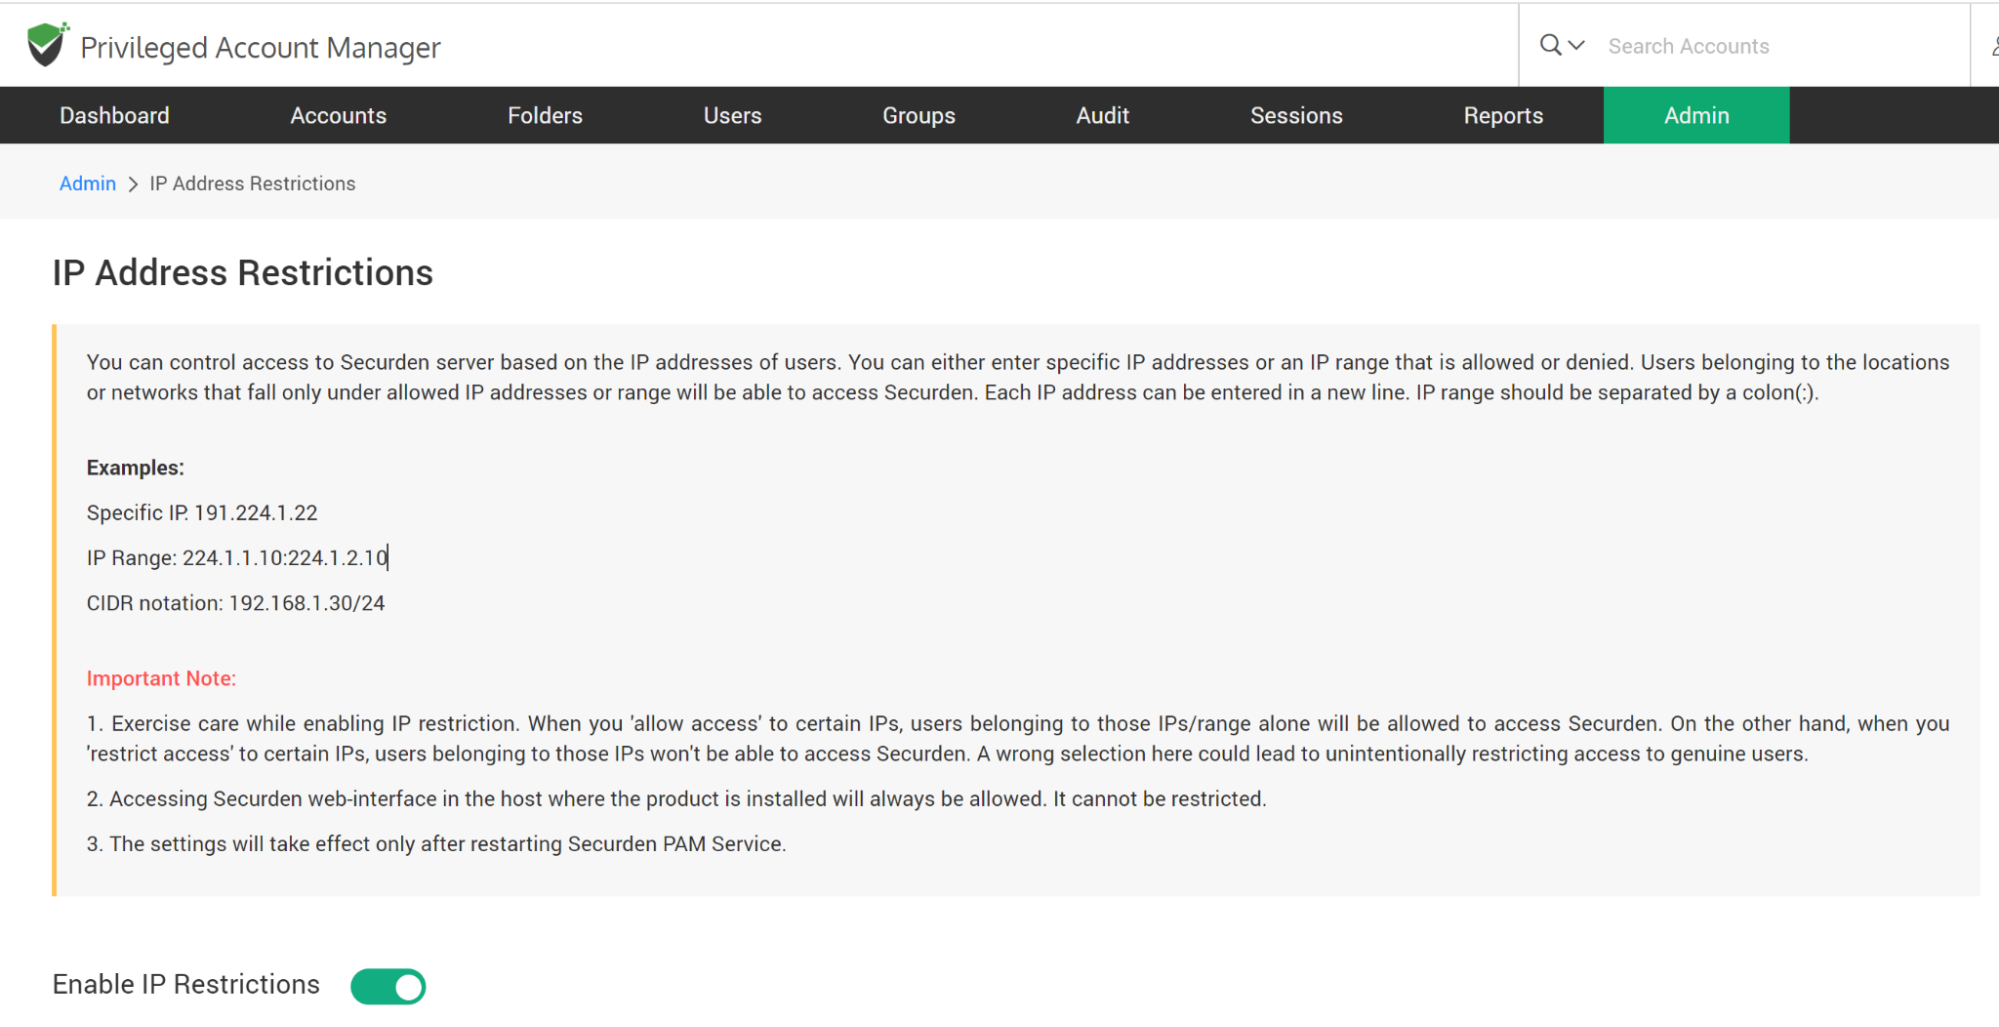
- Here you choose either to allow access or to restrict access.
- Enter one or multiple IP addresses. Each IP address can be entered in a new line. IP range should be separated by a colon(:).
Examples:
Specific IP: 191.224.1.22
IP Range: 224.1.1.10:224.1.2.10
CIDR notation: 192.168.1.30/24
Note:
- Exercise care while enabling IP restriction. When you allow access to certain IPs, users belonging to those IPs/ranges alone will be allowed to access Securden. On the other hand, when you restrict access to certain IPs, users belonging to those IPs won't be able to access Securden. A wrong selection here could lead to unintentionally restricting access to genuine users.
- Accessing the Securden web interface in the host where the product is installed will always be allowed. It cannot be restricted.
Finally, click “Save”. The settings will take effect only after restarting Securden PAM Service.
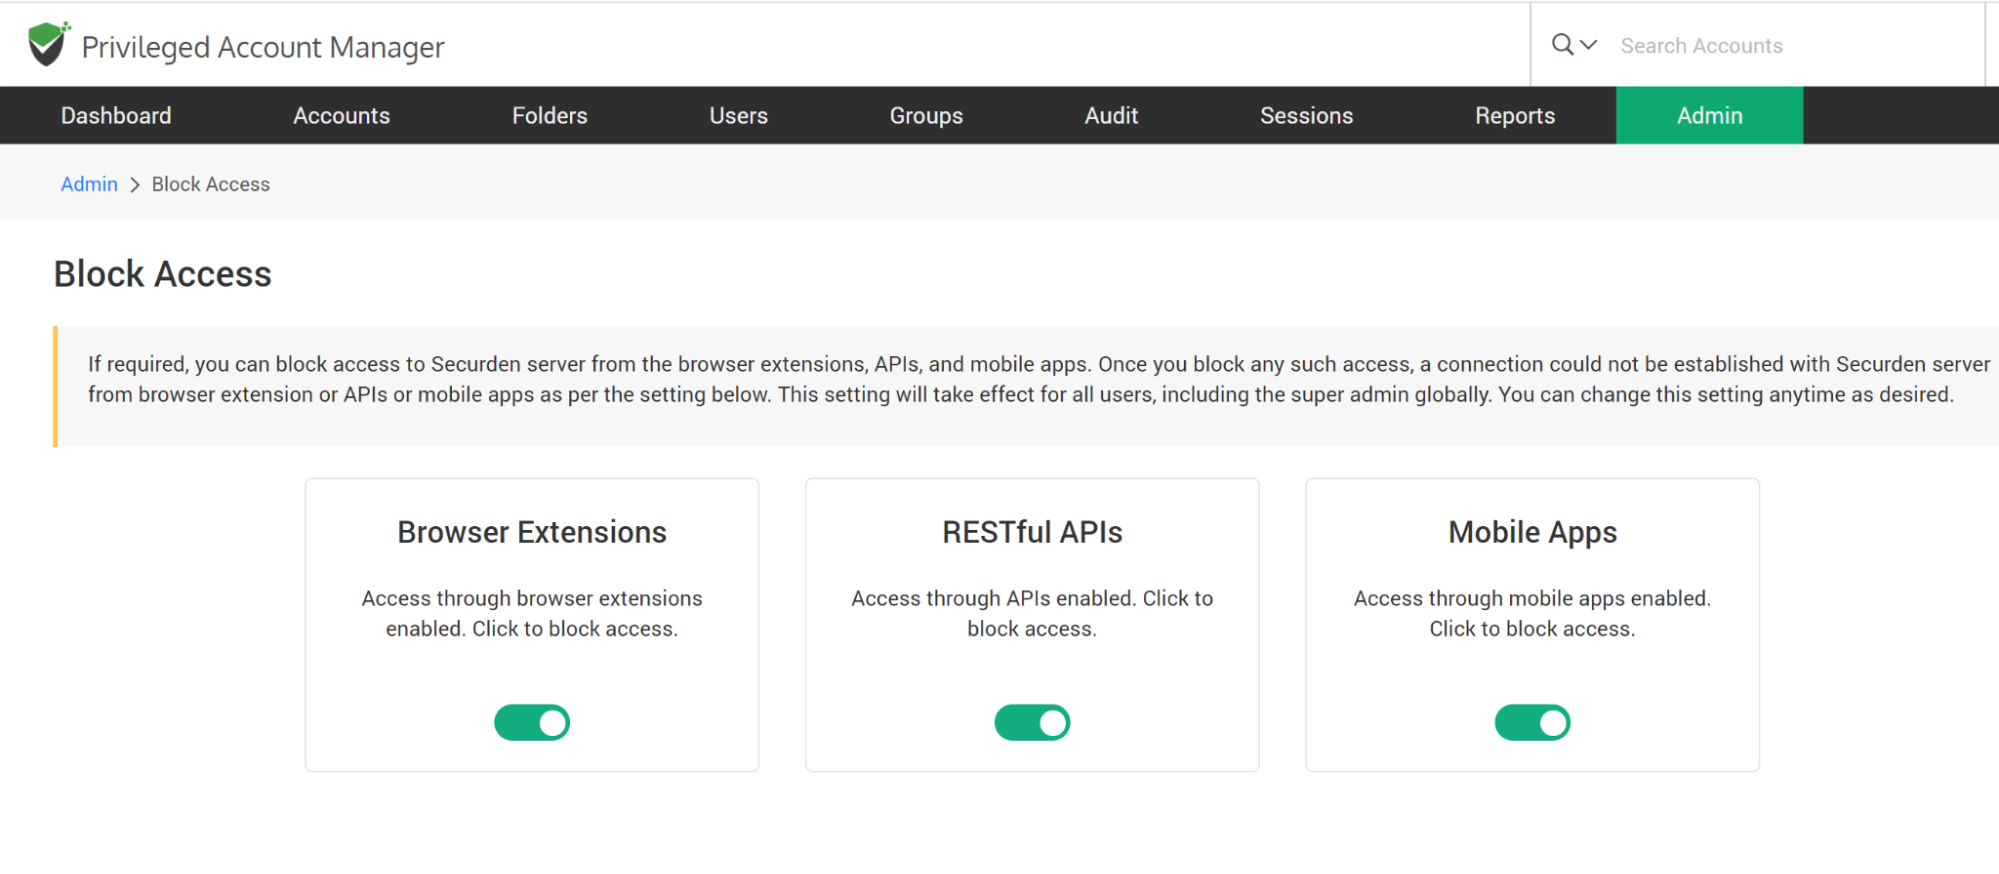
How to Block, Restrict Access from APIs, Mobile Devices, and Extensions.
Securden allows you to block and filter access to its server from extensions, API, and mobile applications. Once you block any such access, a connection could not be established with the Securden server from browser extension or APIs or mobile apps as per the setting below. This setting will take effect for all users, including the super admin globally. You can change this setting anytime as desired.
To block access, navigate to Admin >> Security >> Block Access. You can block access through browser extensions, APIs, or mobile apps by moving the green toggle to red.
You can change this setting anytime as required.
