How to Configure Two-Factor Authentication in Securden PAM
For enhanced security, you can enforce the second layer of authentication for your users to access Securden. Users will have to authenticate through two successive stages. Securden integrates with a wide range of Two Factor Authentication (TFA) mechanisms and you may integrate with the one that suits you best.
Configuring TFA is a three step process:
- Activate TFA
- Select required TFA option and configure
- Configure the enforcement option
Configure TFA
To configure TFA, navigate to Admin >> General >> Two Factor Authentication in the GUI.
Activate TFA
The first step in configuring TFA is to activate the option. Move the “Activate Two Factor Authentication” toggle to green.
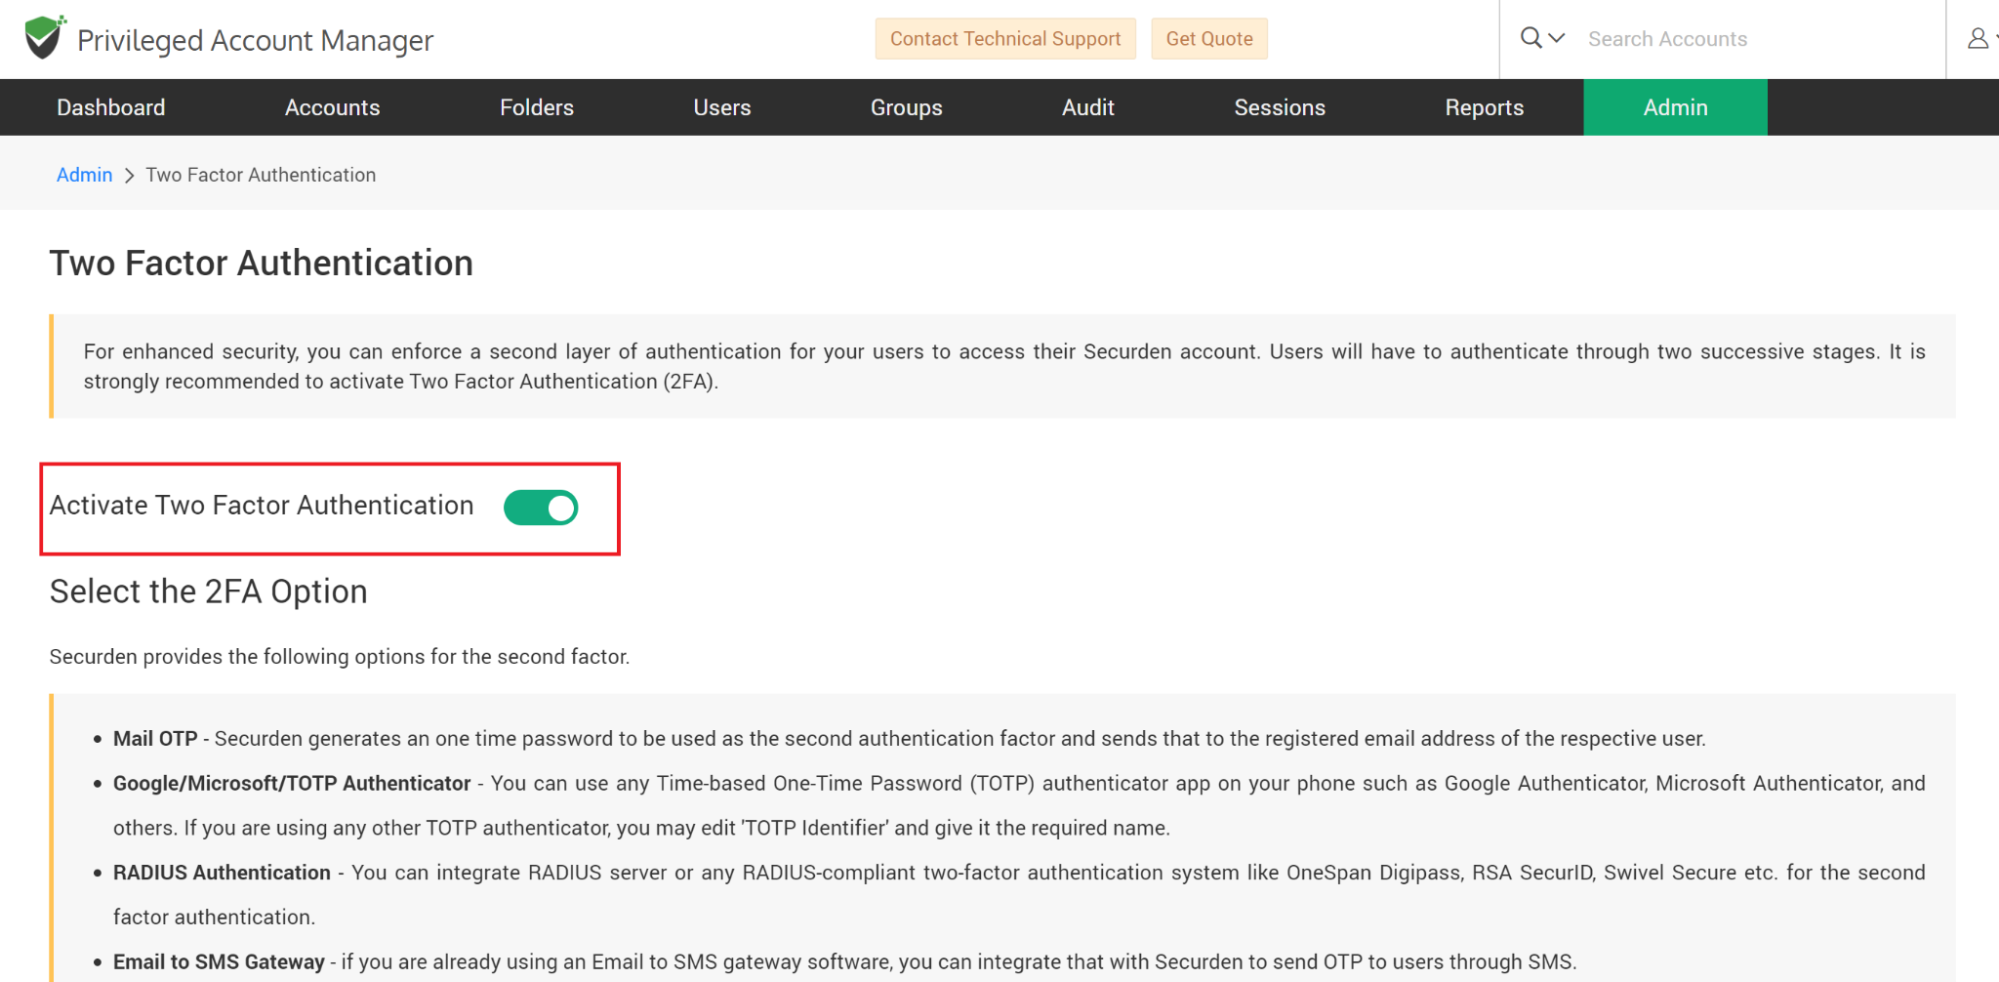
How to Configure 2FA in PAM
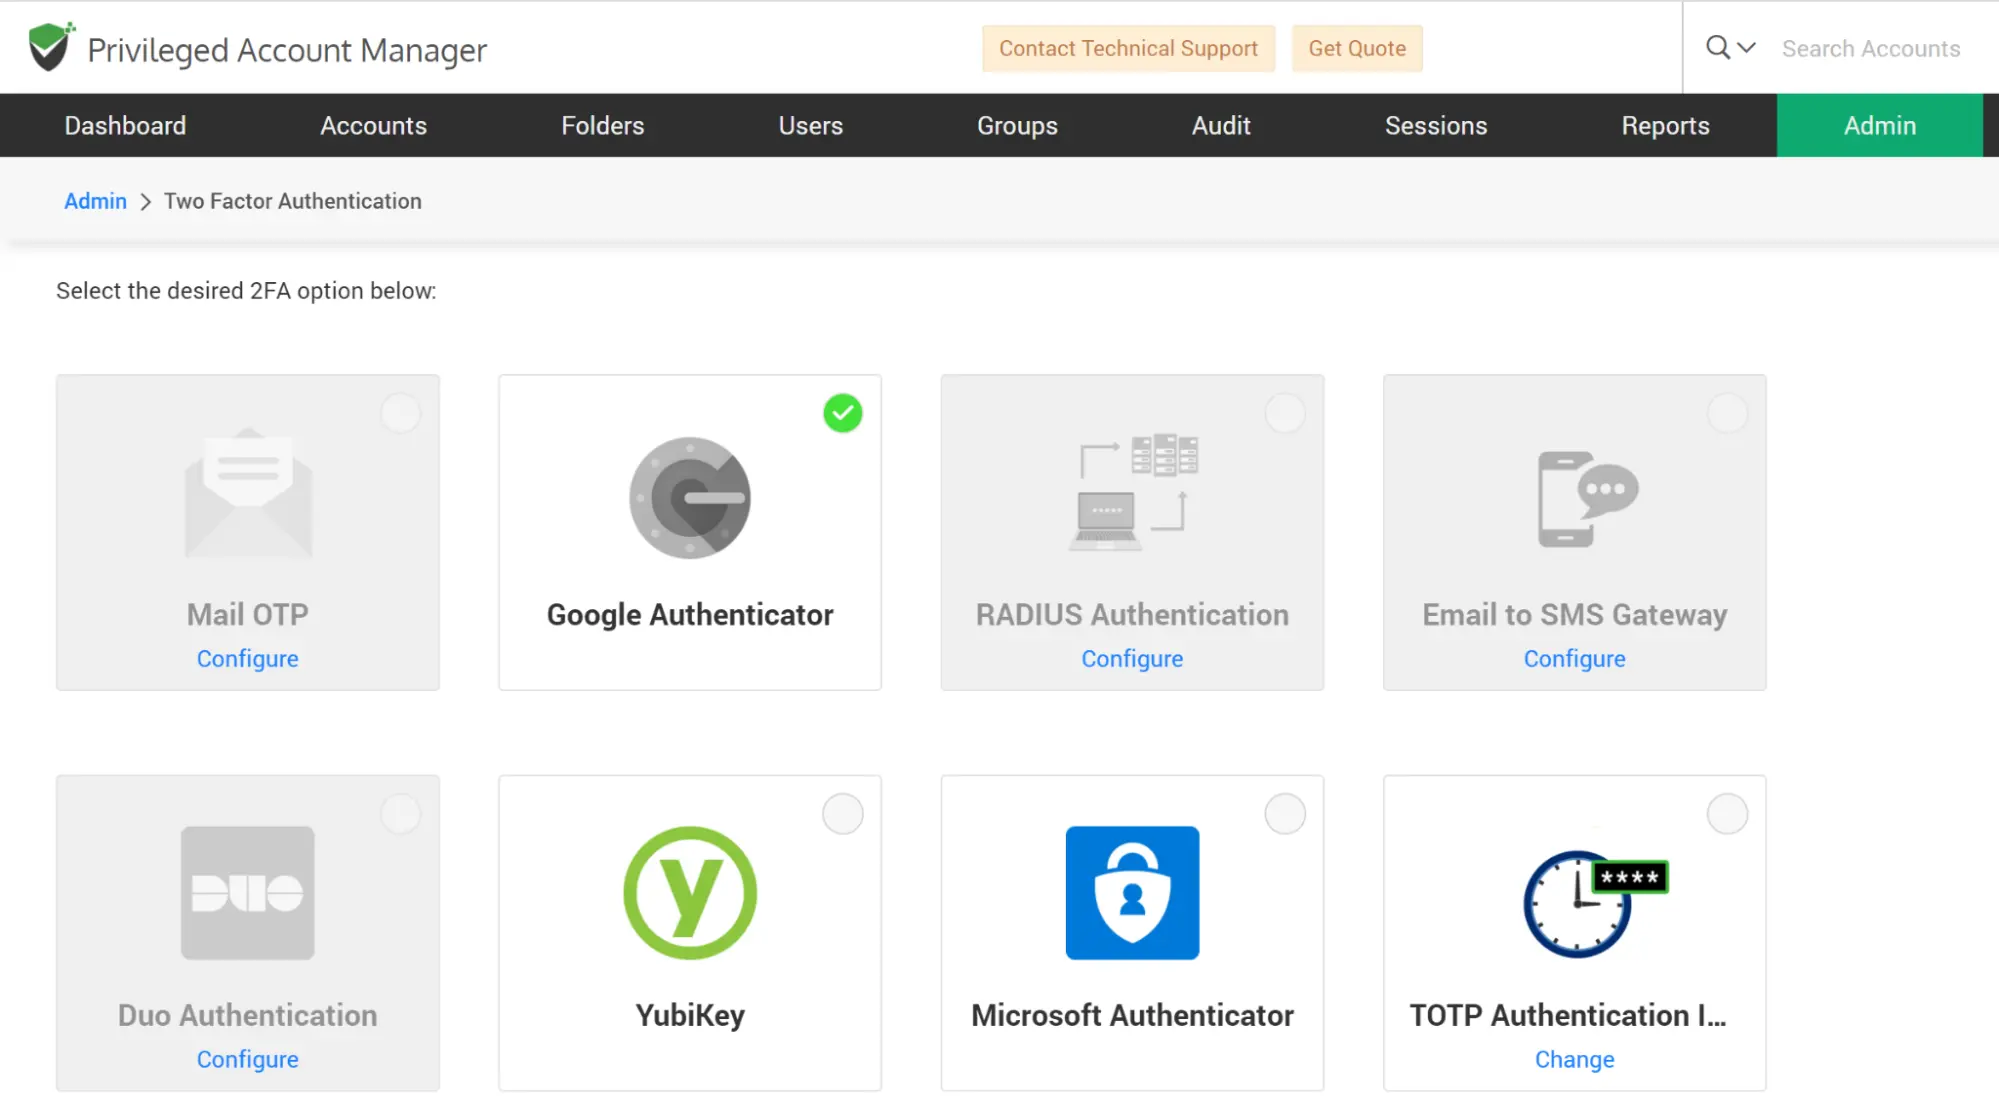
The next step is to select the required TFA option from the various supported options.
At present, Securden supports:
- Mail OTP - Securden generates a one-time password to be used as the second authentication factor and sends that to the registered email address of the respective user.
- Google/Microsoft/TOTP Authenticator - You can use any Time-based One-Time Password (TOTP) authenticator app on your phones such as Google Authenticator, Microsoft Authenticator, and TOTP authenticator. If you are using any other TOTP authenticator, you may edit the 'TOTP Identifier' and give it the required name.
- RADIUS Authentication - You can integrate the RADIUS server or any RADIUS-compliant two-factor authentication system like OneSpan Digipass, RSA SecurID, etc. for the second-factor authentication.
- Email to SMS Gateway - if you are already using an Email to SMS gateway software, you can integrate that with Securden to send OTP to users through SMS.
- Duo Security Authentication
- YubiKey Authentication
Configuring Two-Factor Authentication
Once you select the required TFA option, you need to configure it.
How to Configure OTP through Email for TFA
Securden generates an OTP and emails it to the user who tries to login. This option requires that email addresses are associated with all users and also the ‘Mail Server Setting’ is configured. This OTP sent through the email will only be valid for the current session and expires when the user logs out.
To configure Mail OTP for TFA:
- Navigate to Admin >> Authentication >> Two-Factor Authentication
- Select Mail OTP as your option
How to Use Google/Microsoft/TOTP Authenticator as your 2FA Method
TOTP authenticators like Google Authenticator, Microsoft Authenticator, and others provide a six-digit code to authenticate the second level of access. Users just need to have the Google Authenticator/Microsoft Authenticator/TOTP Authenticator app on your mobile phones or tablet devices.
To use Google/Microsoft/TOIP Authenticator as your 2FA method,
- Navigate to Admin >> Authentication >> Two-Factor Authentication.
- Choose any of the options ‘Google Authenticator/ Microsoft Authenticator / TOTP Authenticator’.
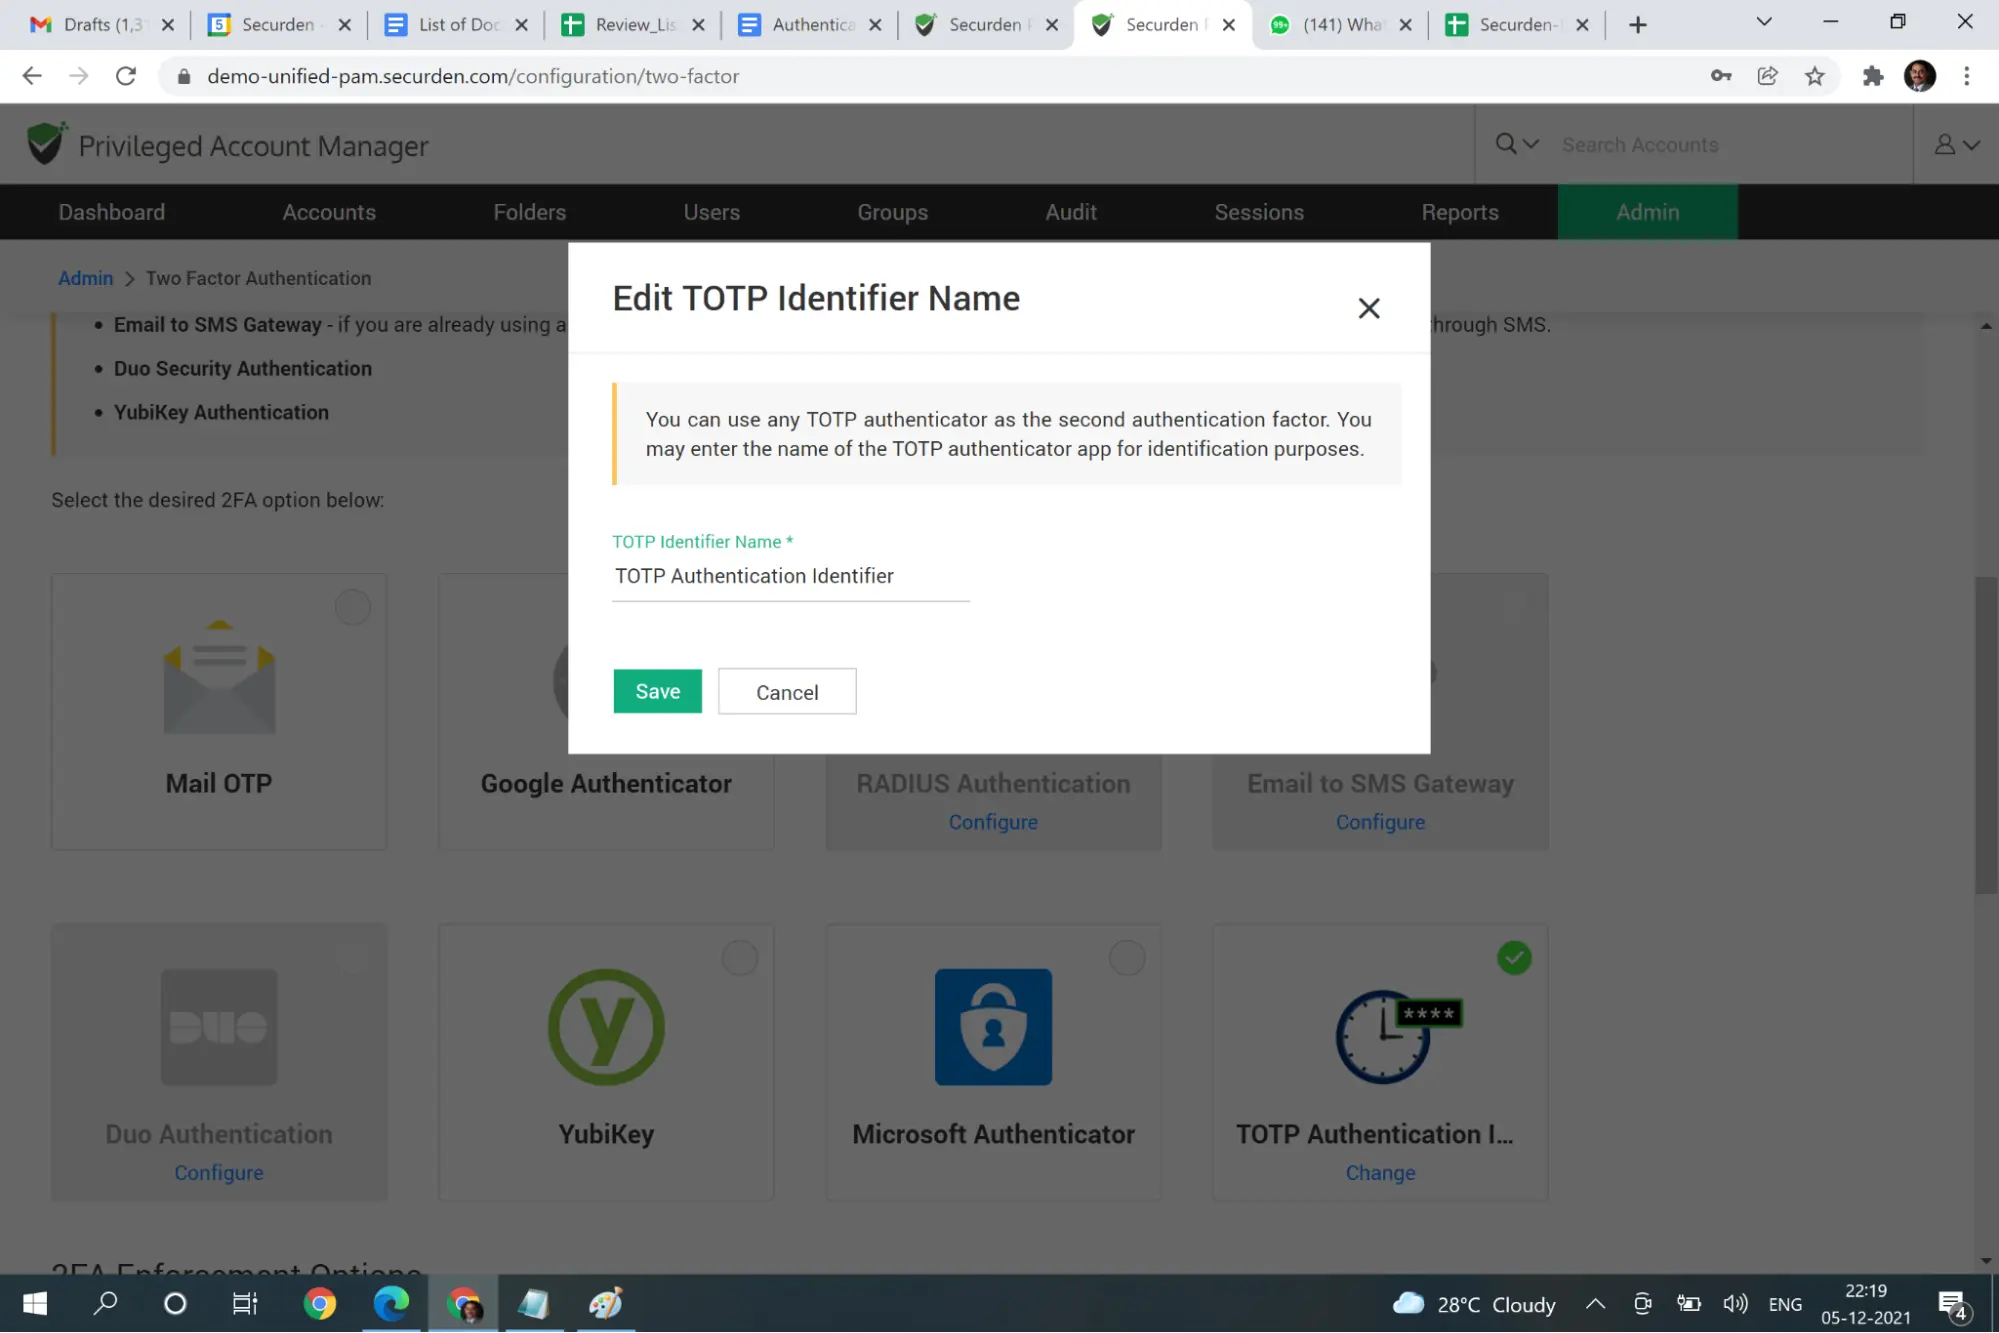
Self-support any TOTP Authenticator
If you are using any other TOTP authentication mechanism, you may self-support it by configuring the TOTP authentication Identifier. When you click that, you will be prompted to enter an identifier name. Enter the name of your TOTP authentication mechanism and click save.
How to Configure the RADIUS Server as the 2FA Mechanism
You can integrate RADIUS server or any RADIUS-compliant two-factor authentication system like OneSpan Digipass, RSA SecurID, Swivel Secure etc. for the second factor authentication. You need to configure RADIUS server details for the integration to take effect.
To configure RADIUS server,
Navigate to Admin >> Authentication >> Two-Factor Authentication and click the “Configure” on “RADIUS Authentication”. In the ‘RADIUS Server Settings’ page that opens up, you need to enter the following details:
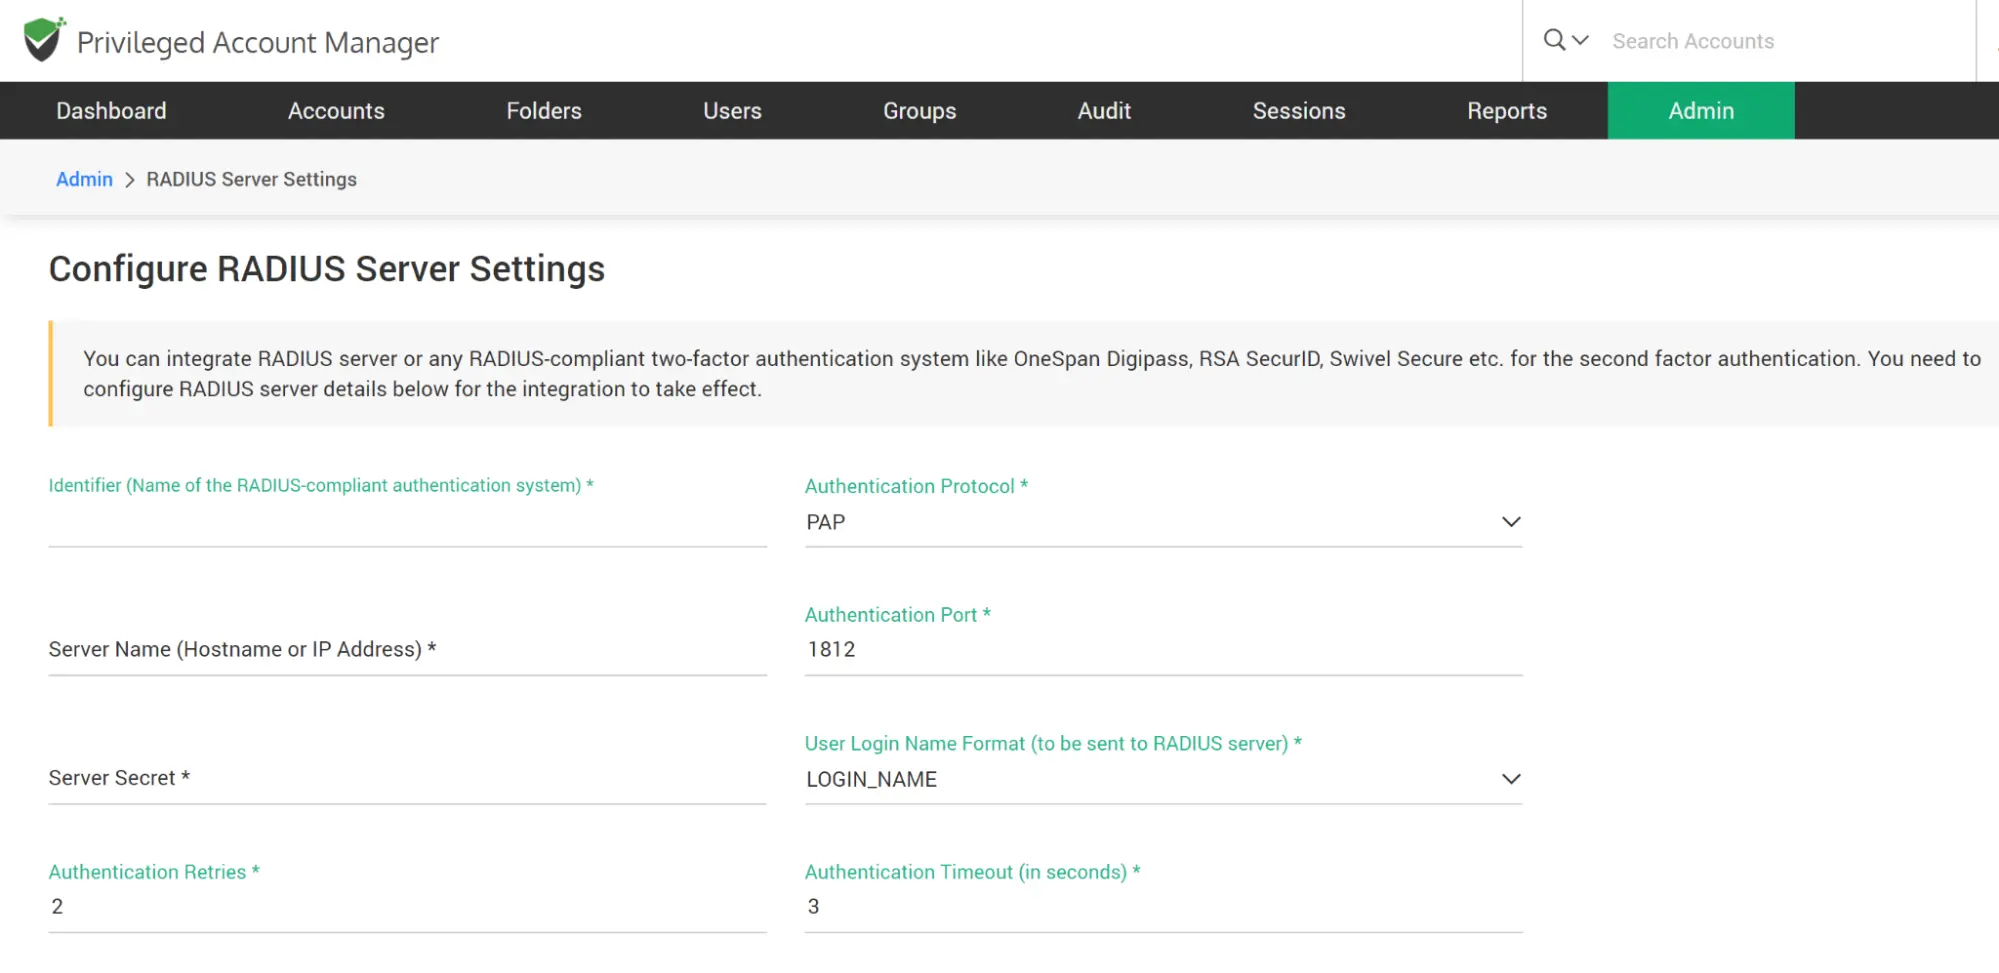
- Identifier - Name of the RADIUS-compliant authentication mechanism you are trying to integrate. The name you enter here will appear on the Securden login screen.
- Servername - The hostname or IP Address of the RADIUS server
- Server Secret - The secret key that RADIUS clients use to access the RADIUS server
- Authentication Retries - The maximum number of times Secrden must try to authenticate with the RADIUS server
- Authentication Protocol - Select the authentication method from the list of supported protocols PAP, CHAP, MS-CHAP, MS-CHAPv2
- Authentication Port - Enter the RADIUS server port (1812 by default)
- User Login Format - The specific format in which the user would enter the login name. This format will be sent to the RADIUS server for authentication. You can select one of the predefined formats or add a new one.
- Authentication timeout (in seconds): The maximum time after which the authentication attempt times out.
After entering the details, click “Save” and you may check RADIUS authentication once.
How to Configure the Email to SMS Gateway as the 2FA Mechanism
As part of two-factor authentication, Securden integrates with Email to SMS gateway providers (like ClickSend) to send one-time passwords as SMS to the phone numbers of the users. If you are using any such service, you may integrate that with Securden. You need to ensure that all your users have phone numbers added in Securden with the country code. Otherwise, OTP cannot be sent as SMS.
To configure Email to SMS Gateway as an option,
- Navigate to Admin >> Authentication >> Two-Factor Authentication
- Click on ‘Configure’ on the ‘Email to SMS Gateway’ option.
- Enter the ‘Display Name’ of the service provide you are integrating.
- Enter the domain name of your Email SMS service provider here. For example, if you are using ClickSend, its domain name has to be entered as sms.clicksend.com. In general, the service provider's domain name appears after the @ symbol in the following format: ∠Mobile Number>@serviceprovider-domain-name.
- Adding the country code to the phone numbers is an important requirement. You enter the code in the textfield and direct Securden to prefix it.
- Click ‘Save’
How to Configure Duo Authentication as the 2FA Mechanism
Securden PAM integrates with Duo Security for two-factor authentication. Once configured, users will be enforced to authenticate through Duo for accessing the web interface.
Prerequisite: Before proceeding with the configuration steps in Securden, you need to carry out a few steps at Duo security for enabling the integration with Securden. Once you complete the steps in Duo, you will get an integration key, secret key, and API hostname, which you need to supply in the Securden interface.
Configurations in Duo
- You should have an account with Duo and log into the Duo Admin Panel. Securden has to be added as a new application.
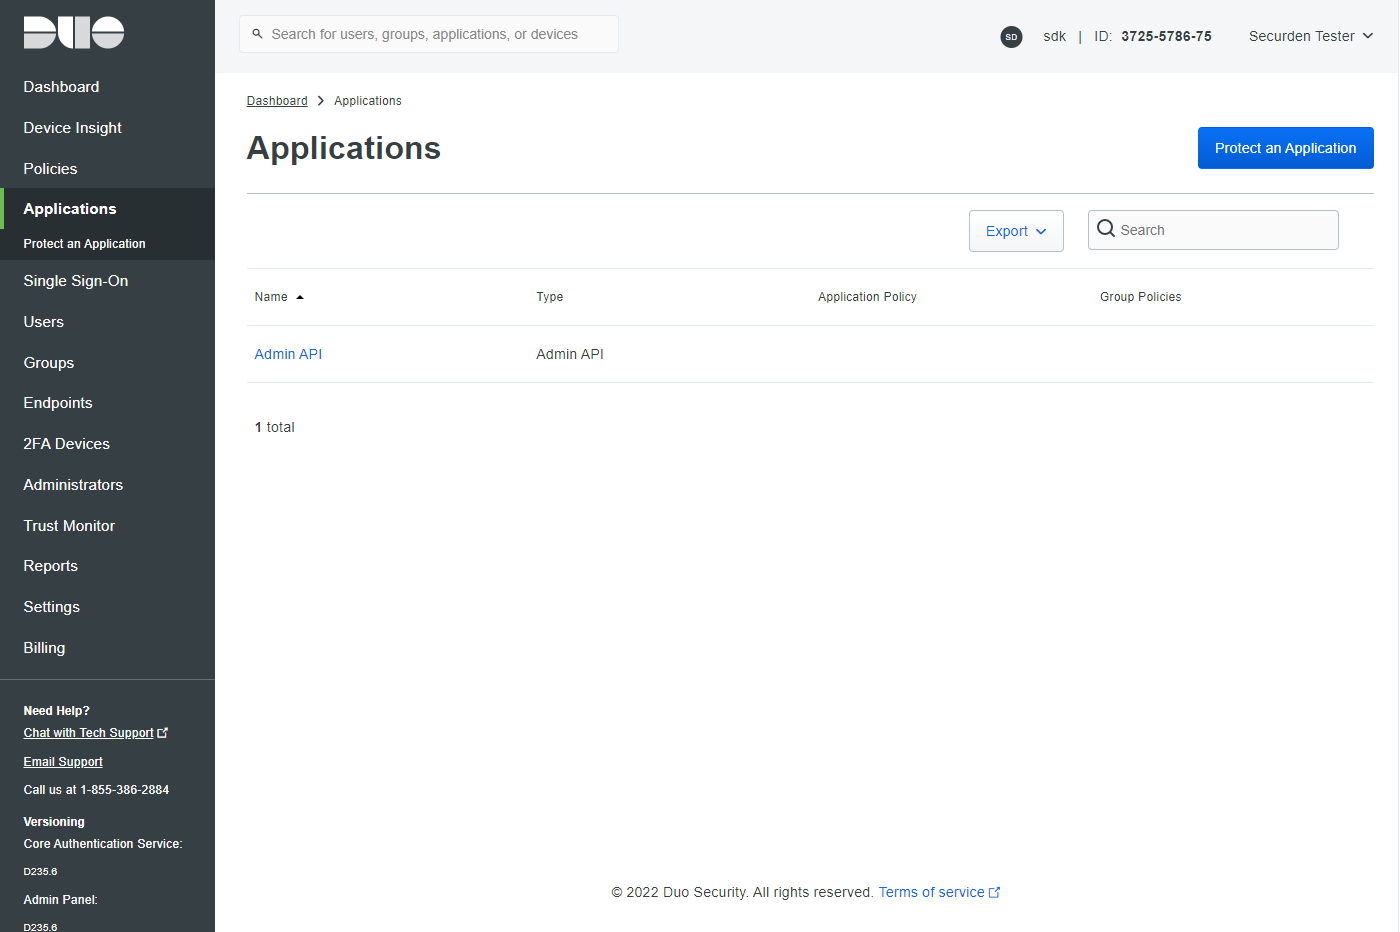
- Click Applications in the left sidebar, and in the GUI that opens, click the ‘Protect an Application' button. Alternatively, you can click the ‘Protect an Application’ submenu item in the left sidebar.
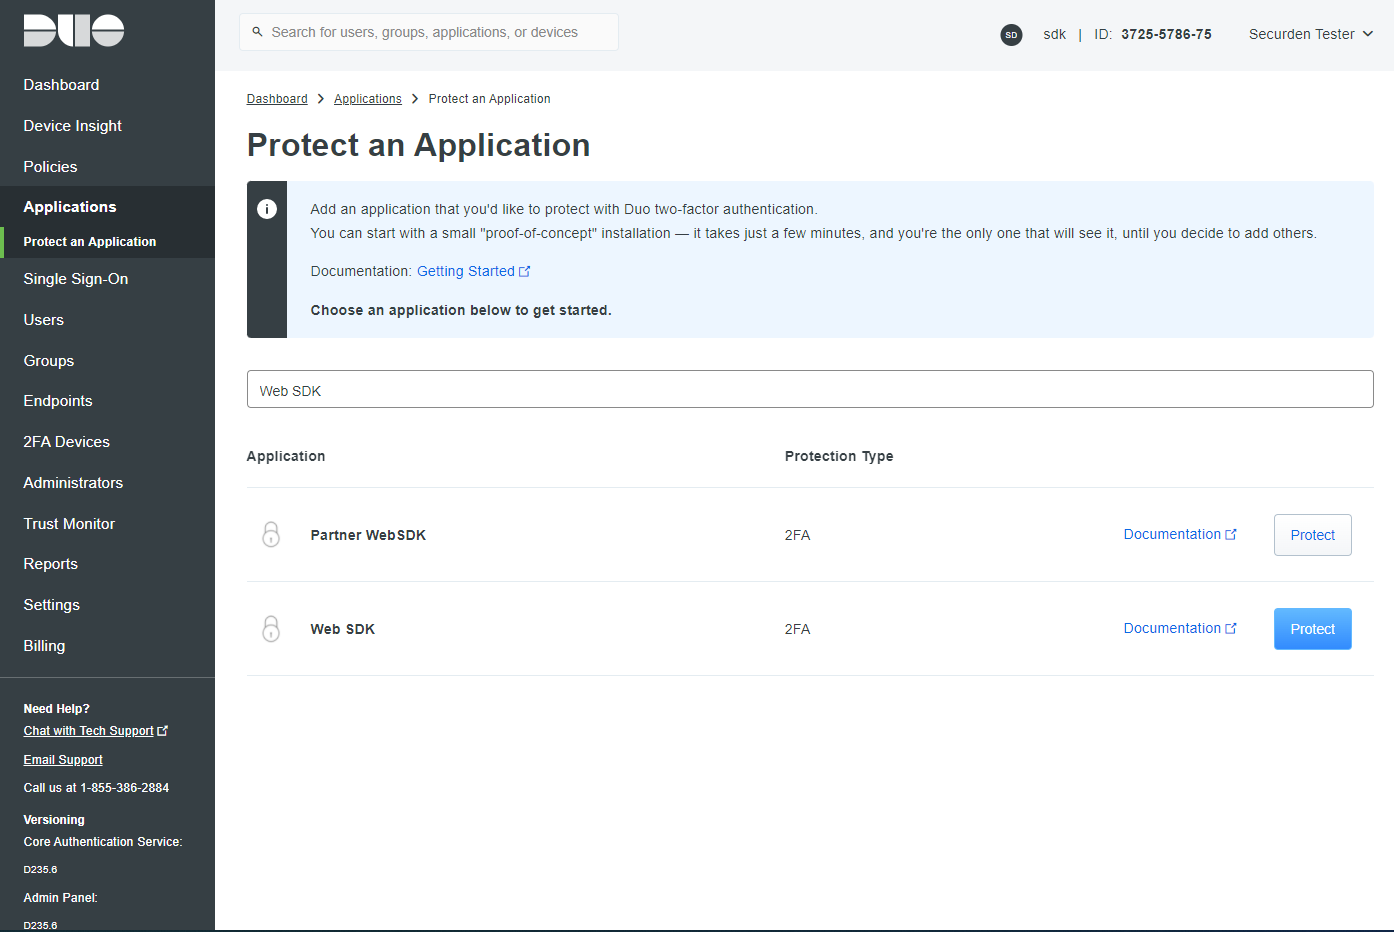
- In the list of applications, search for Web SDK. Click the Protect button on the right to configure the application.
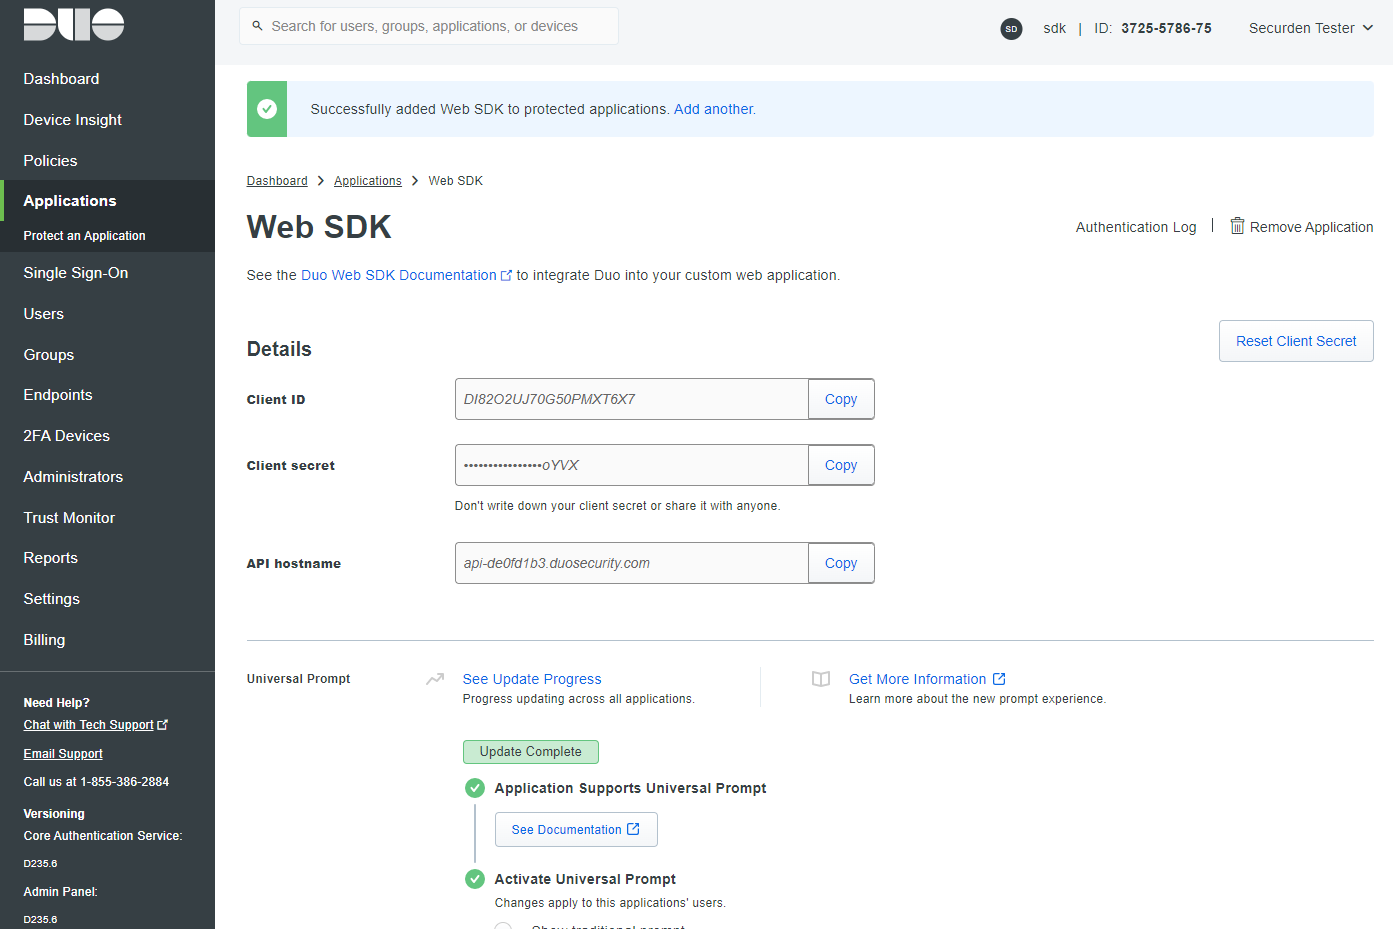
- You will get your integration key, secret key, and API hostname. Copy these details. You will need these to complete your setup.
- Finally, you need to create a policy to handle Duo enrollment scenarios in your organization for Securden. You may create a policy for Securden that takes effect for all users or use a Global Policy applicable to all your applications.
To handle the users who have not been enrolled to Duo yet, you have three options:
- Require enrollment - You can ask them to enroll in Duo. They will see an inline self-enrollment setup process after entering their username and password. (Users who are already enrolled in Duo are prompted to complete two-factor authentication).
- Allow access - You can grant access without Duo authentication to those who haven’t enrolled with Duo. They will not be prompted to complete enrollment.
- Deny access - You can deny access to those who haven’t enrolled with the duo. Users must be enrolled before attempting authentication. The above steps complete the setup process in Duo.
Configurations in Securden
- In Securden GUI, navigate to Admin >> Authentication >> Duo Security. You will need to provide the integration key, secret key, and API hostname, which you created in step 4 in Duo security as explained above.
- Custom Rule for Securden Login: Duo Security (The Identity Provider) returns a login name, which Securden uses as the username for logging in to the application. If you want to map the name returned by the identity provider with a different name, you can create custom rules. Basically, you can make use of the following string functions to create custom rules to manipulate the login name returned by the identity provider. In the string function, 'loginname' denotes the name returned by the identity provider.
- After entering the details, navigate to Admin >> Authentication >> Two-factor configuration and select Duo Security.
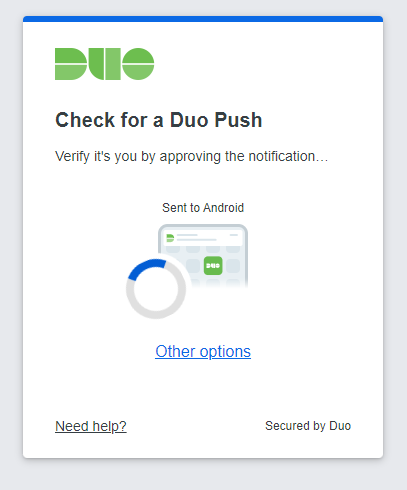
- Then Duo Security will now be used as the second-factor authentication for the users in Securden. The users may select two options for entering the second factor - to send push notifications to their mobile phones or to enter the code from the duo mobile app.
| Function | Input Parameters | Example | Output |
|---|---|---|---|
stringAppend |
(String str, String suffix) |
stringAppend('This is', ' a test') |
This is a test |
toUpperCase |
(String str) |
toUpperCase('This is a test') |
THIS IS A |
toLowerCase |
(String str) |
toLowerCase('This is a test') |
this is a test |
substringBefore |
(String str, String searchString) |
substringBefore('abc@securden.com', '@') |
abc |
substringAfter |
(String str, String searchString) |
substringAfter('abc@securden.com', '@') |
securden.com |
How to Configure Yubikey Authentication as the 2FA Mechanism
Yubikey tokens supplied by Yubico can be integrated with Securden PAM for 2FA. To integrate Yubikey with Securden, navigate to Admin >> Authentication >> Two-Factor Authentication and select ‘Yubikey’.
To connect to Securden PAM after integrating it with Yubikey, users need to do the following:
- Enter your Securden credentials and complete the first level of authentication. Once it succeeds, you will be asked to enter the Yubikey OTP.
- In the USB port of your computer, insert the Yubikey.
Before generating a one-time password, you need to decide which of the two slots, slot 1 or slot 2, of the YubiKey you're going to use for authentication throughout.
Slot 1: If you tap the YubiKey once, it generates a 44-character security key whose first 12 characters are unique to this slot. For every subsequent login through this slot, the first 12 characters remain the same and the rest of the 32 characters are randomized.
Slot 2: If you tap and hold the YubiKey for 2-5 seconds, it generates a 44-character security key whose first 12 characters are unique to this slot. For every subsequent login through this slot, the first 12 characters will remain the same and the rest of the 32 characters will be randomized.
Here is a sample output from a YubiKey where the button has been pressed three times.
cccjgdwkdjkwjdkjwikjdkhhfgrtnnlgedjlftrbdeut
cccjgjubuebduhubnjkedjkehijeiocjbnublfnrev
cccjgjgkcbejnvchfkfhiiuunbtnvgihdfiktncvlhck
Note: By default, YubiKey generates slot 1 passcode for NFC configured mobile devices. You can set slot 2 passcodes as default by changing the setting from slot 1 to slot 2 using the Yubikey Personalization Tool.
- Securden matches the 12-character key against your account in its database and verifies the same for the second level of authentication during future login attempts.
- After submitting the YubiKey one-time password, click Register and Login.
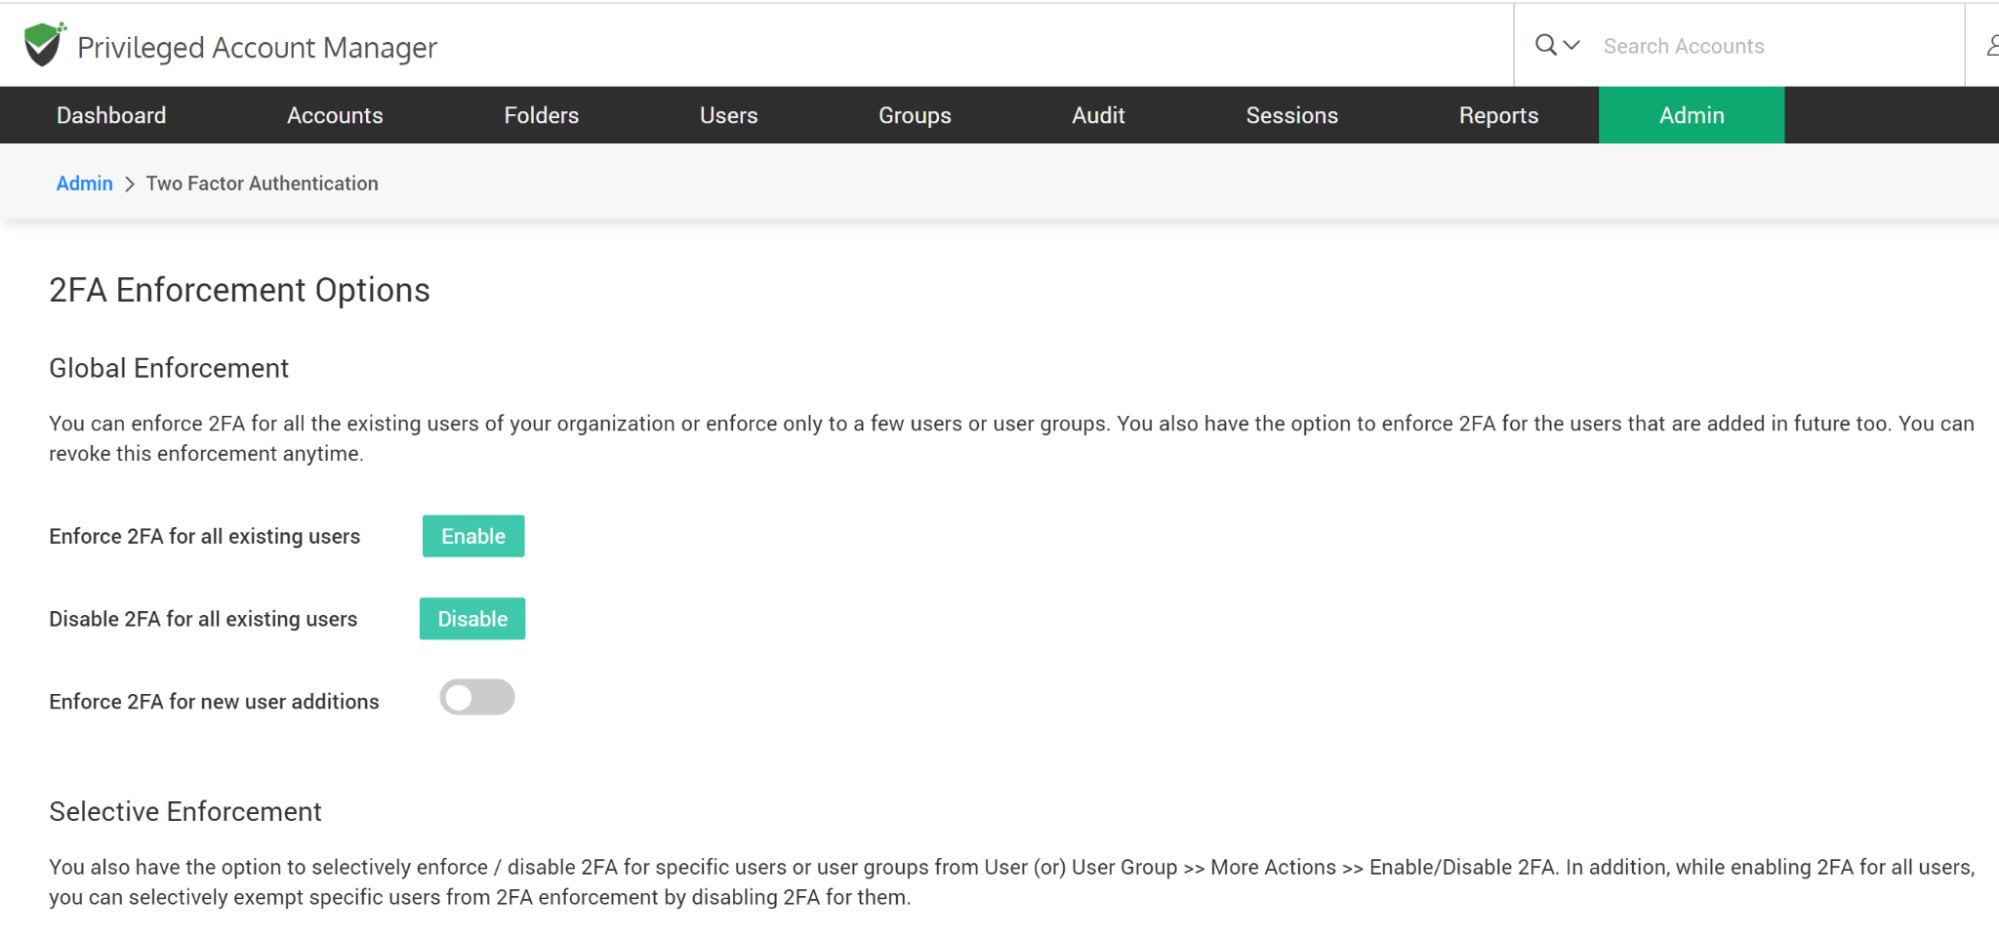
Once you have selected the required TFA option, the next step is to choose enforcement options.
From “Global Enforcement” and “Selective Enforcement” options at the bottom of the TFA configuration page, you can do the following:
- enable TFA for all existing users
- disable for everyone
- enable for new user additions in the future
- selectively enforce for a few users
- selectively exempt specific users
Allow Users to Trust Browser
You have the option to allow your users to mark their browsers as 'Trusted' and skip TFA. Upon entering the second authentication factor, the users can mark the browser as trusted for a specific number of days or forever. Once it is marked so, users won't be prompted to enter the second authentication code until the end of the trust period.
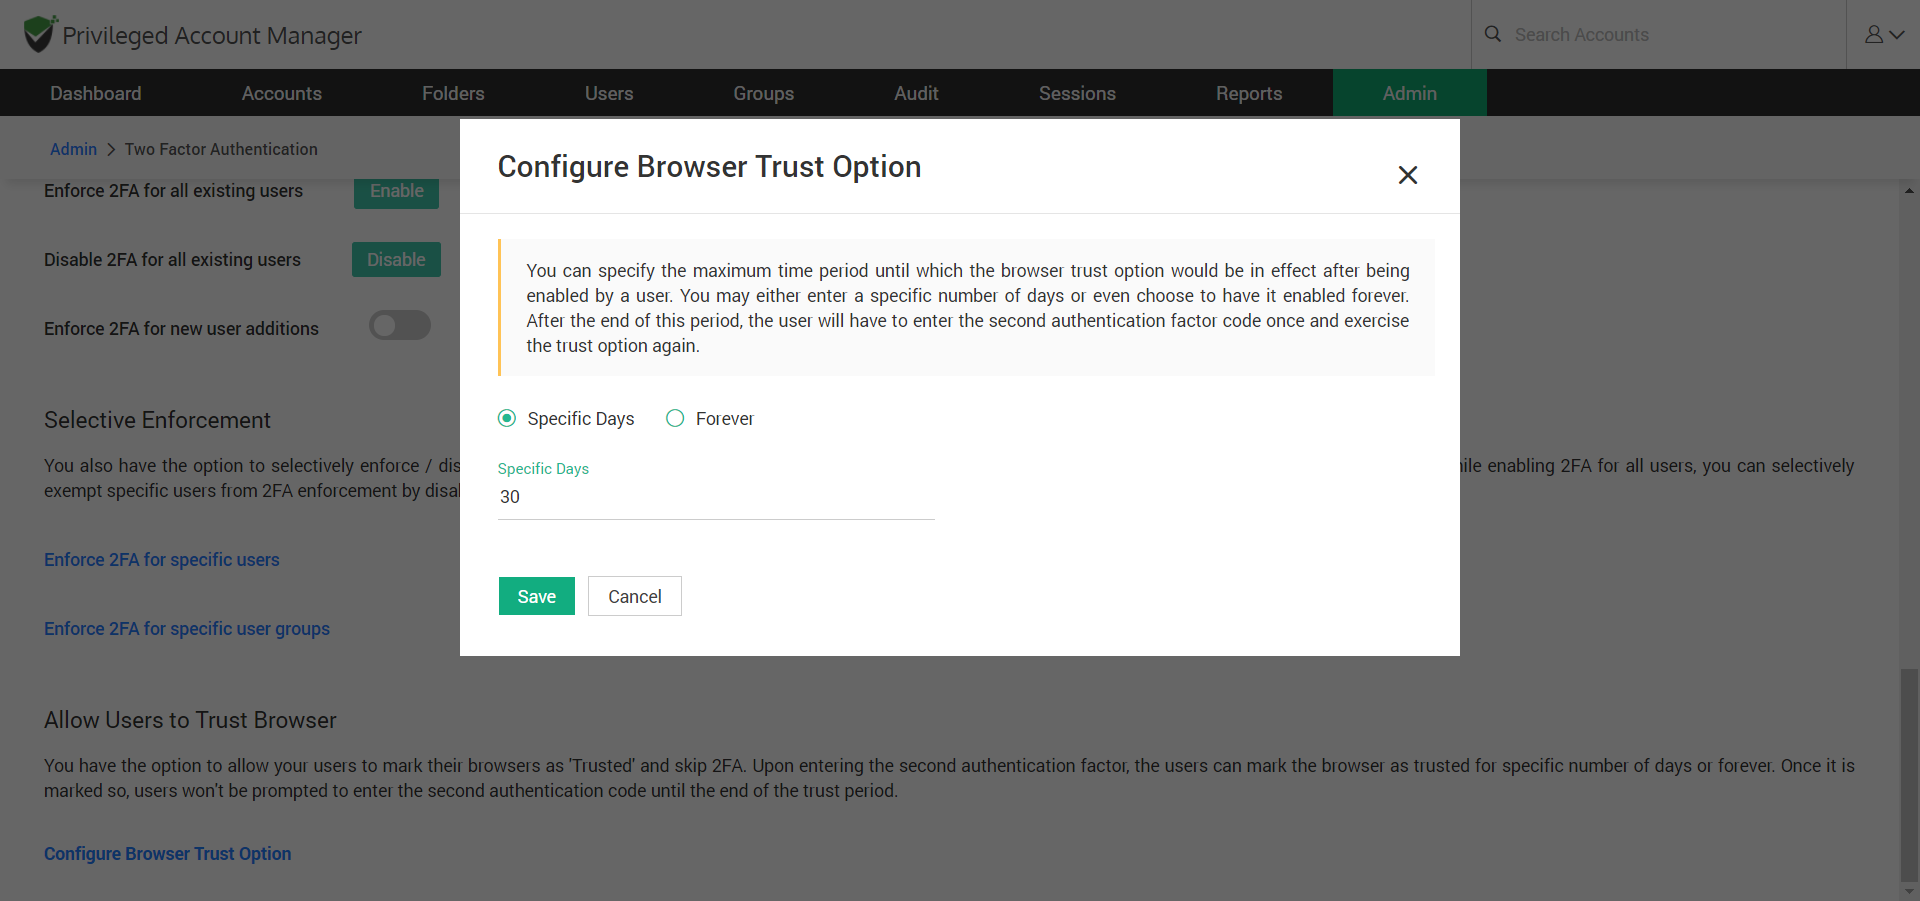
To enable this feature, click the ‘Configure Browser Trust Option’ link, and the pop-up box will appear. Here, you can specify the maximum period until which the browser trust option would be in effect. You may either enter a specific number of days or even choose to have it enabled forever. After the end of this period, the user will have to enter the second authentication factor code once and exercise the trust option again.
How to Configure Smart Card as the Primary Mode of Authentication
If your organization uses smart cards for authenticating user logons, you can leverage the same for Securden authentication. If the users have logged in to their machines using their smart cards, they will be allowed to access Securden web-interface too. During the process, Securden web-interface will display the available certificates. Users will have to choose their certificates. Securden validates them against the already configured trusted CA root certificate.
Smart card authentication serves as the primary authentication mode in Securden. It is different from the various 2FA options, which serve as the second authentication mode.
To integrate with Securden, you need to add the trusted CA root certificate and then tell Securden which part of the smart card certificate attribute uniquely identifies the user details in the product. You need to specify this mapping attribute detail for Local Authentication OR/AND Active Directory Authentication separately.
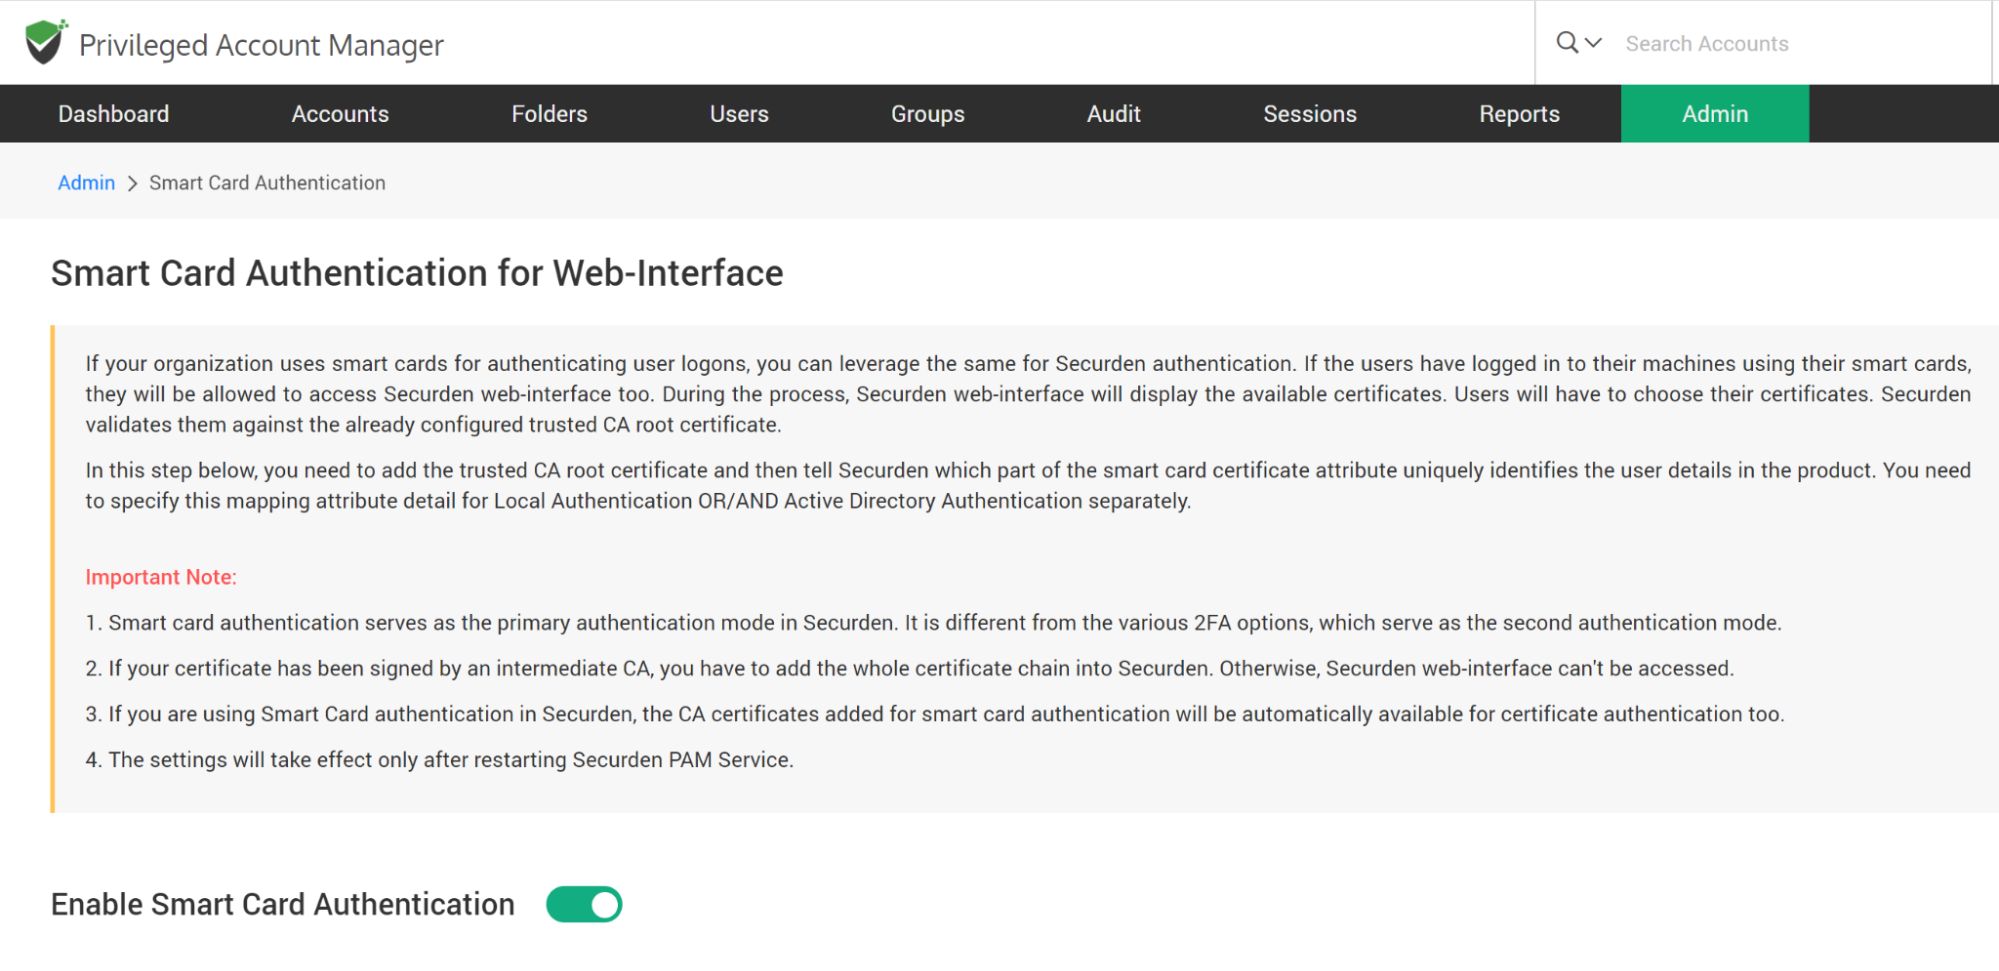
To Enable Smart Card Authentication,
- Navigate to Admin >> Authentication >> Smart Card Authentication. Move the toggle “Enable Smart Card Authentication” to green.
- Select the CA-signed root certificate. You can do this by selecting the Browse button and selecting the certificate. If your certificate has been signed by an intermediate CA, you have to add the whole certificate chain into Securden. Otherwise, Securden web-interface can't be accessed.
- Enter a name in the text field for “Identifier”. The text you enter here appears on the Securden login page.
- Now, you need to specify which part of the smart card certificate attribute uniquely identifies the user details in Securden. It could be one of CommonName, SAN.DNSName, SAN.URI.
- Based on the way in which you added users to Securden (manual addition or imported from AD), you need to specify this mapping attribute detail for Local Authentication OR/AND Active Directory Authentication separately.
- Click Save
- Restart Securden PAM service for the settings to take effect.
